After a little hiatus from Gore ridge traversing (primarily due to two little lovely ladies entering our respective worlds in the past 9 months), J and I finally got back out together and completed another solid ridge run in our favorite range. Honestly, I think my last Gore ridge run was before Sawyer was born on Rockinghorse Ridge with Brian Miller and Dillon Sarnelli, so I was excited to get back out, especially with J. We make a good tandem on these gnarlier ridge runs. We both love the route-finding, the exposed scrambling and alpine climbing feel, and the unknown – well, as unknown as you can realistically get this day and age. I had been corresponding with Stan Wagon on other Gore outings and adventures when I remembered he said he had traversed Red Diamond Ridge on the Red Peak massif and recalled it as one of his favorites and has done it three times since he and Bill Briggs’ likely first traverse of the ridge in 1994. I inquired as to the best approach for Red Diamond from Stan and the other beta I received was that he did use a rope. It was good enough for J and myself. The full Red Diamond Ridge stretches from the East East Red summit (12,885′) west over fairly mellow terrain to East Red (12,945′) and then west again through the “meat and potatoes” of the traverse to the main Red Peak summit (13,189′). I’ve seen Red Diamond up close a few times from Buffalo Mountain’s summit as well as from the north on Rain Peak’s east ridge and indeed it looked to be challenging. Even though the gnarliest section of Red Diamond between East Red and Red Peak is not even three-quarters of a mile, it is chock-full of spiciness.
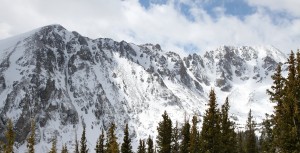
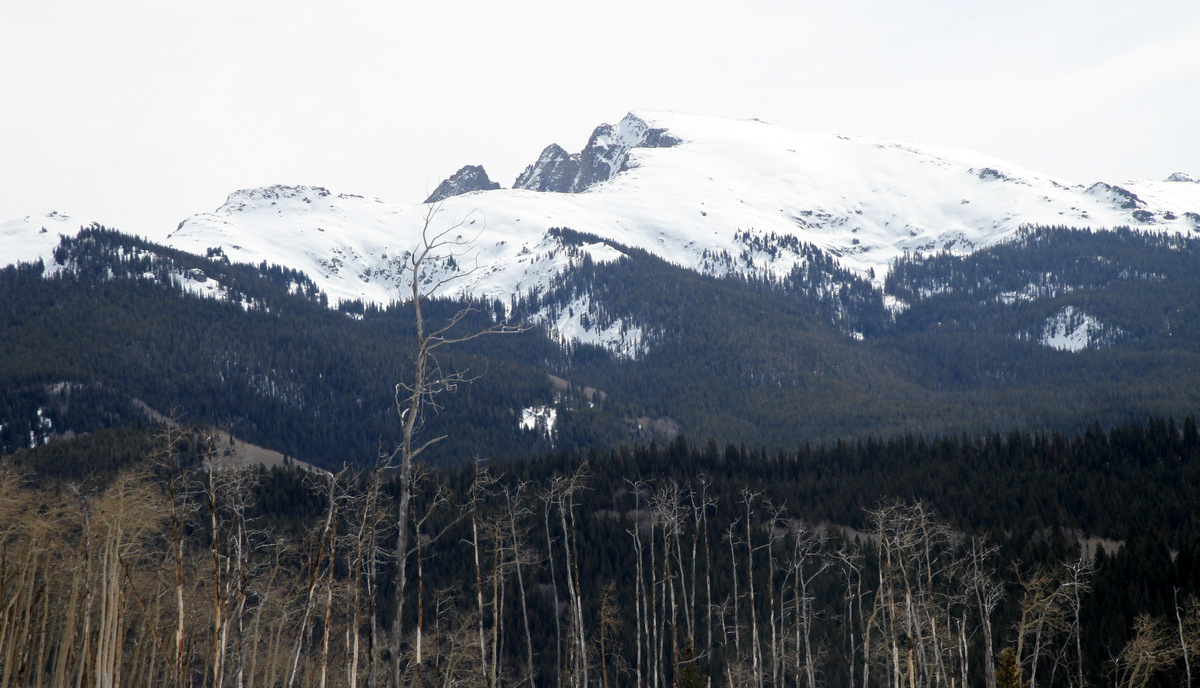
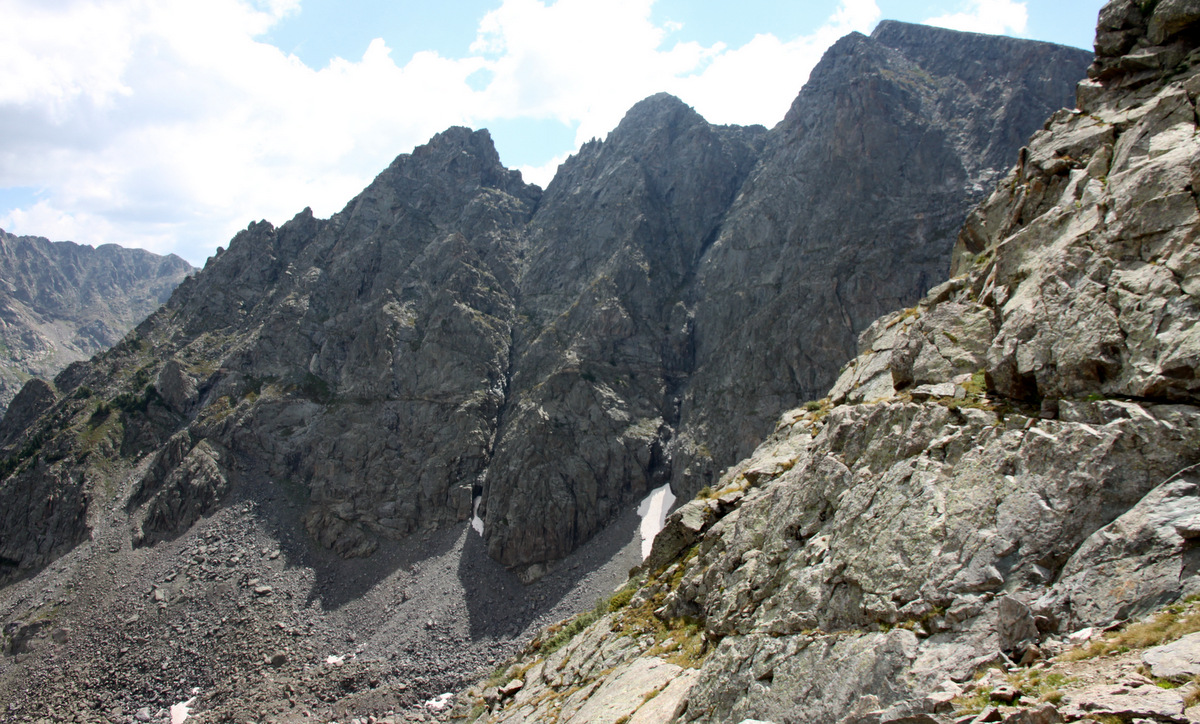
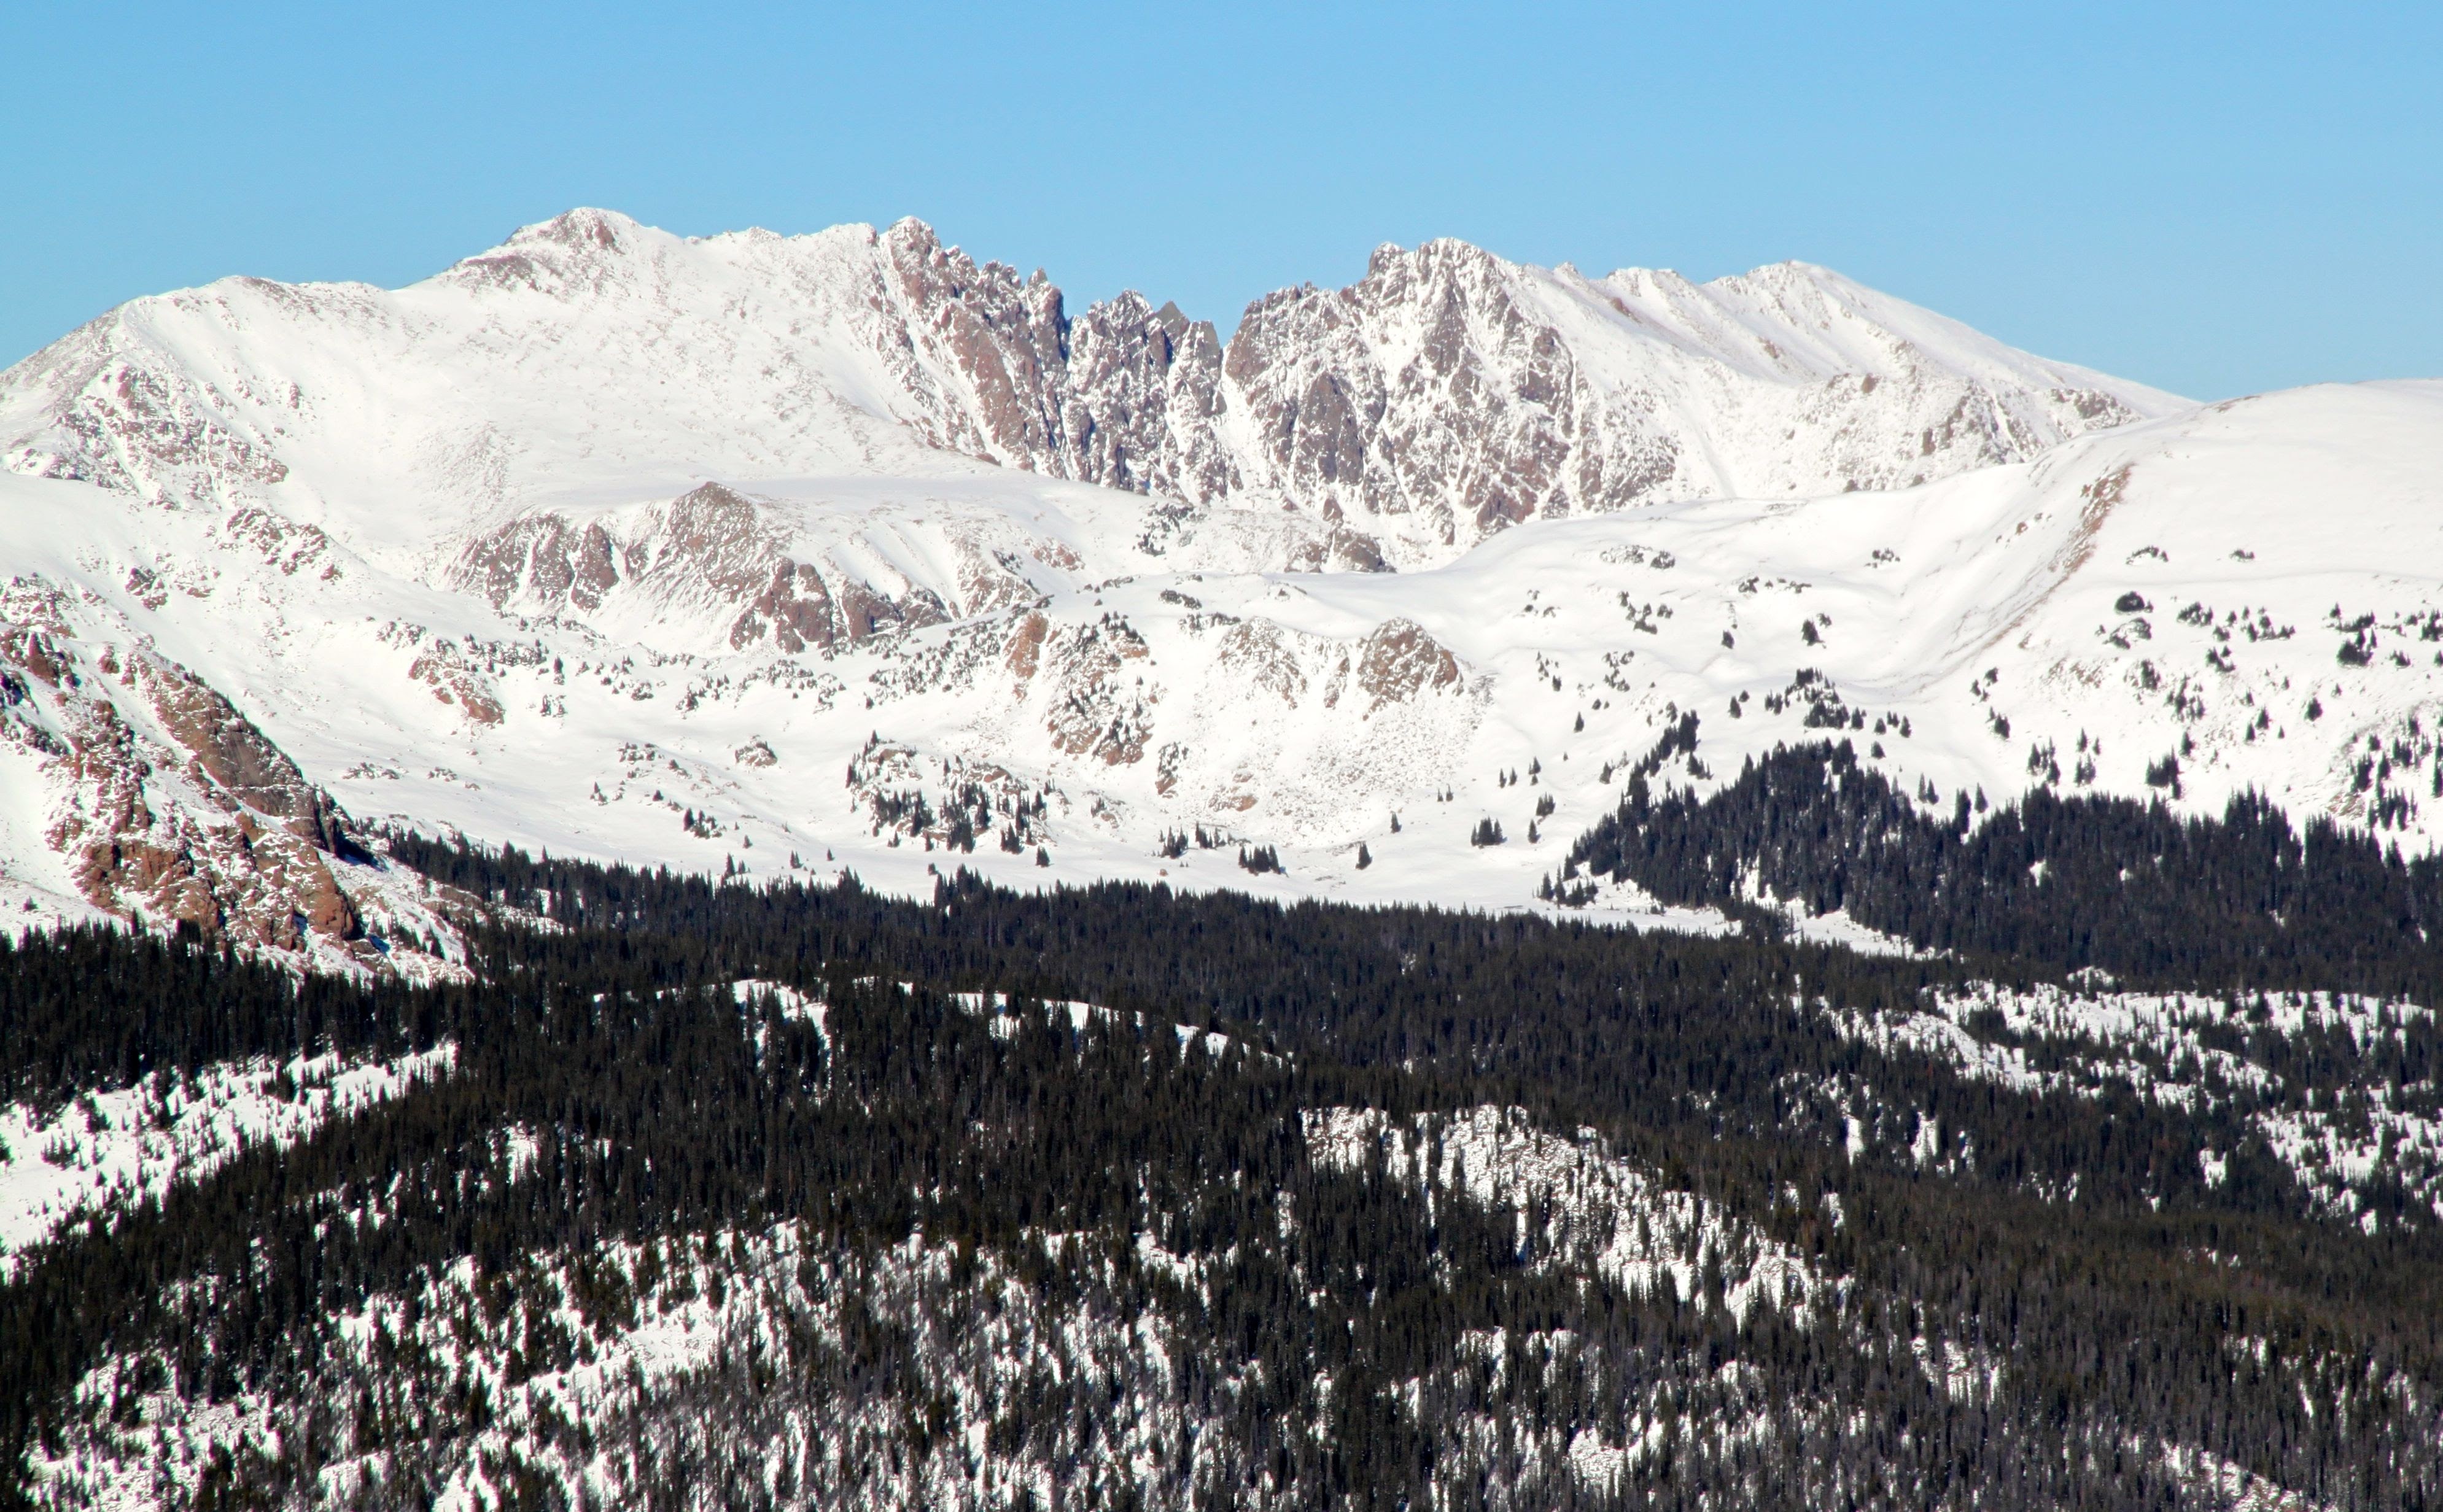
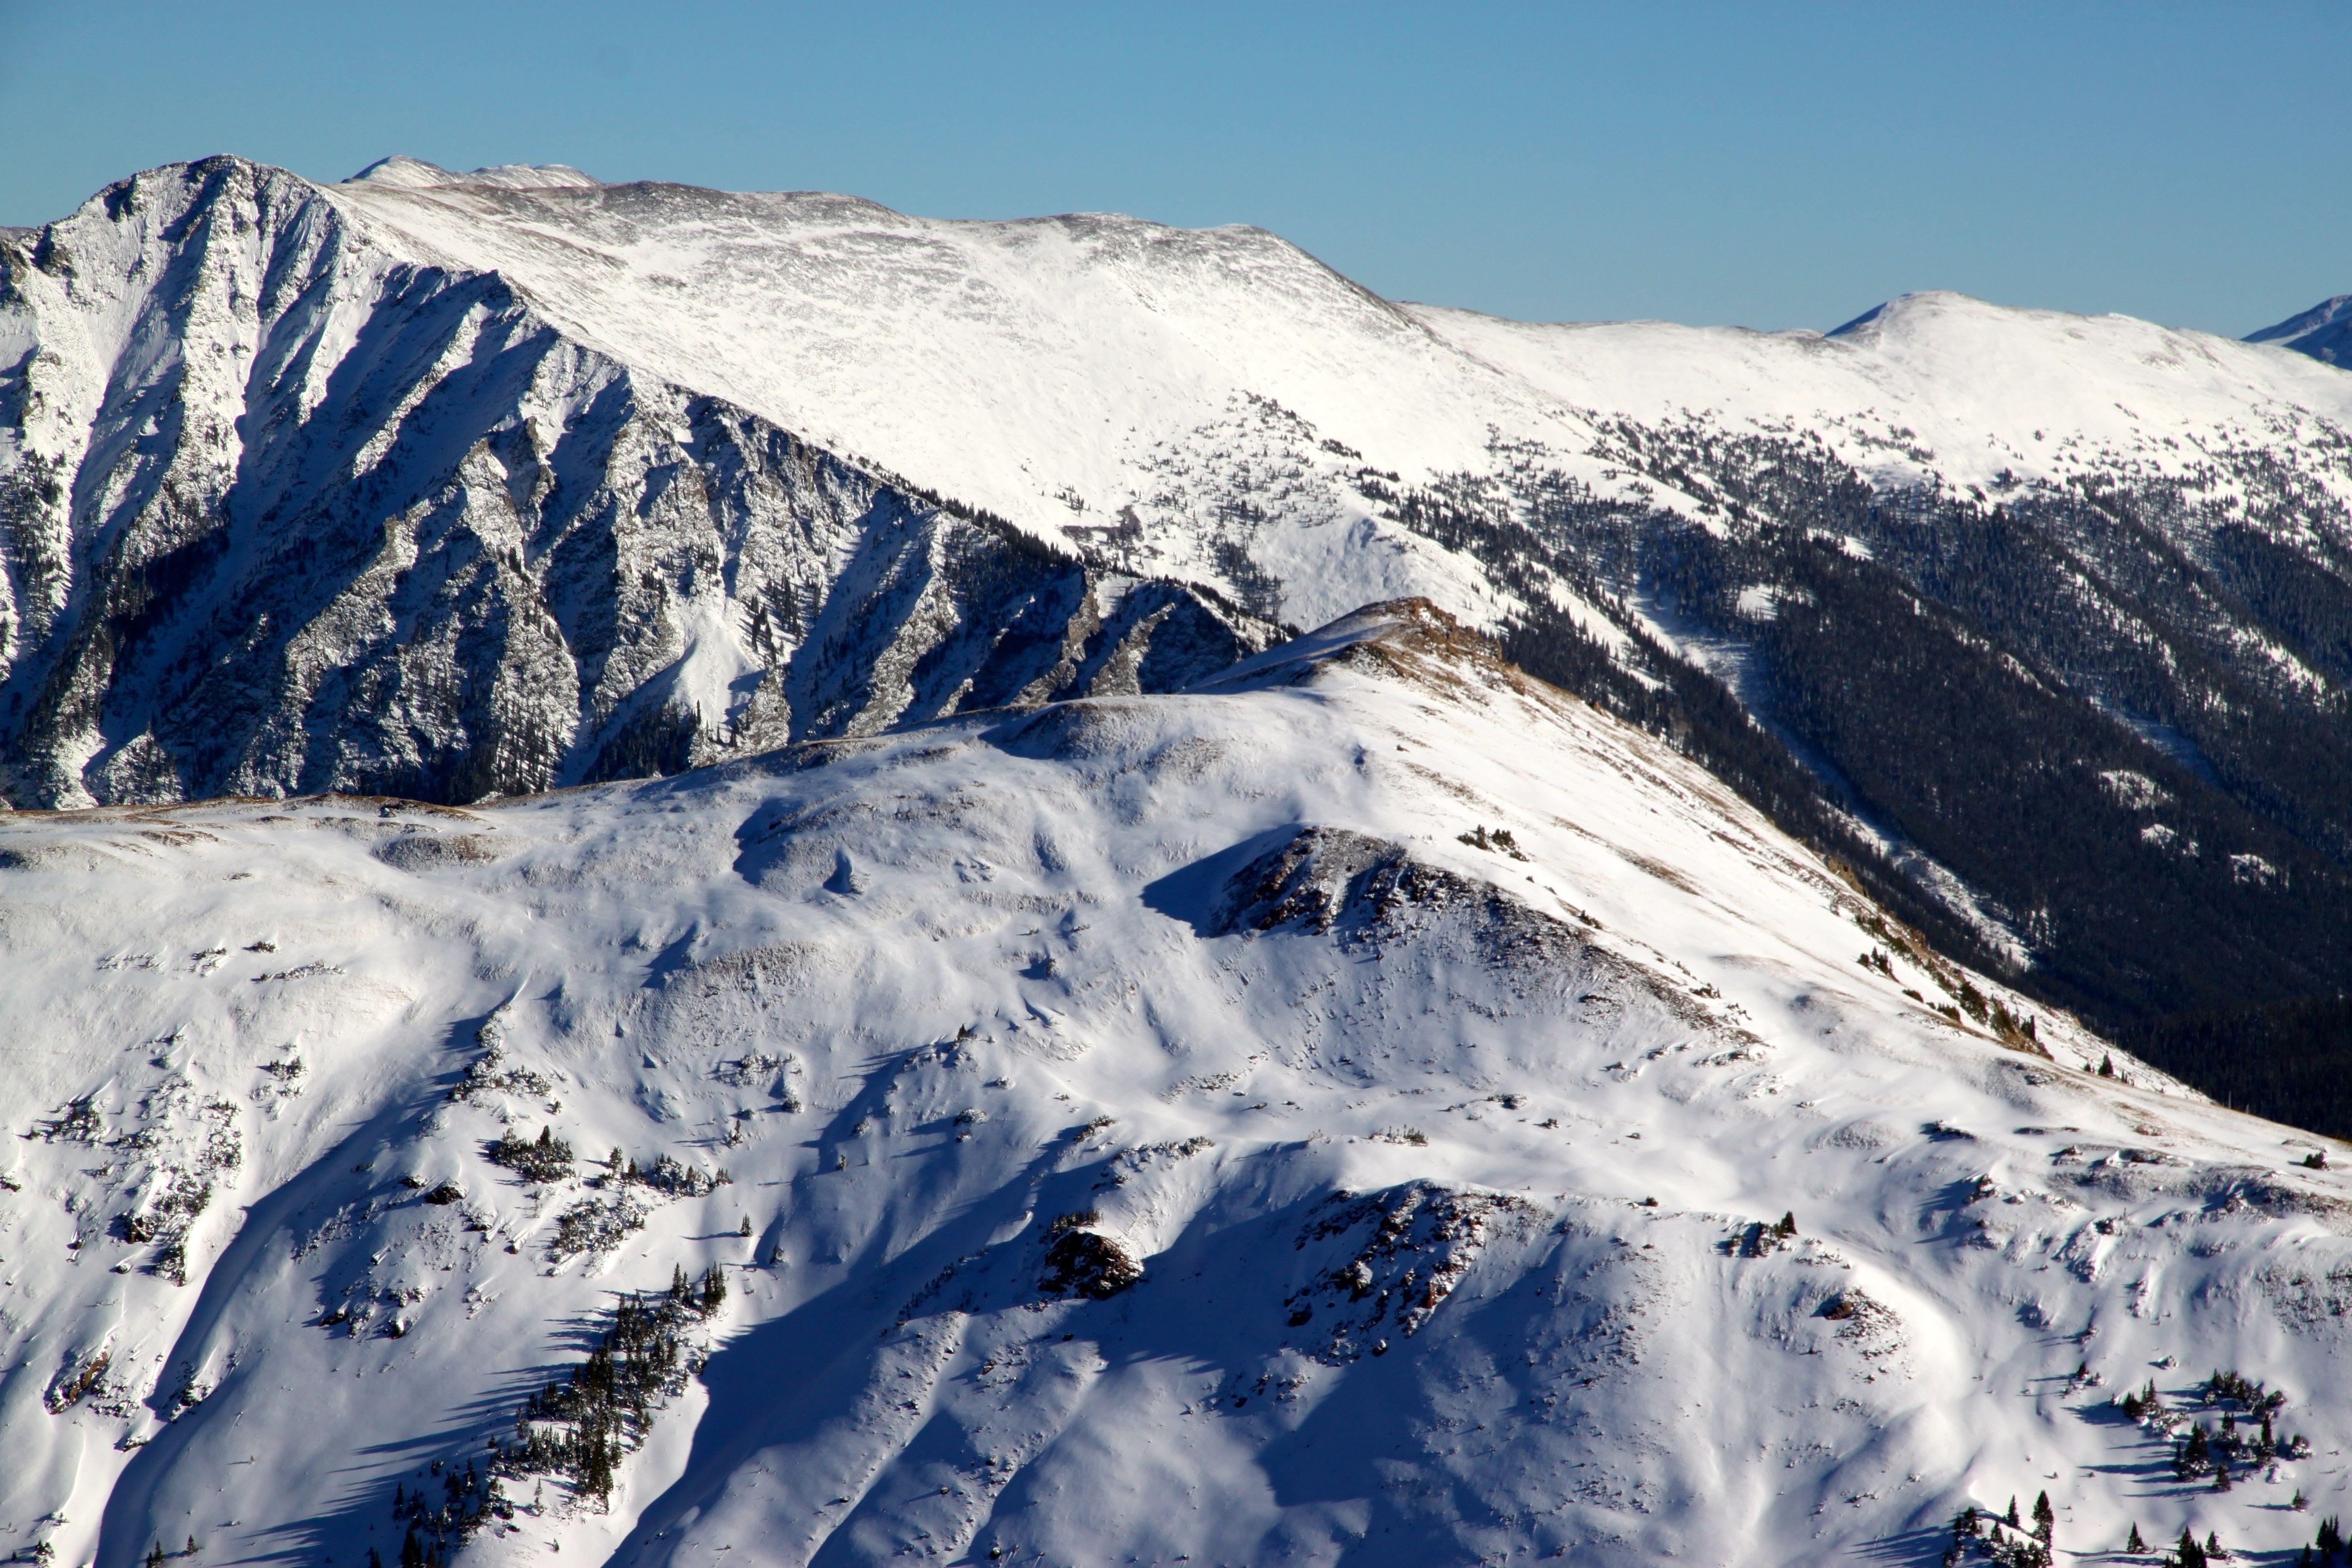
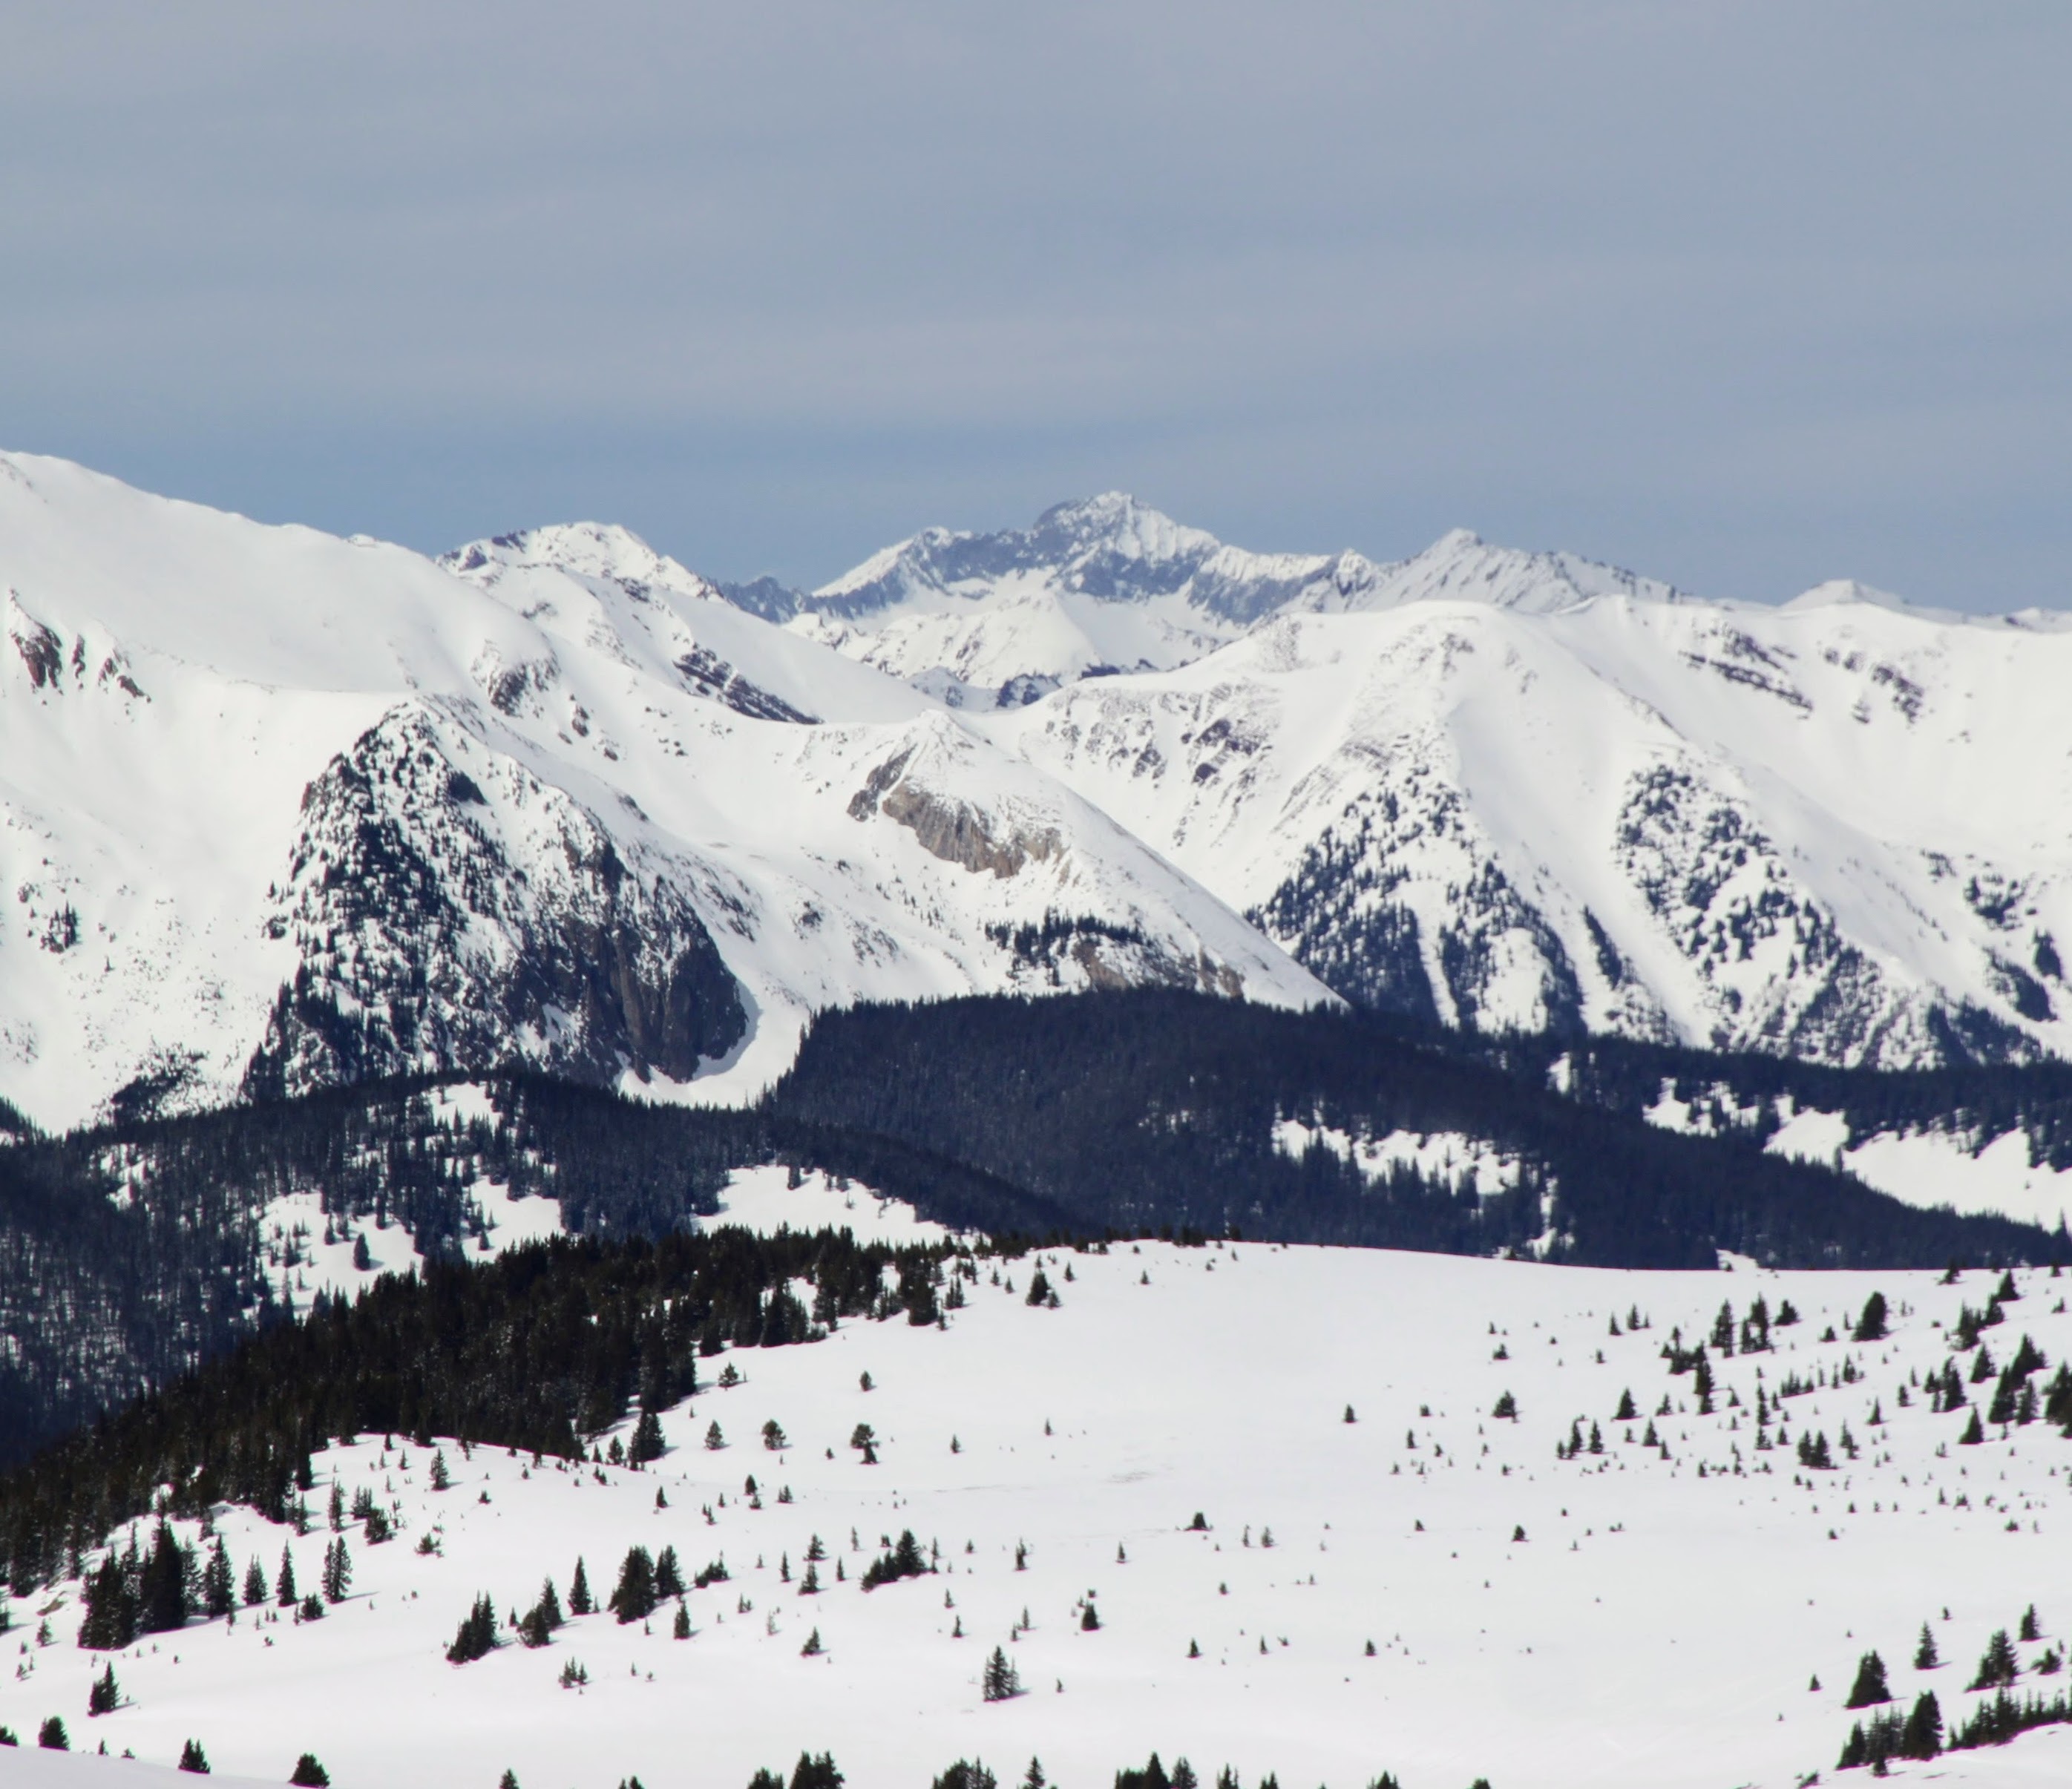
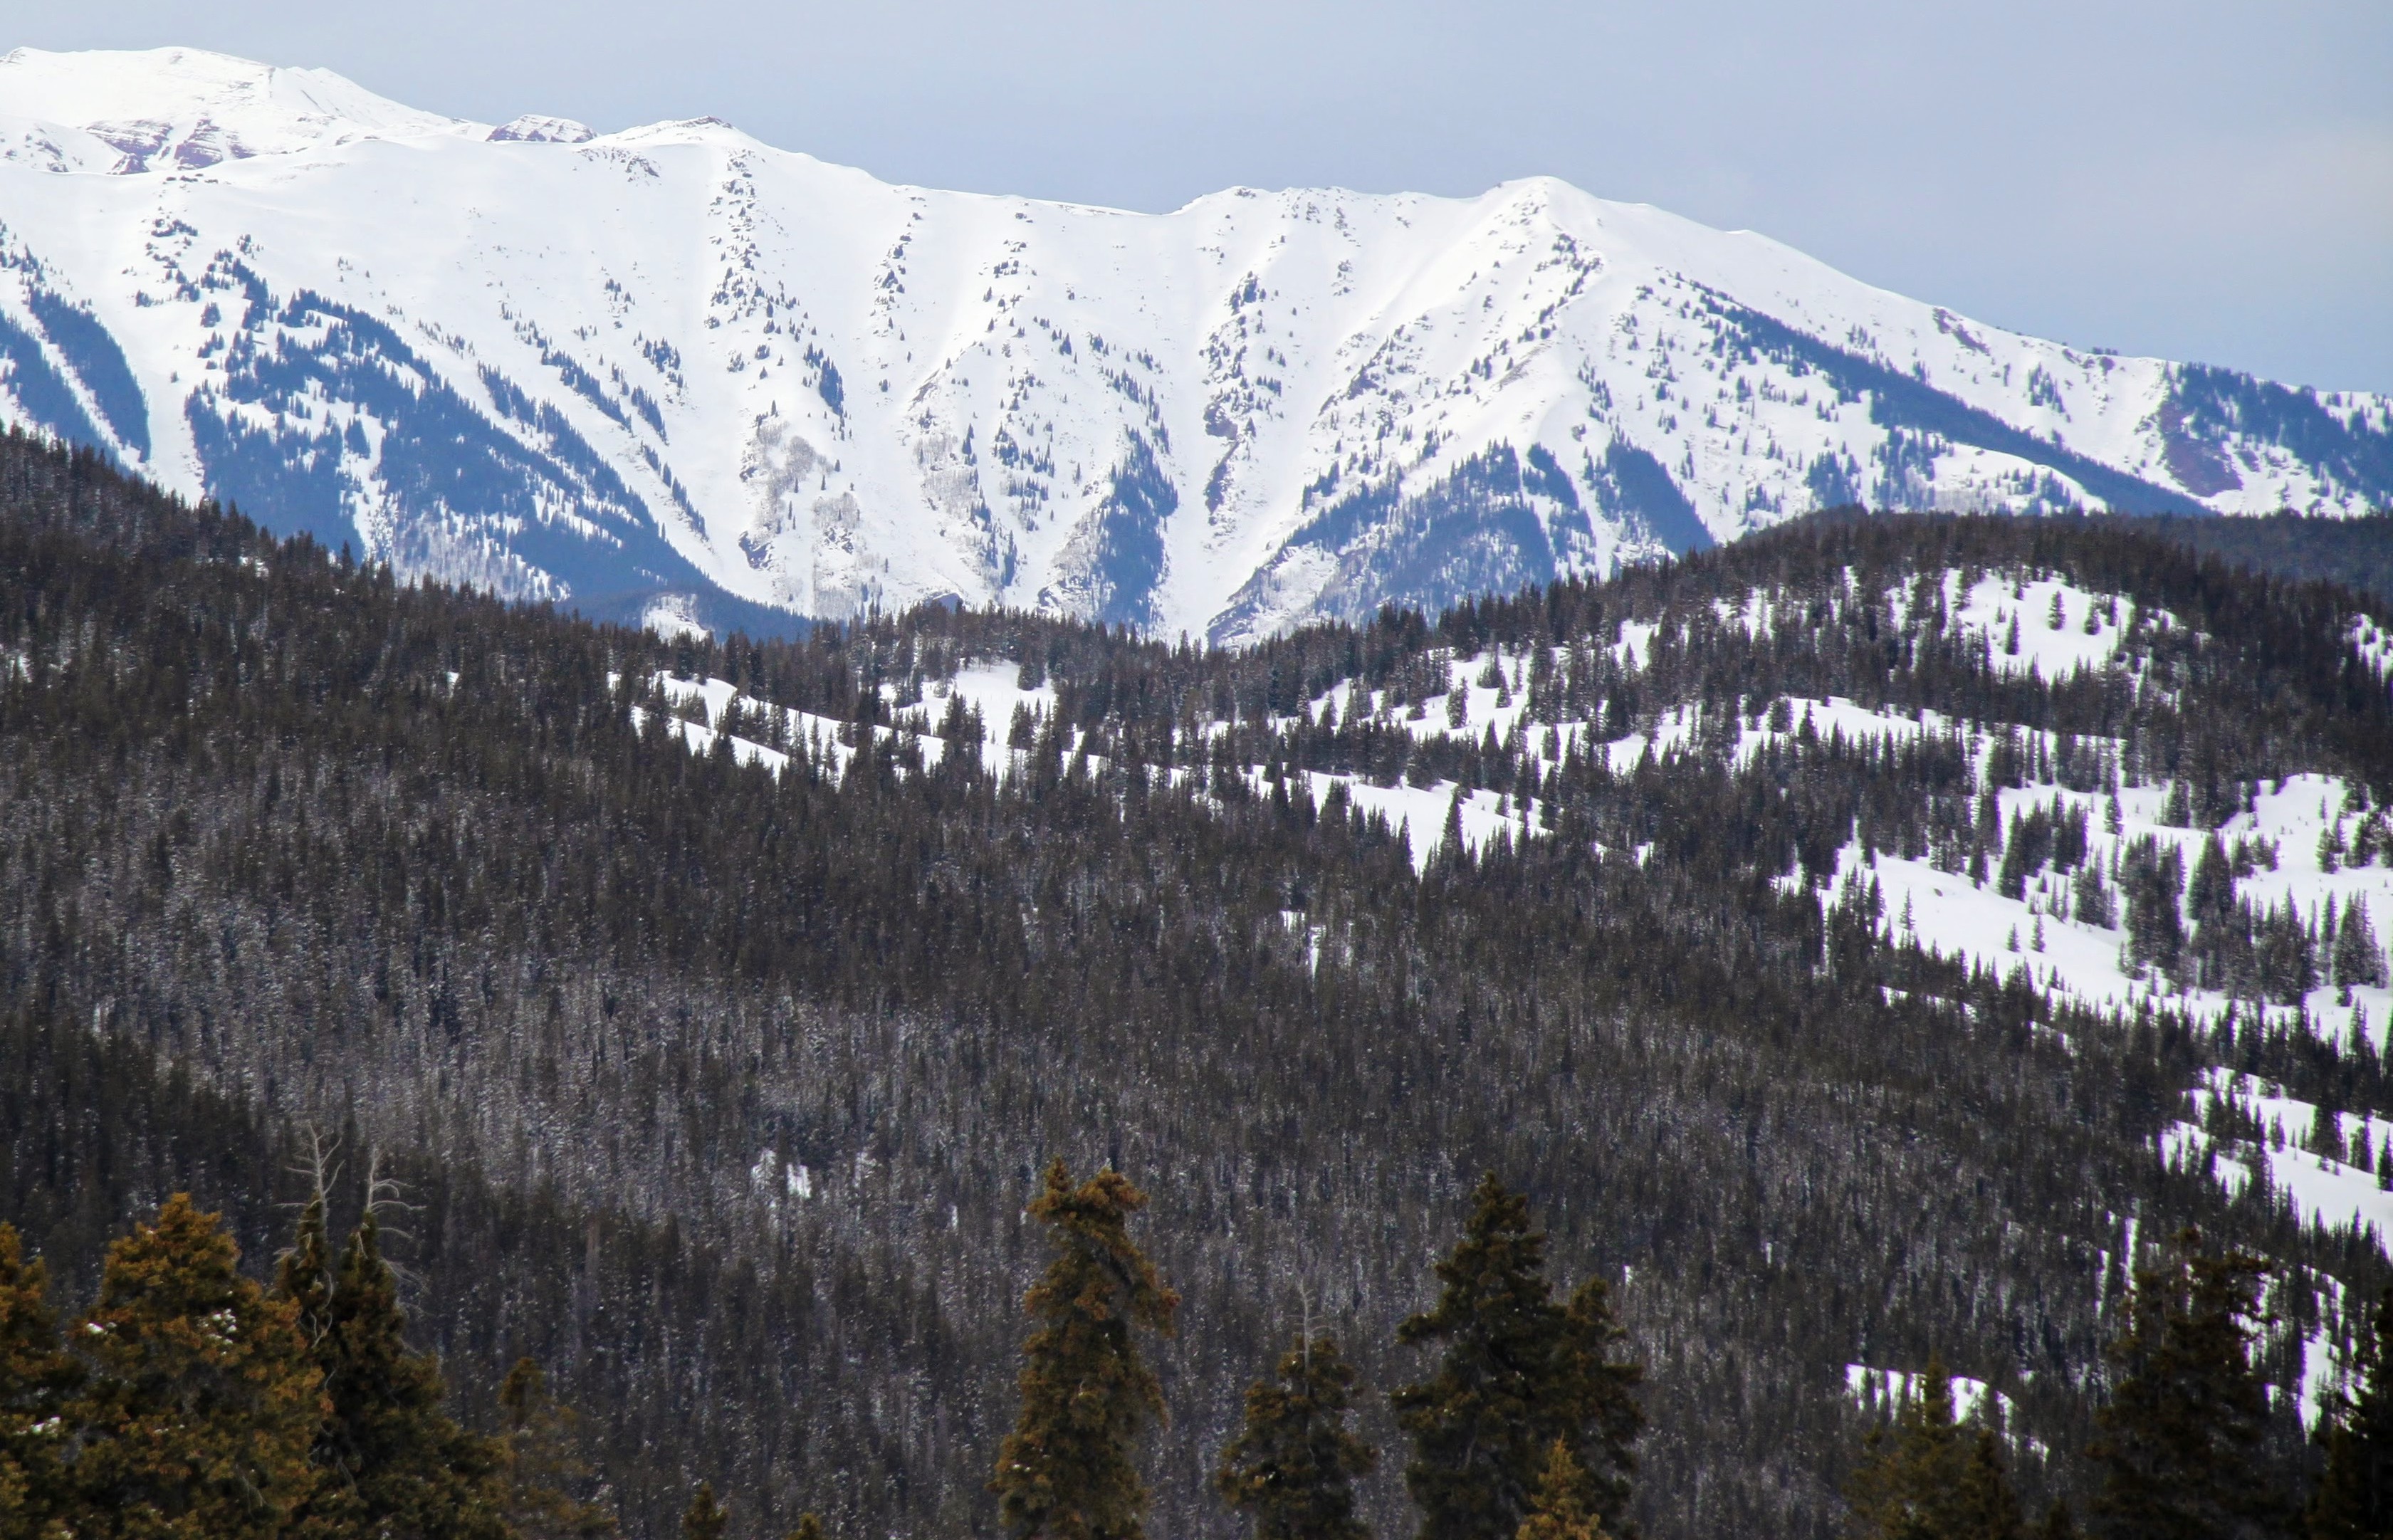
Red Diamond Ridge on the Red Peak massif as seen from Rain Peak’s east ridge in early May 2014. The far left peak is East East Red with What Big Eyes You Have Couloir dropping below its north face and the far right peak is the main Red Peak summit. East Red is the highest bump in the ridge’s center. Click to enlarge
After a not so great few hours of sleep the night before (like very little to none at all), I had trouble getting out of bed at 4:15am. However, I was determined to make this happen as J and I had not gotten out much together in the last while. And, with babies in our lives now, you have to make the most of what you got when you can. I felt sort of haggered most of the day from a lack of sleep, but still thoroughly enjoyed our outing. I mean what’s not to be excited about when adventuring in the Gores, right? I was completely gutted when I realized driving over Vail Pass that I left one of my most precious items in my car when we transferred to J’s car at 5:30am – my big Canon SLR camera. I was kicking myself as its always with me on my adventures. However heavy it is, its always worth carrying for the high resolution pics. Unfortunately on this day, we would be without it and rely on iphone pictures as our documentation. C’est la vie. I still have yet to be a phone picture convert – maybe I never will. I hope not.
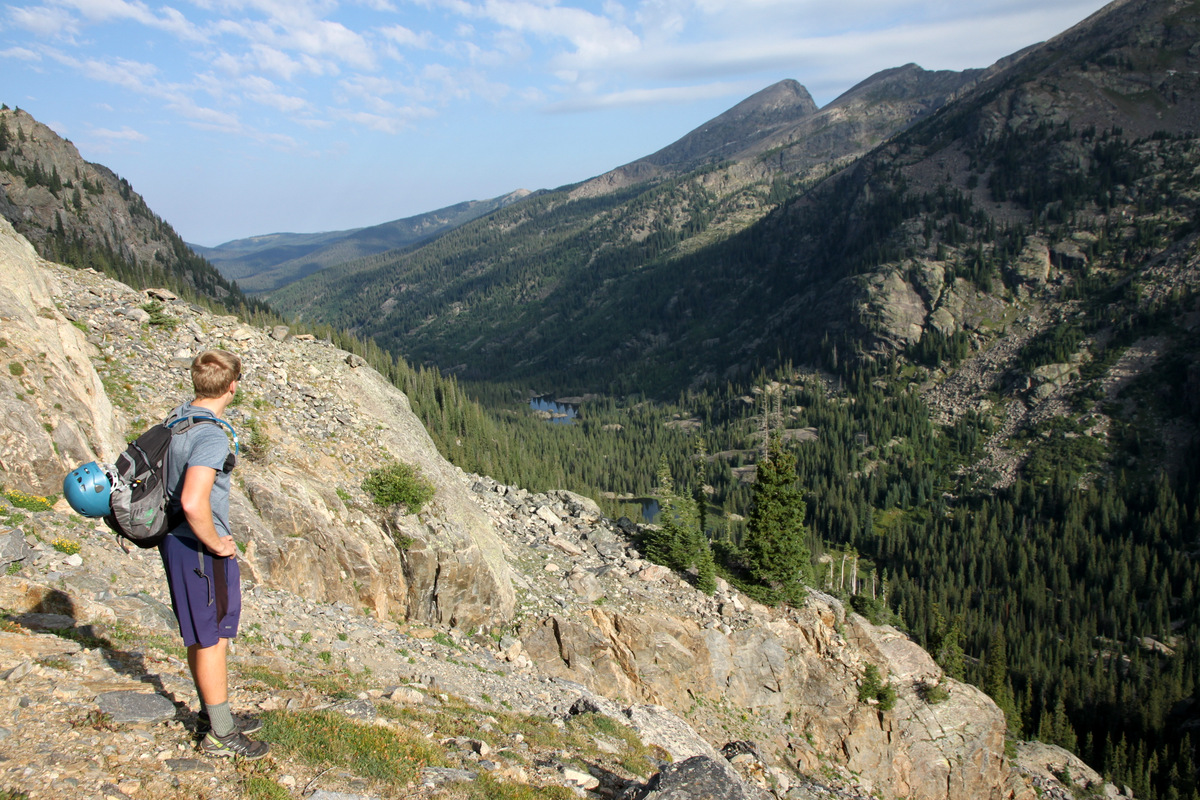
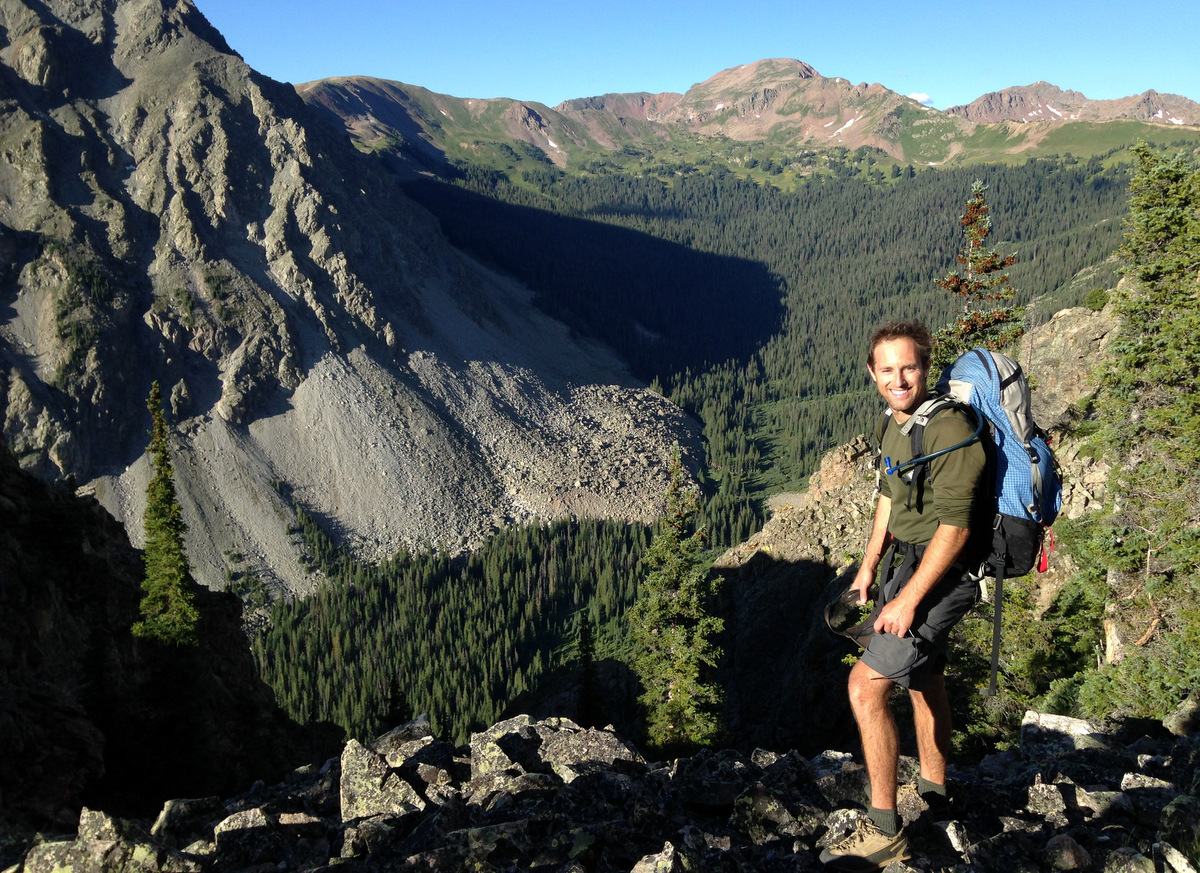
We left the standard Buffalo Mountain Trailhead (Ryan Gulch Trailhead) around 6:30am and made good time up to the four-way intersection, stayed straight on the trail, and started descending down another mile to South Willow Creek and the intersection with the Gore Range Trail. Per Stan’s recommendations, we left any signs of trail at this intersection (until Red Buffalo Pass 6.5 hours later) and continued due north through dense woods and began the off-trail bushwhacking. It actually wasn’t bad bushwhacking at all. Just a nice walk up through the woods albeit steep at that. We pretty much ascended Eat Red’s east ridge proper the entire time at times walking atop the steep southern cliffs above the South Willow Creek drainage all the while staring down Buffalo Mountain’s Silver Couloir.
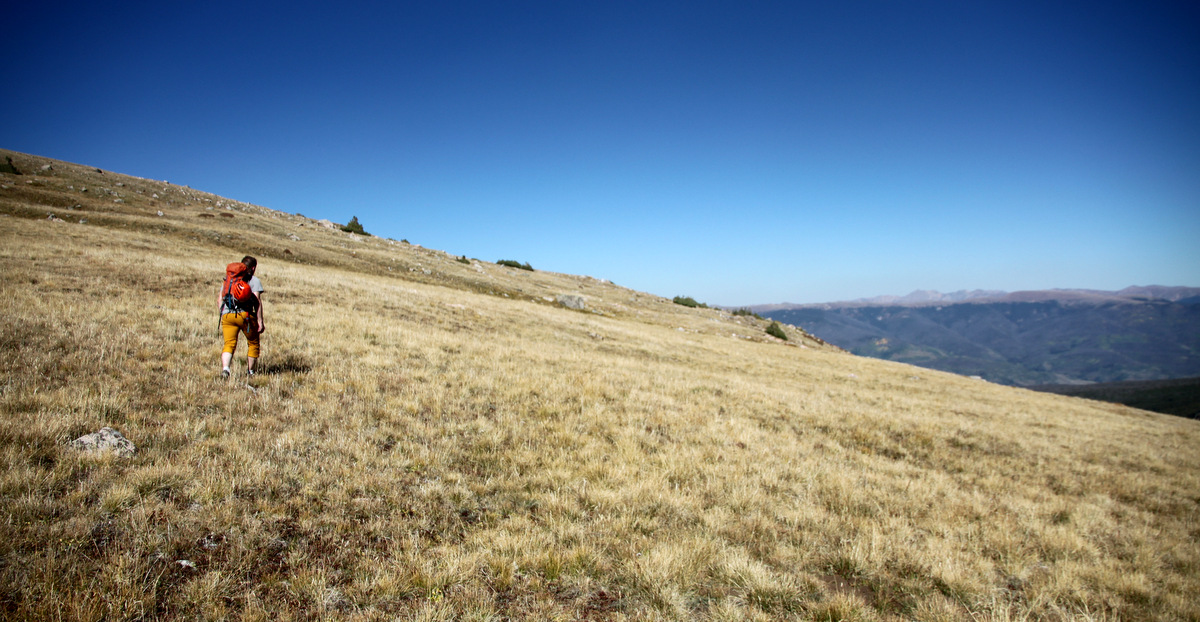
J on East Red’s east ridge looking down into the South Willow Creek drainage with Buffalo Mountain’s north shoulder to the left and Deming Mountain in the distance
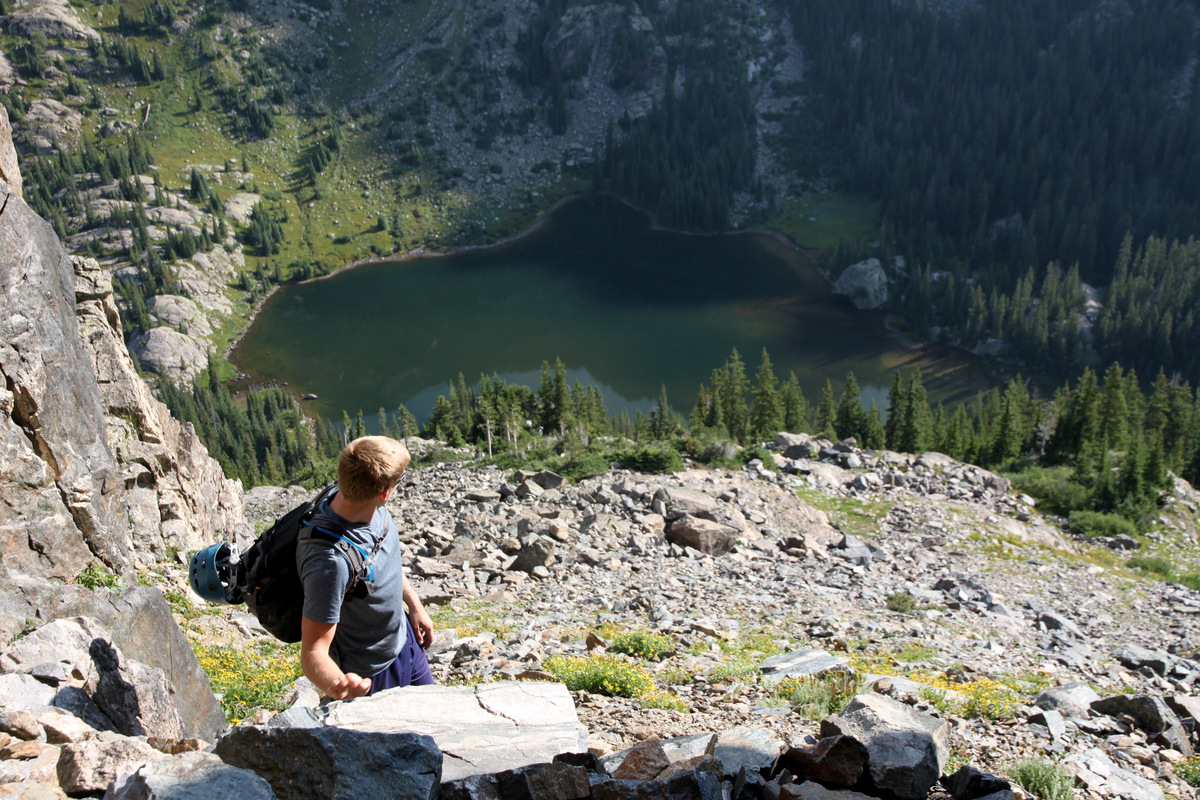
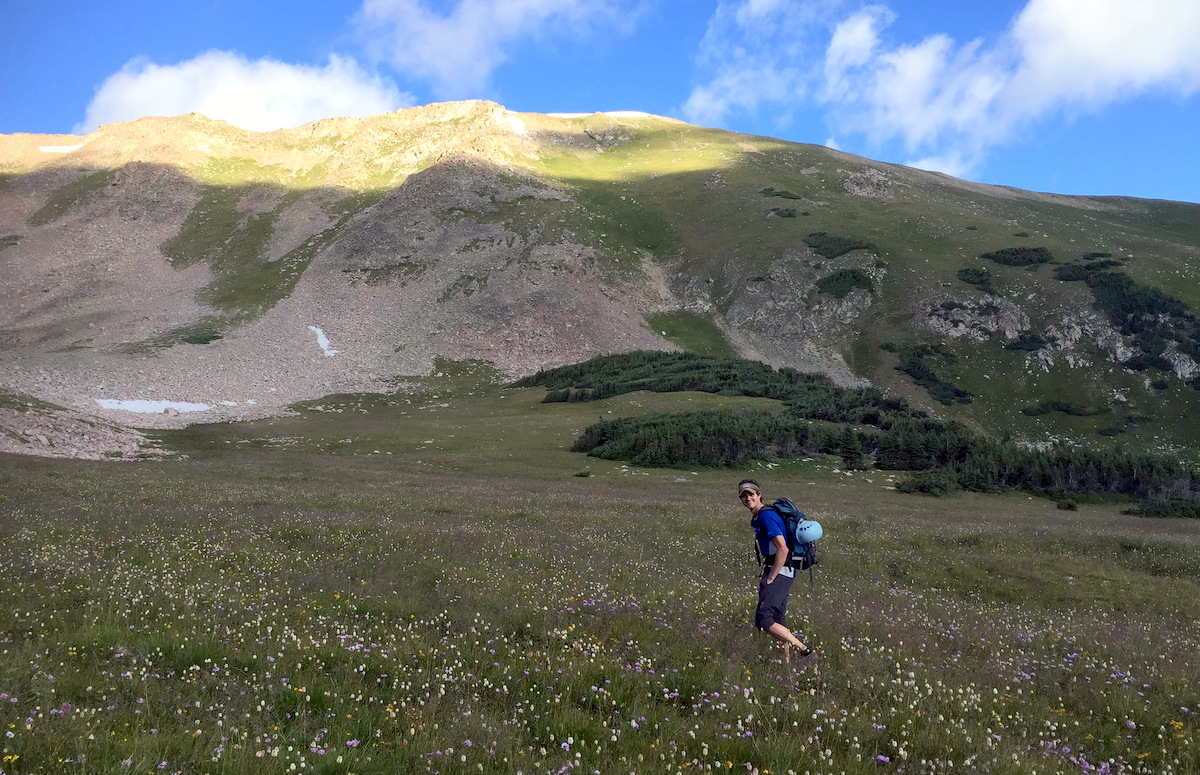
We eventually broke through treeline and were able to view our options. We could have just remained on East Red’s east ridge over a few more bumps and another 1,500′, but we decided to descend a hundred vertical feet or so and cross the Middle Willow Creek basin to gain East East Red’s summit as a first objective. This was a beautiful basin with wildflowers galore. It cannot see much traffic.
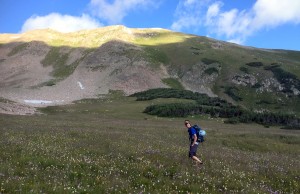
Me crossing Middle Willow Creek drainage with East East Red’s summit far above at top center. Photo by J
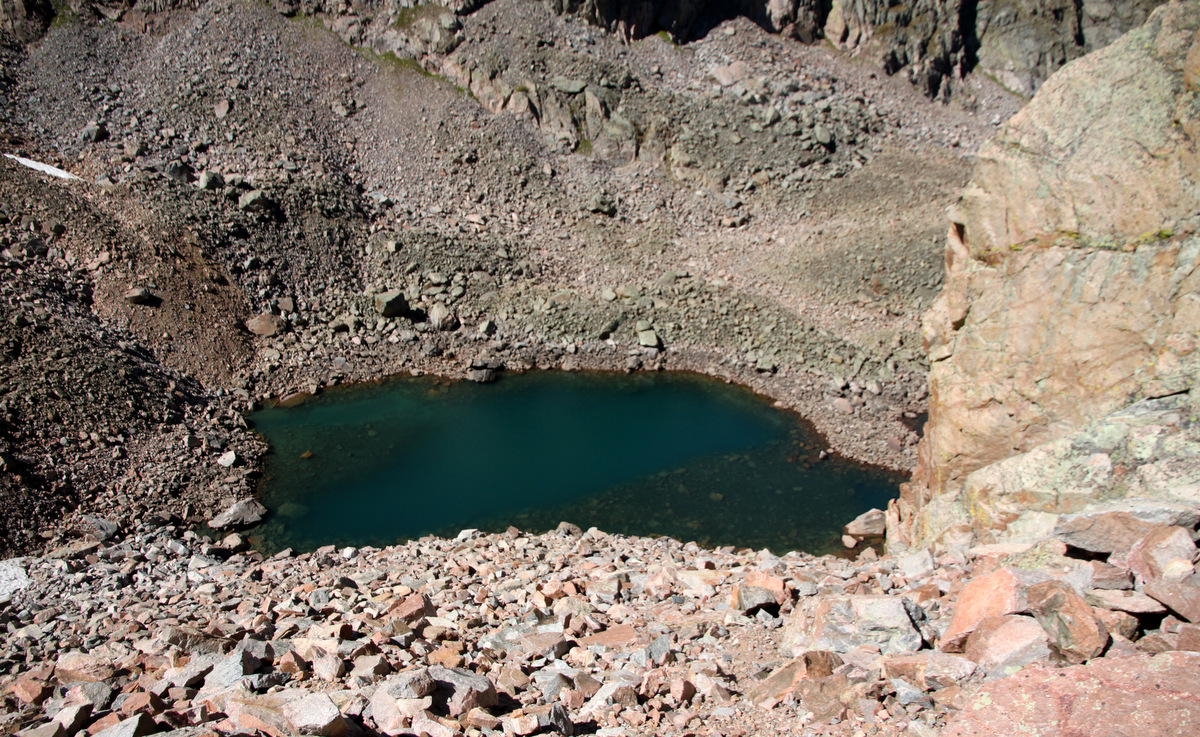
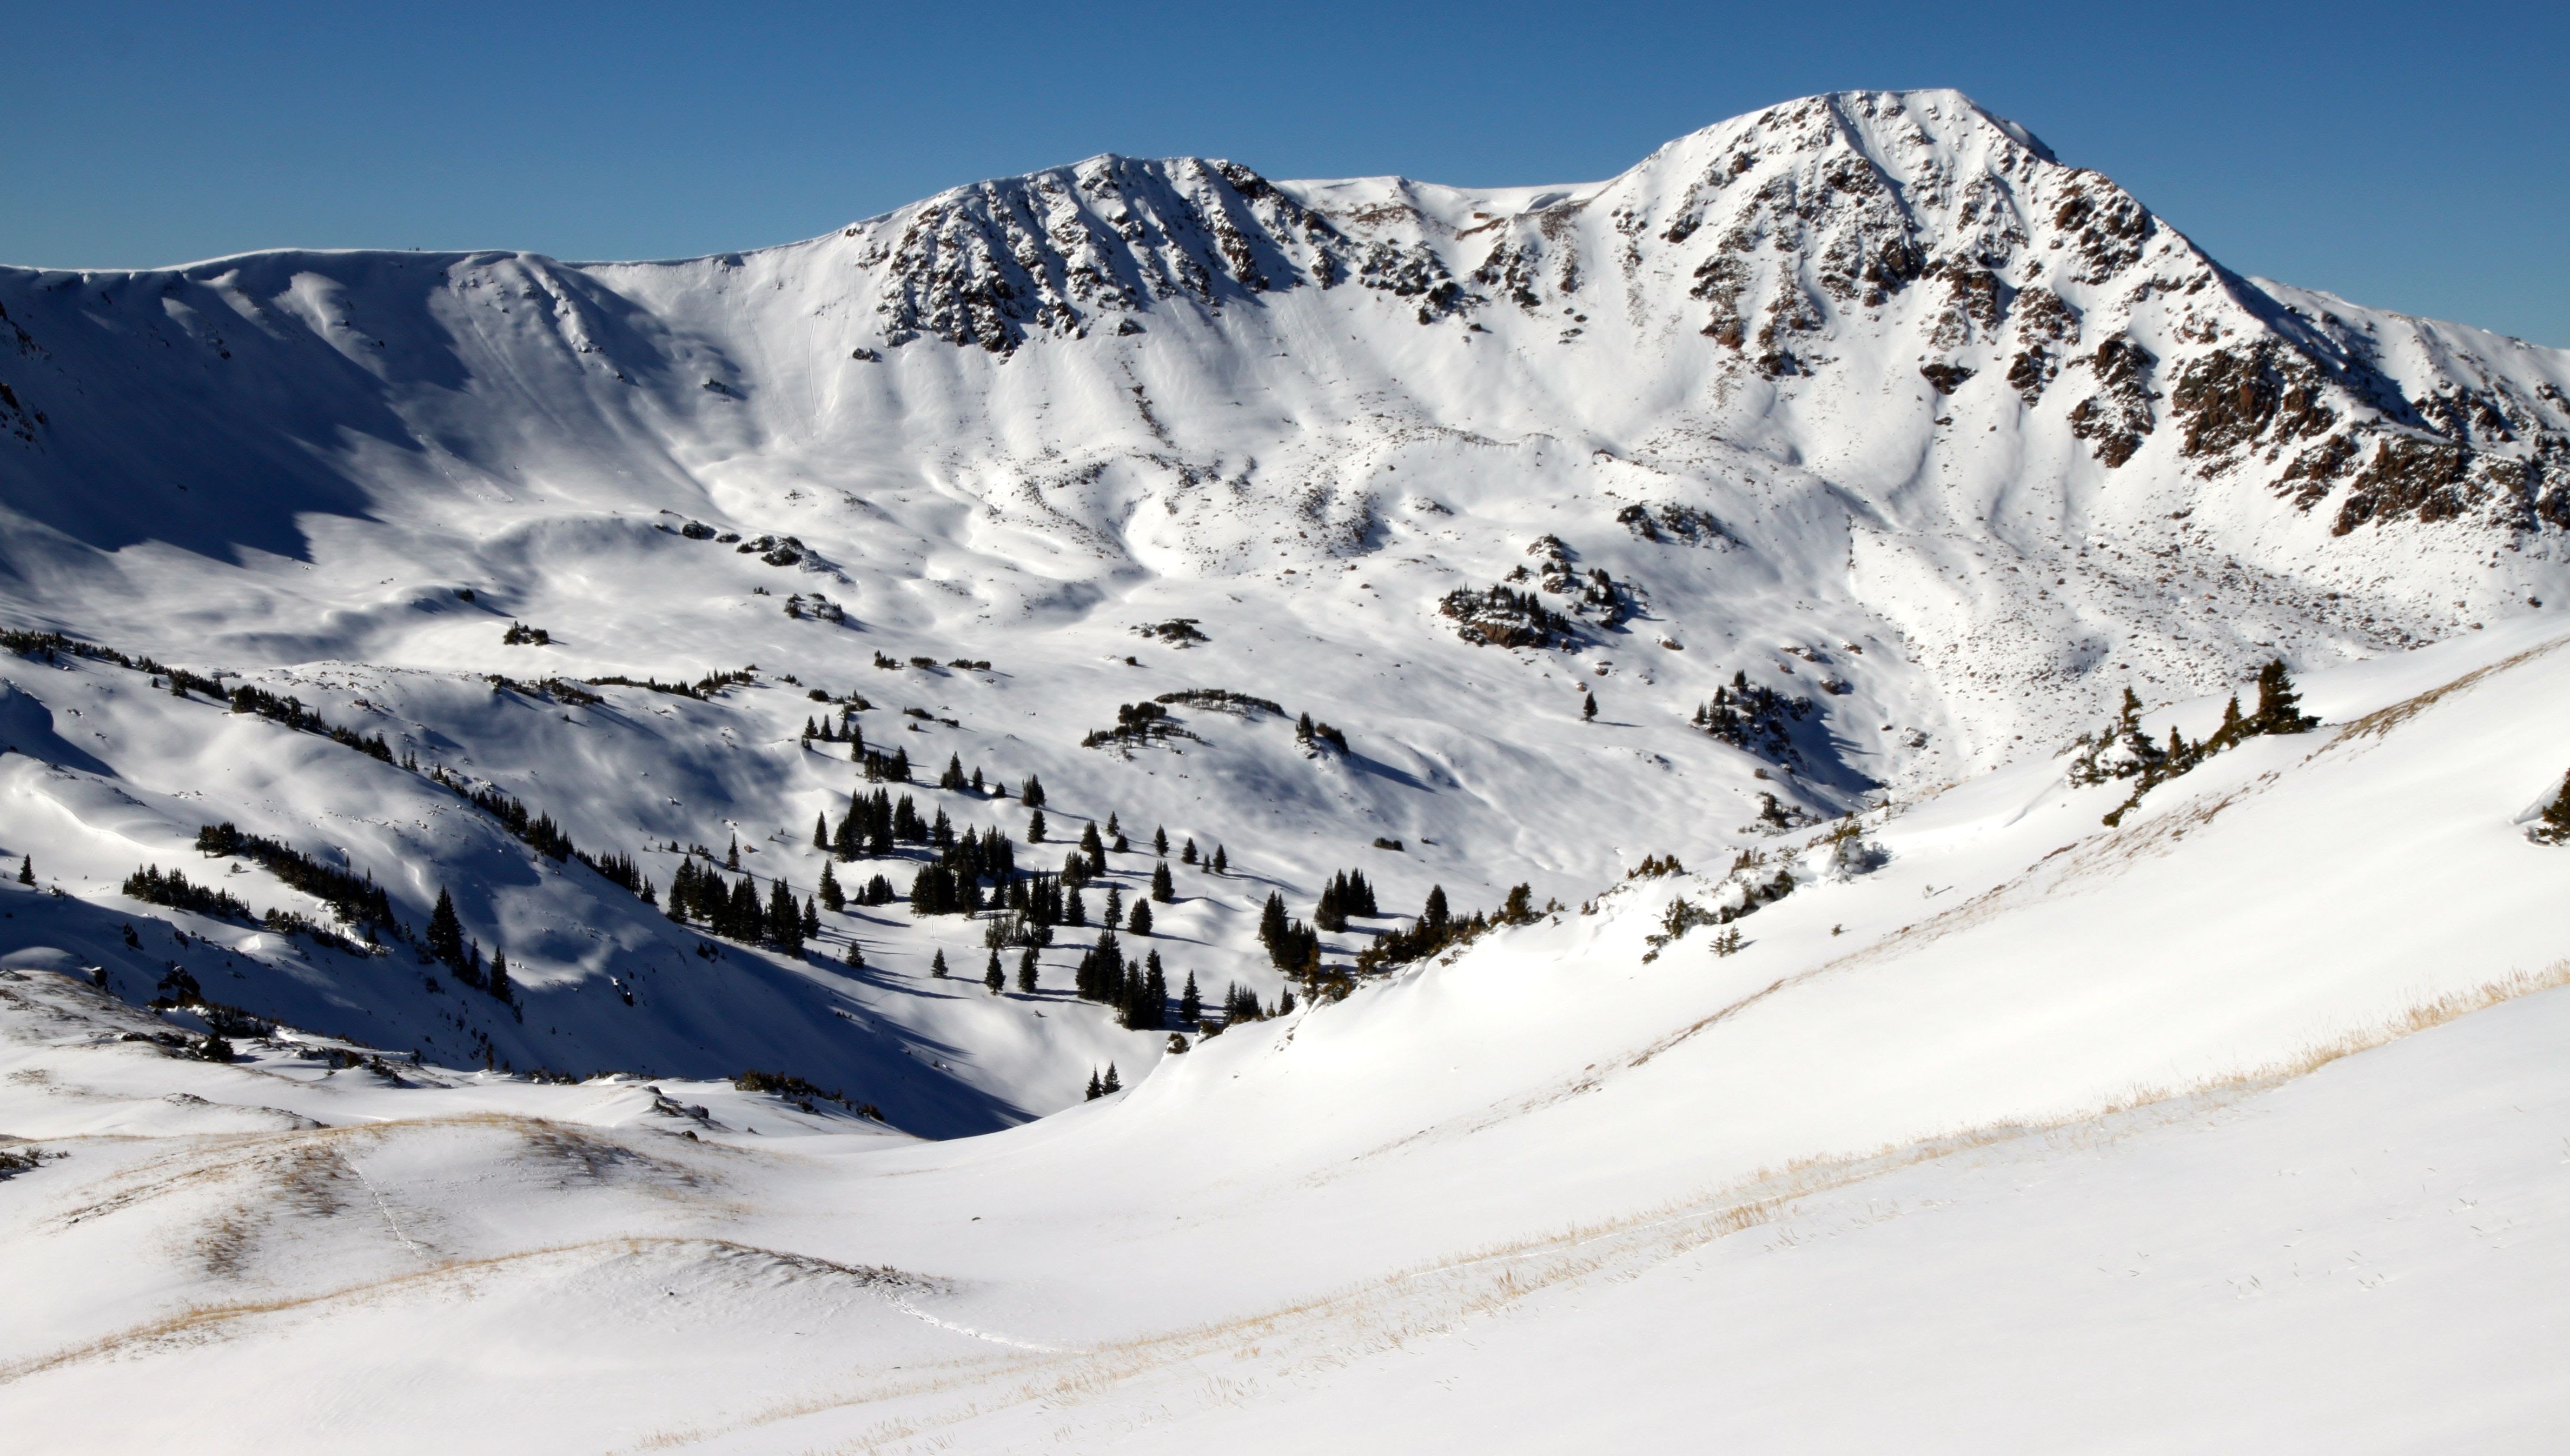
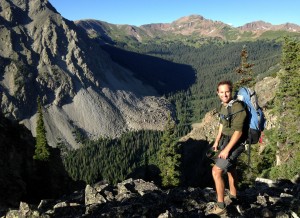
Looking down into the Middle Willow Creek drainage with Buffalo Mountain to the left from East East Red’s south slopes
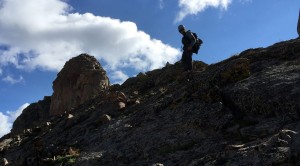
We then made a 1,500′ climb up steep grass to east East Red’s summit topping out about 2 hours and 30 minutes after we began around 9am. I felt like we were making pretty good time. I wanted to be home my mid-afternoon so Kristine could go on a bike ride earlier than later in the day, but it turned out it needed to be an evening ride due to my lateness and ability to never seem to realize that things, especially traverses, take longer than they look like they will on a map 🙂 Very sorry about that, babe.

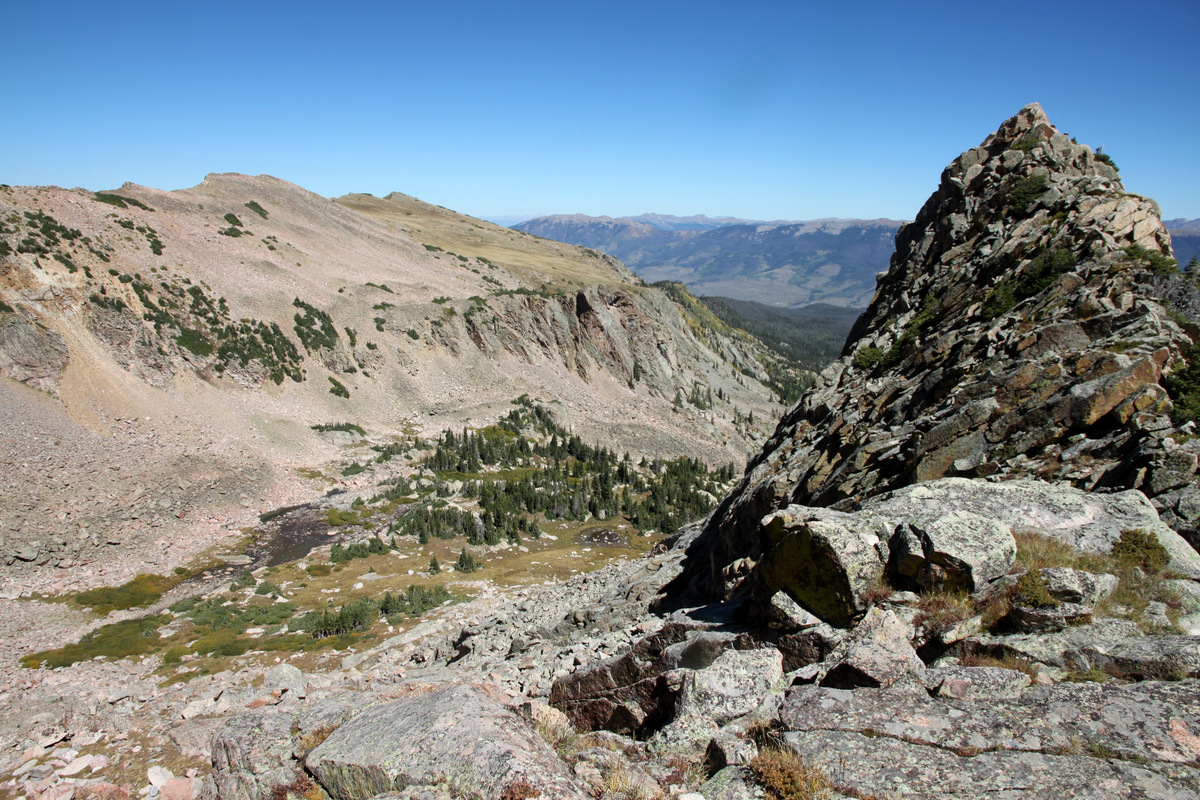
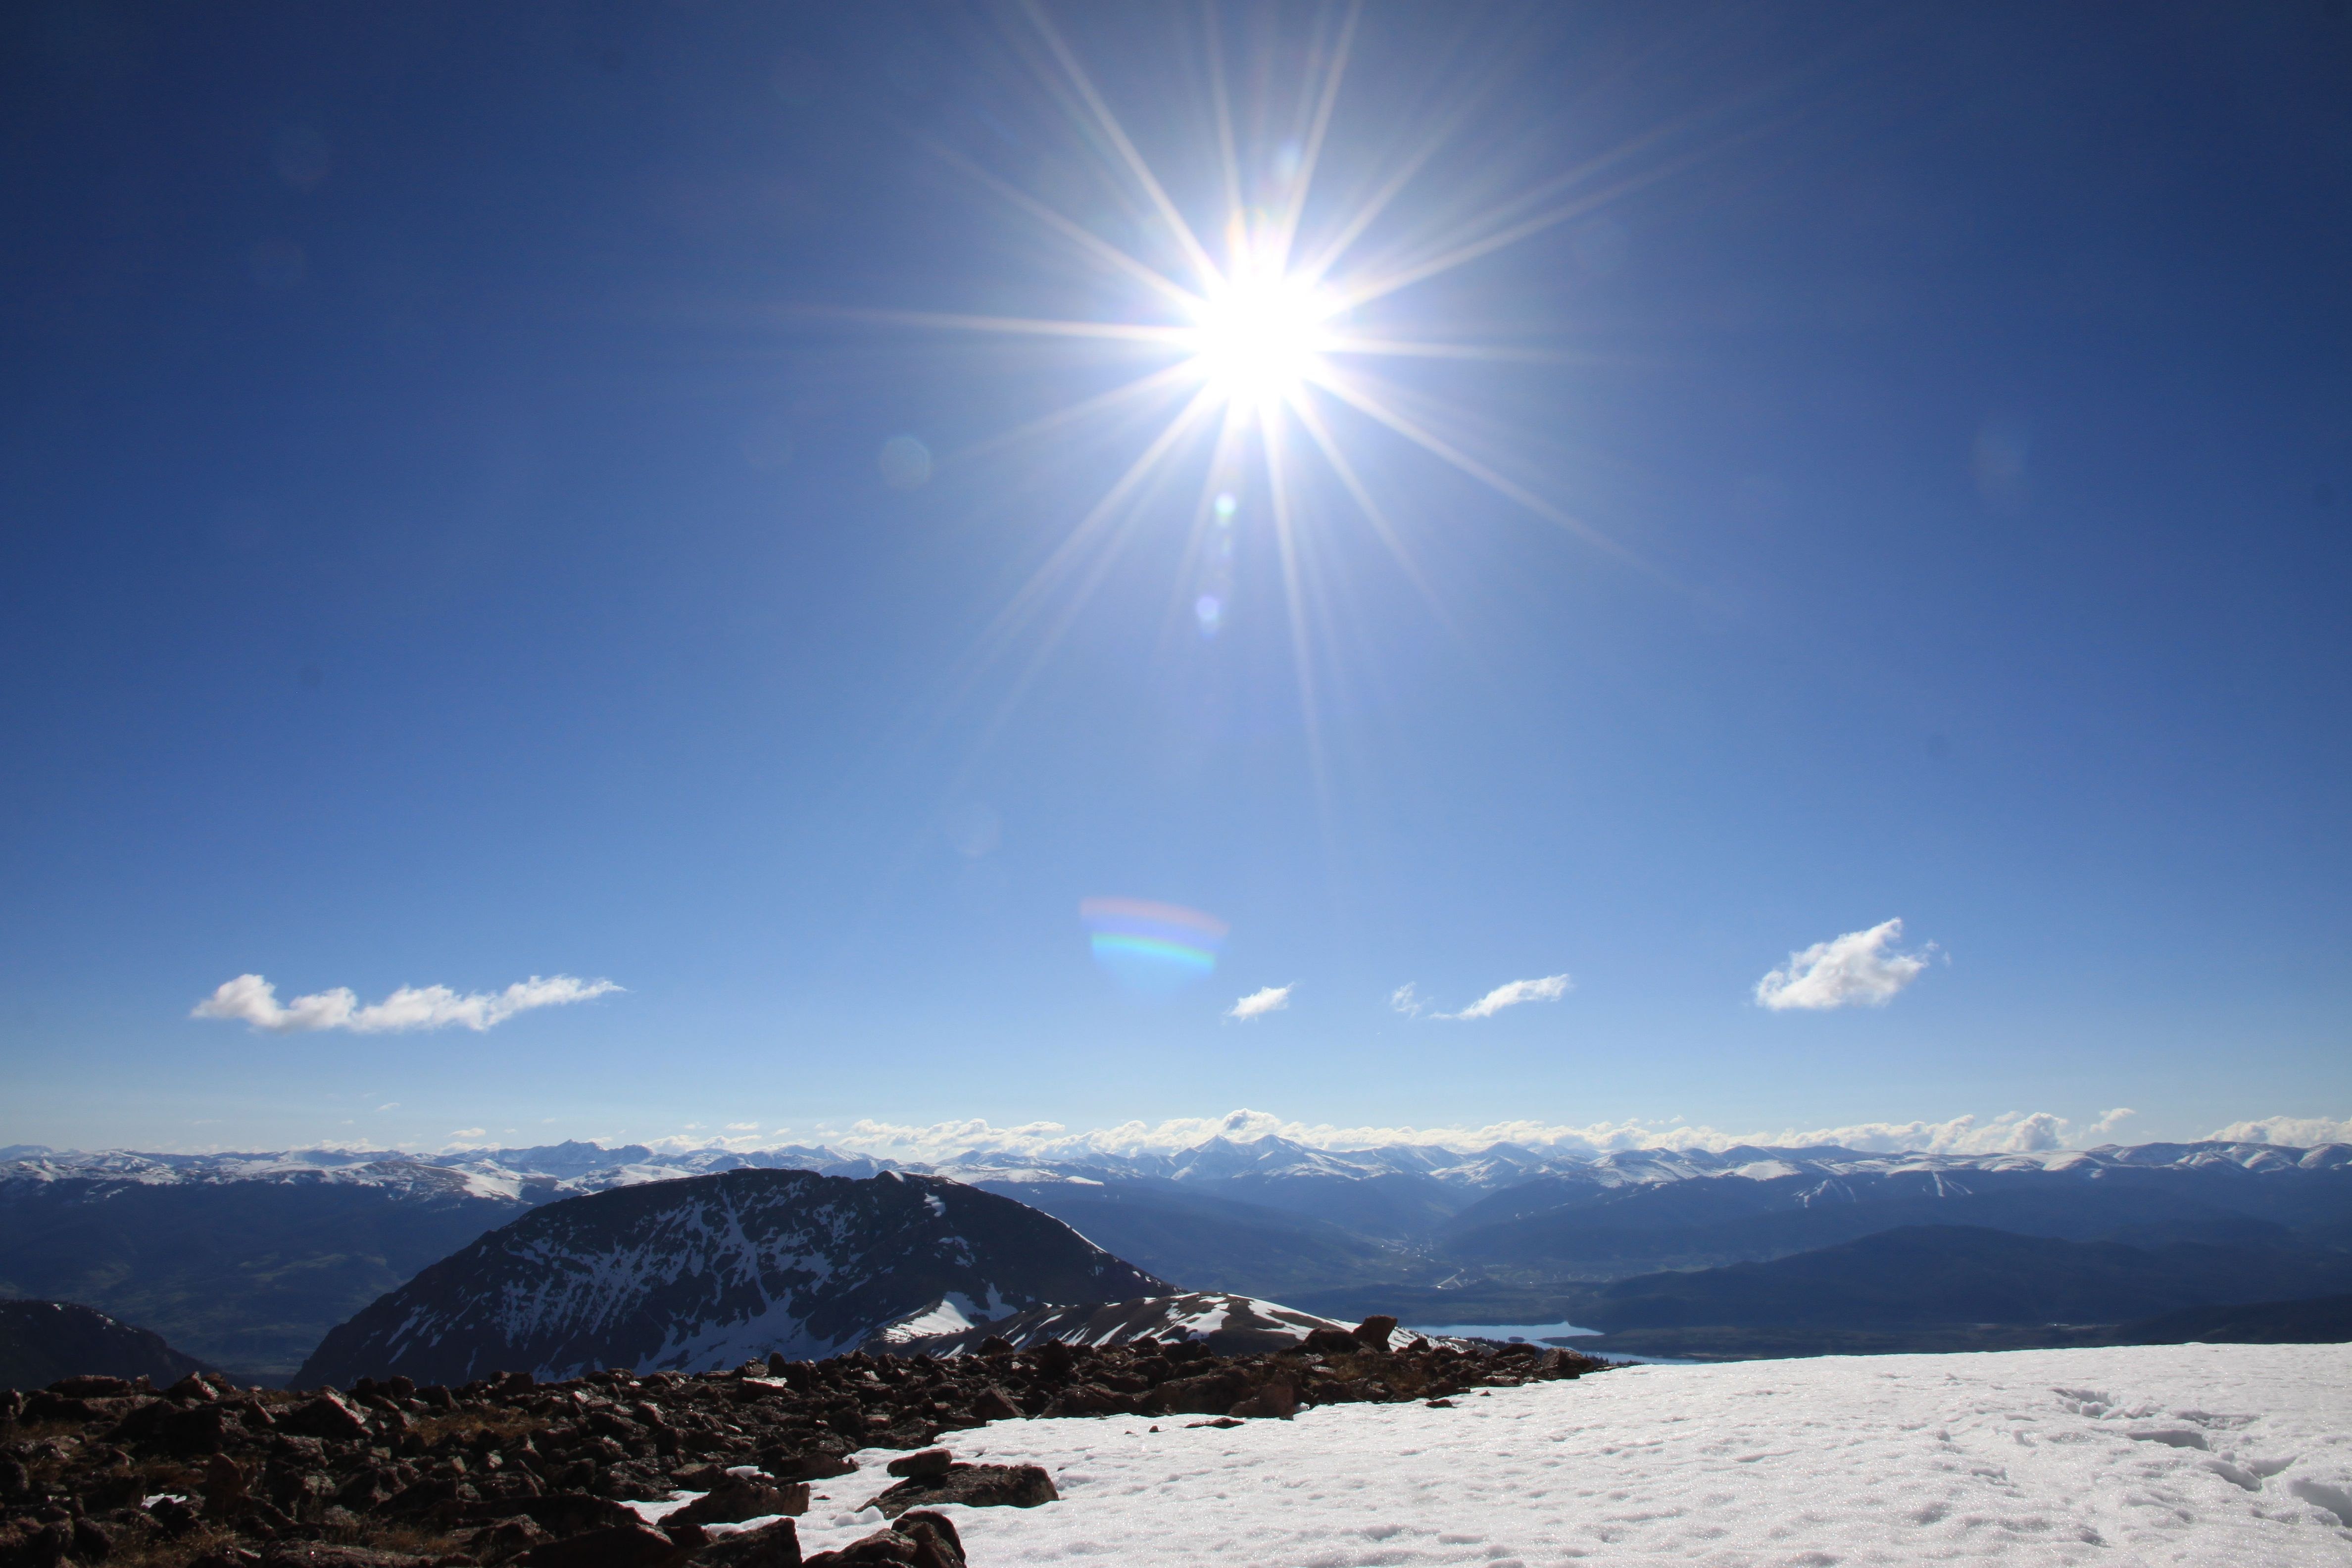
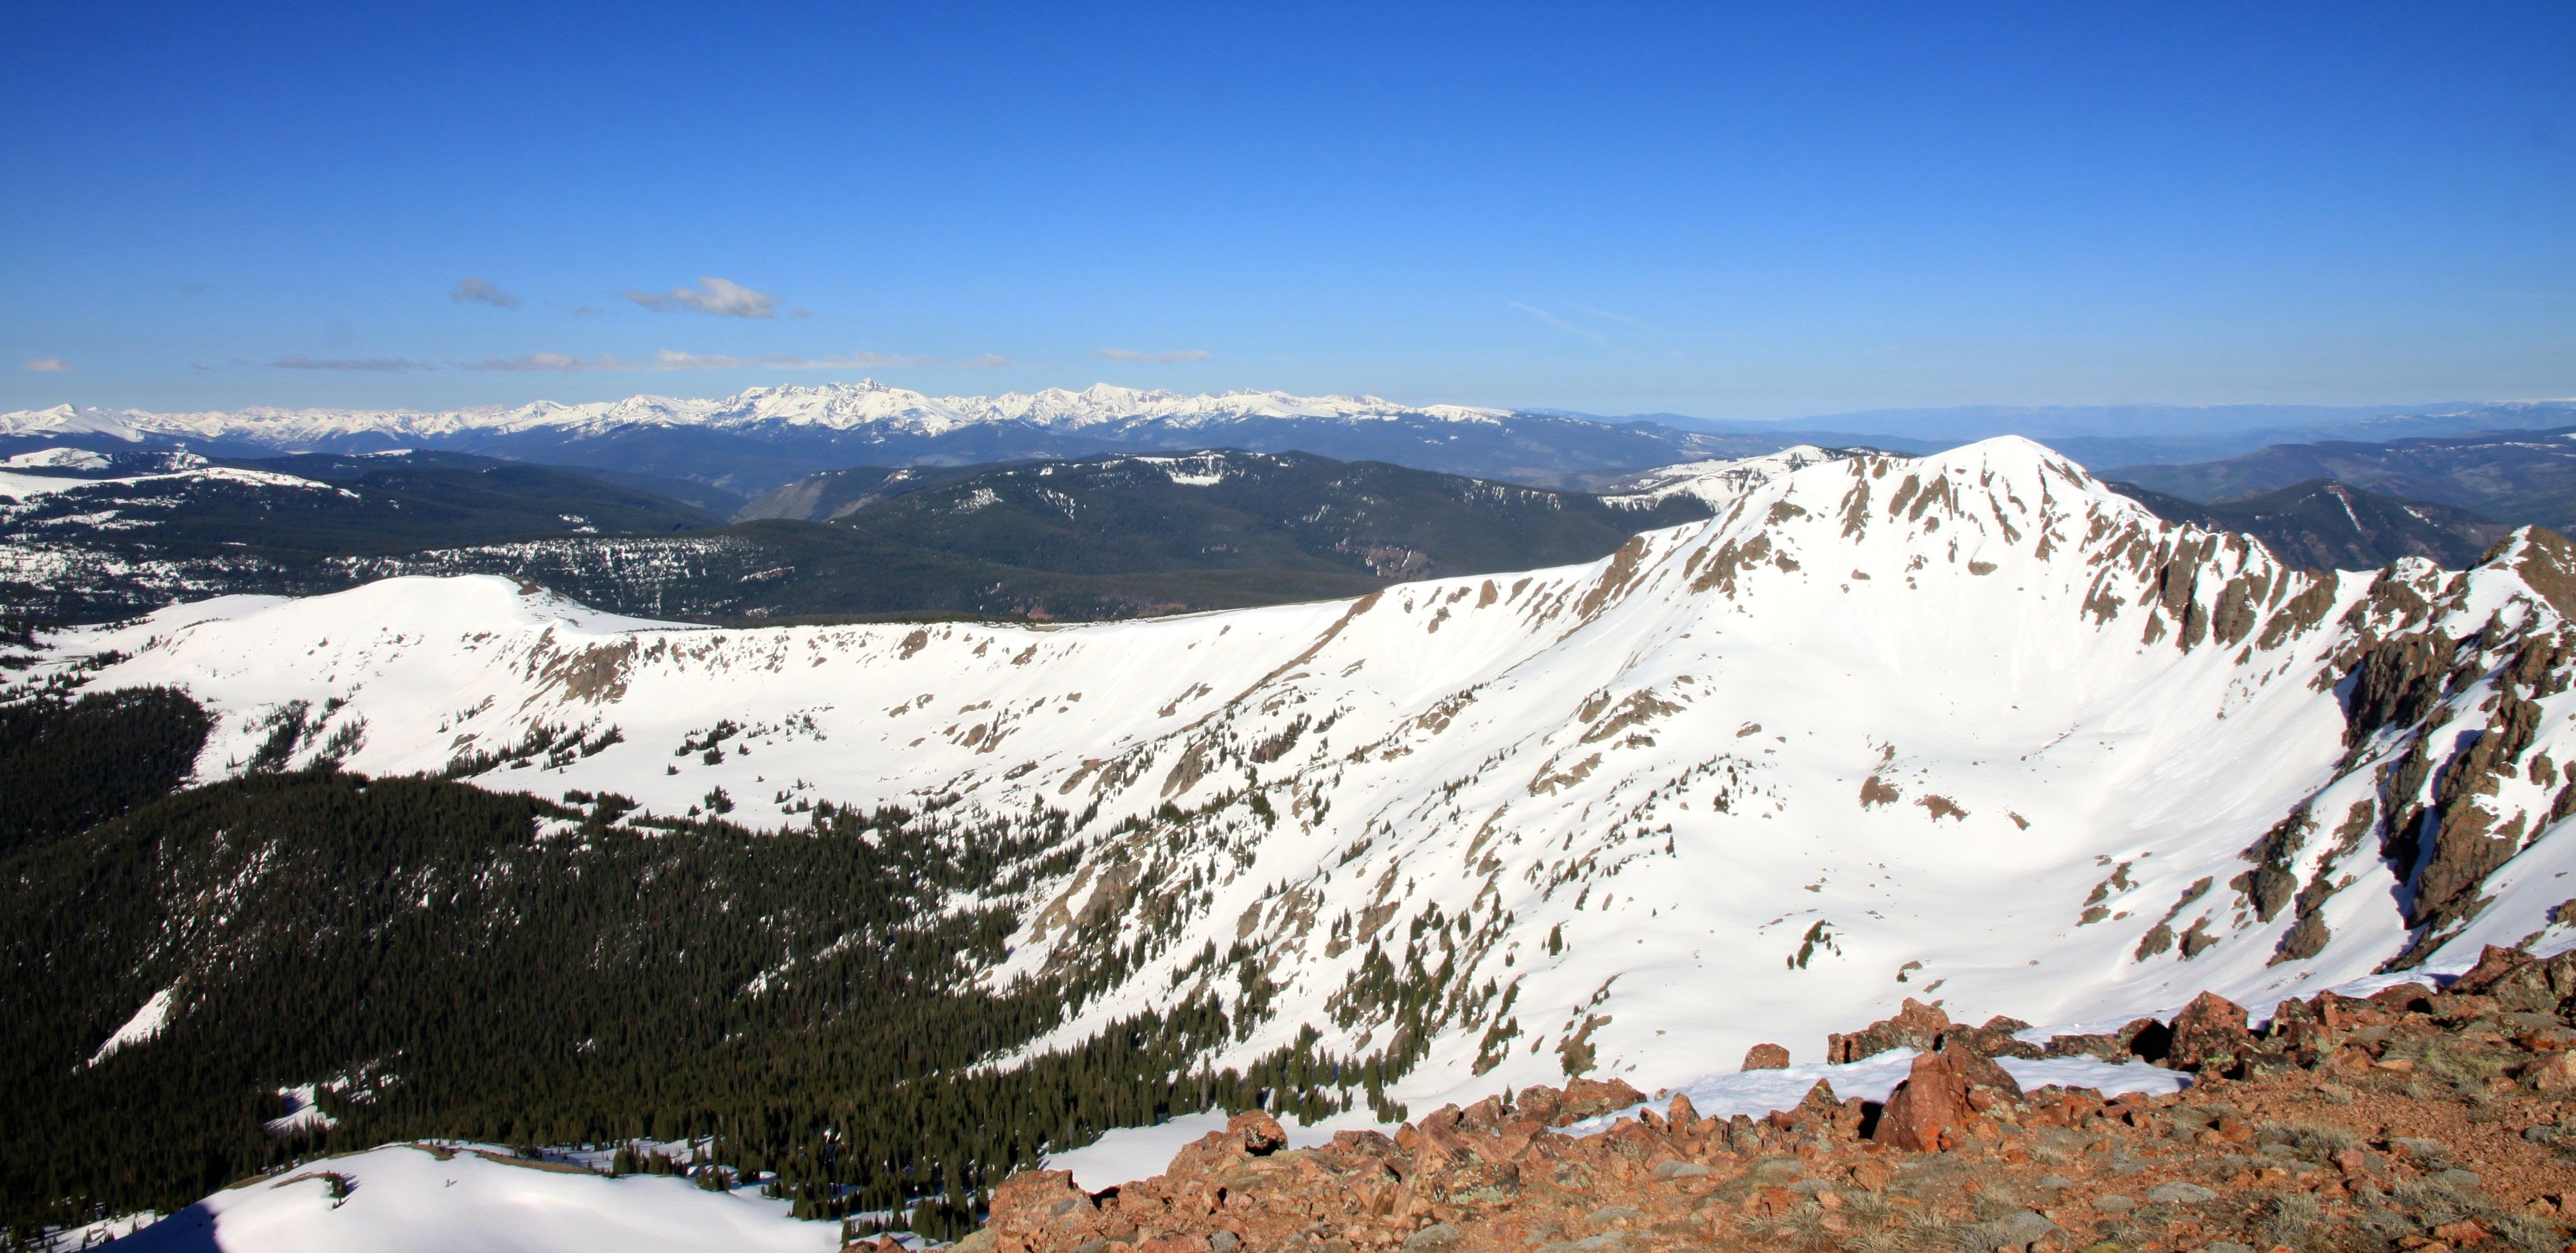
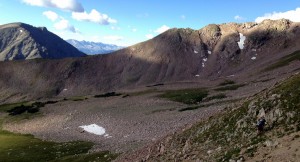
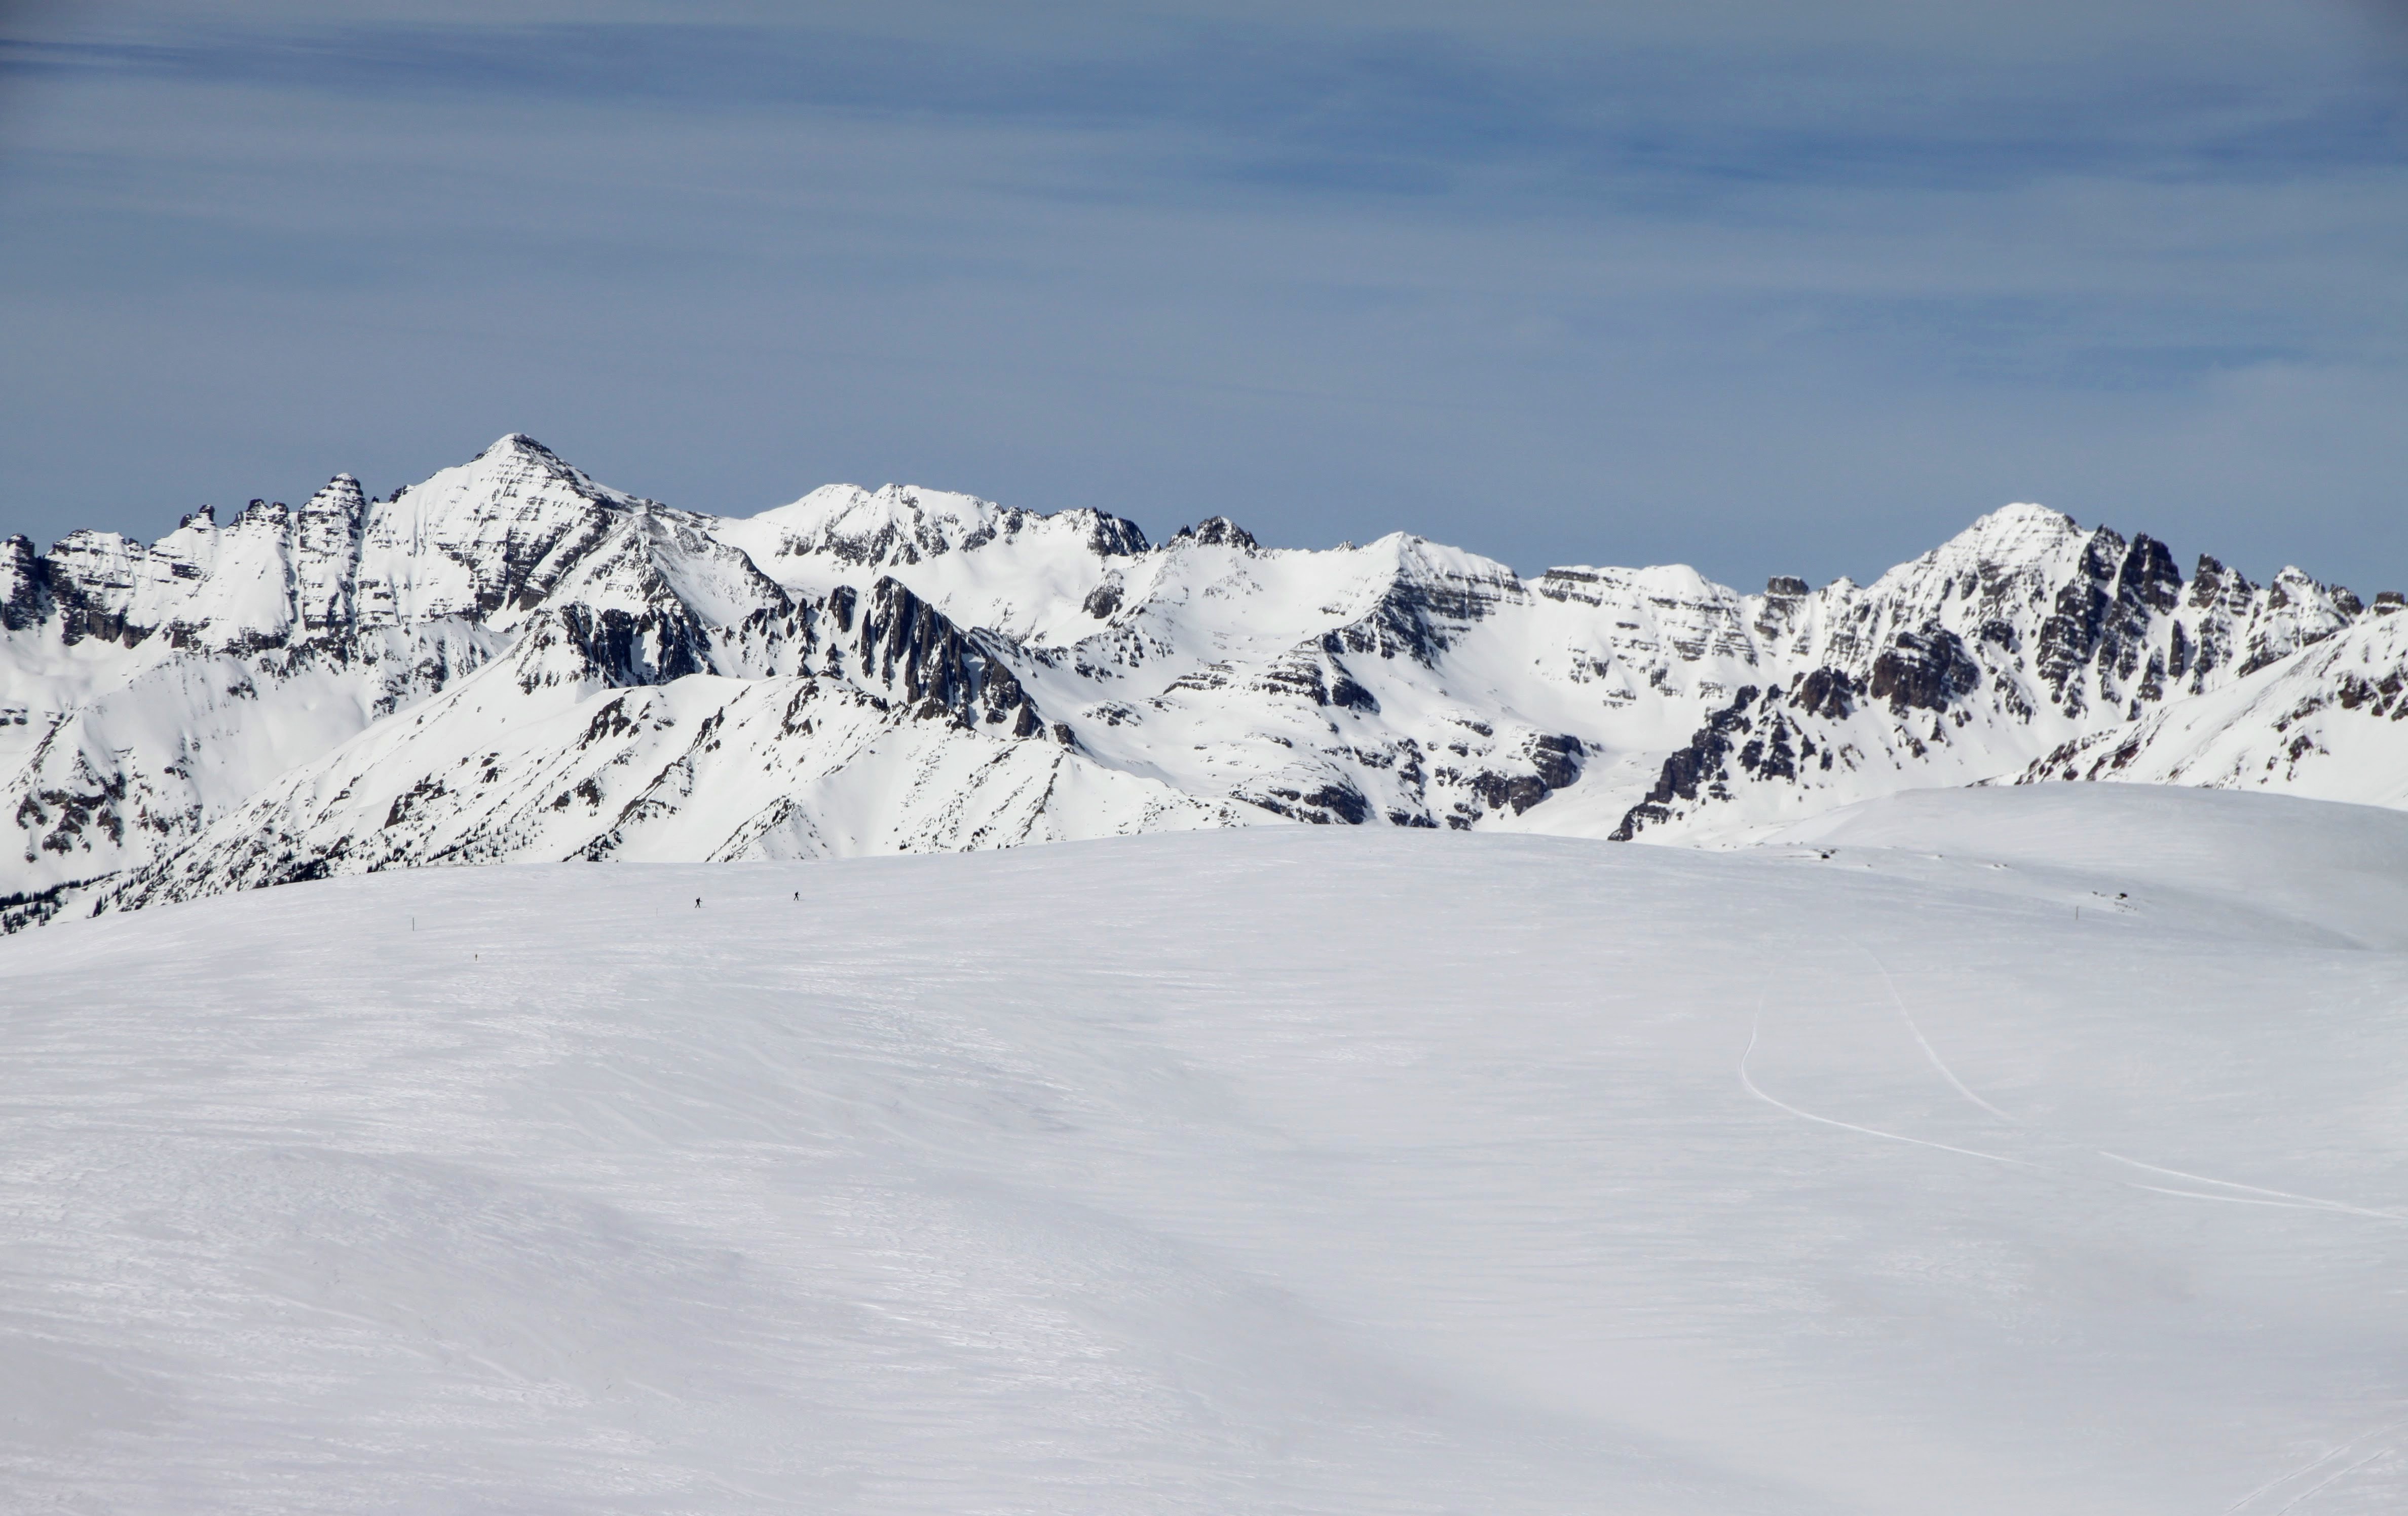
View of the Silverthorne massif (center), Snow Peak (left), and Rain Peak (right) as seen from the East East Red summit (12,885′)
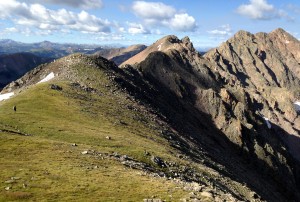
J down to the left and Red Diamond Ridge stretched out in front of us from East East Red’s summit
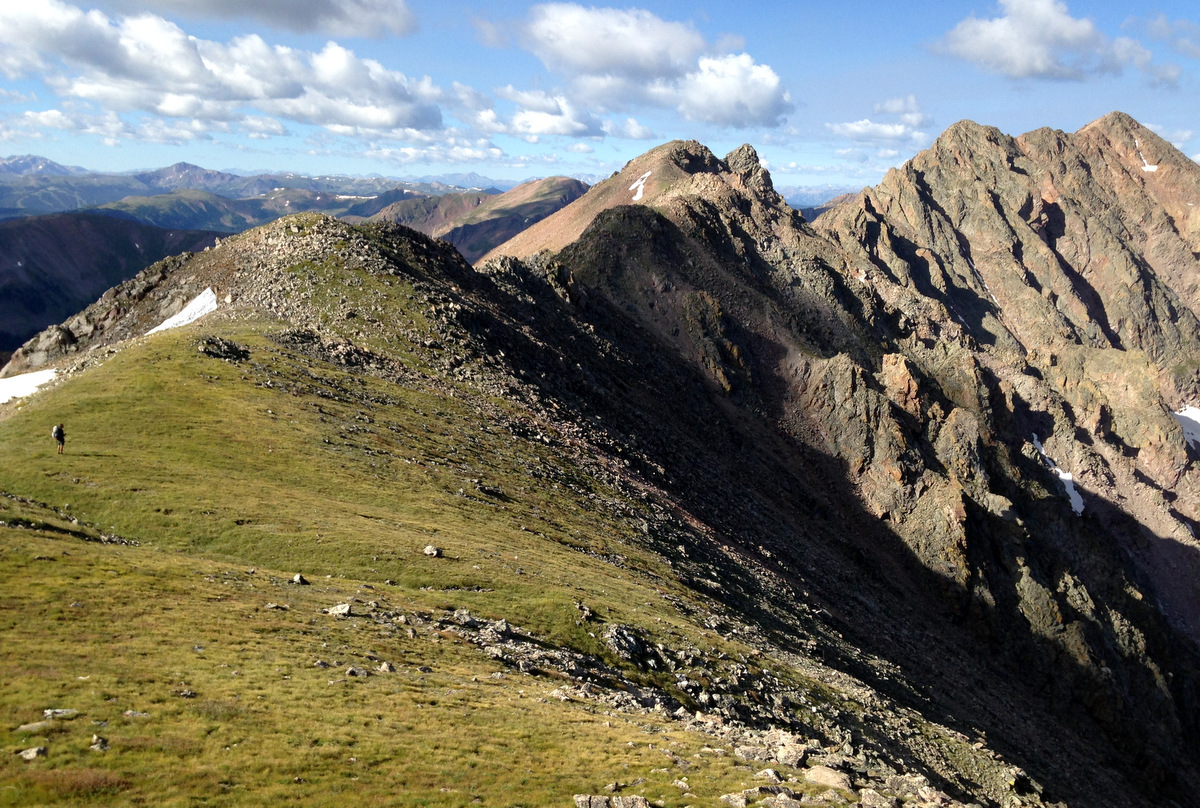
Nevertheless, it was a gorgeous morning and we made our way over the mellow bumps for approximately 3/4 of a mile to East Red’s summit arriving around 9:30am.
Easy cruising between East East Red and East Red. Photo by J
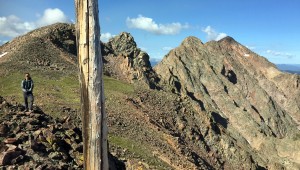
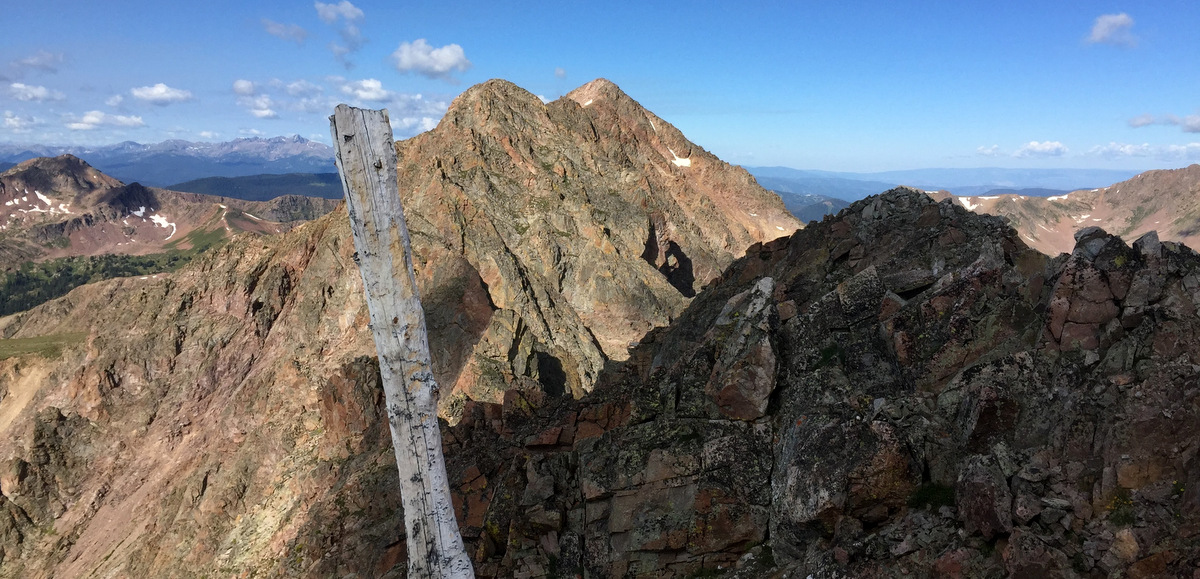
There were log poles sticking up from every little point along this section of ridge. Photo by J
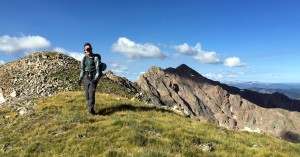
East Red summit (12,945′)
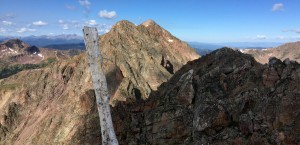
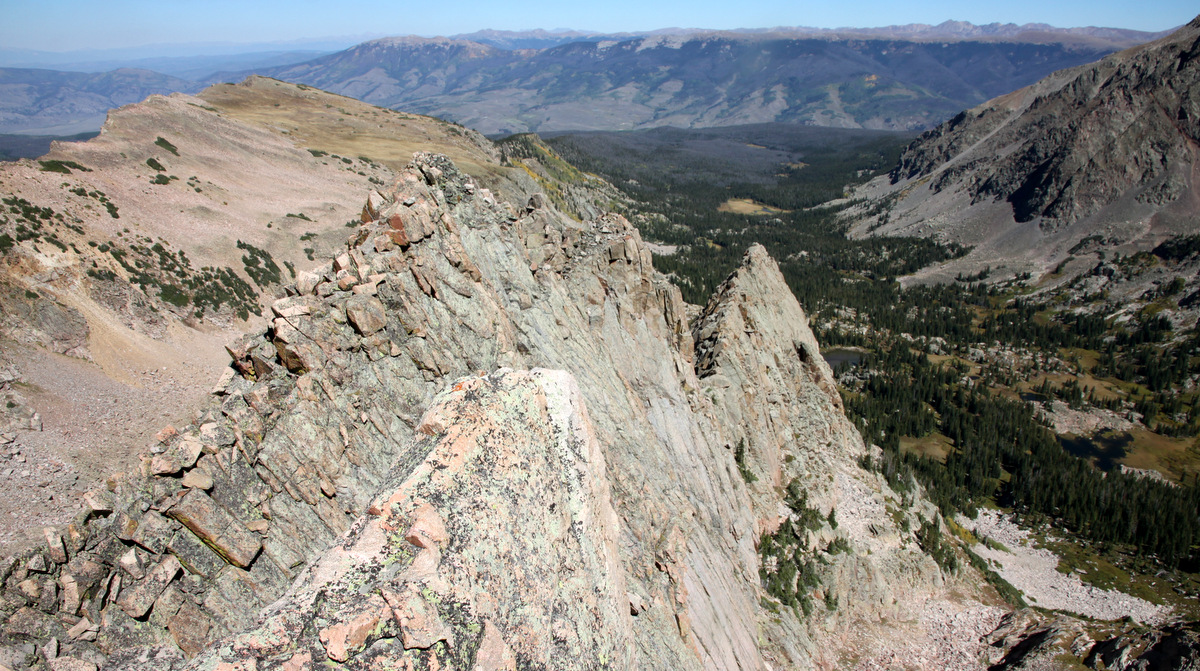
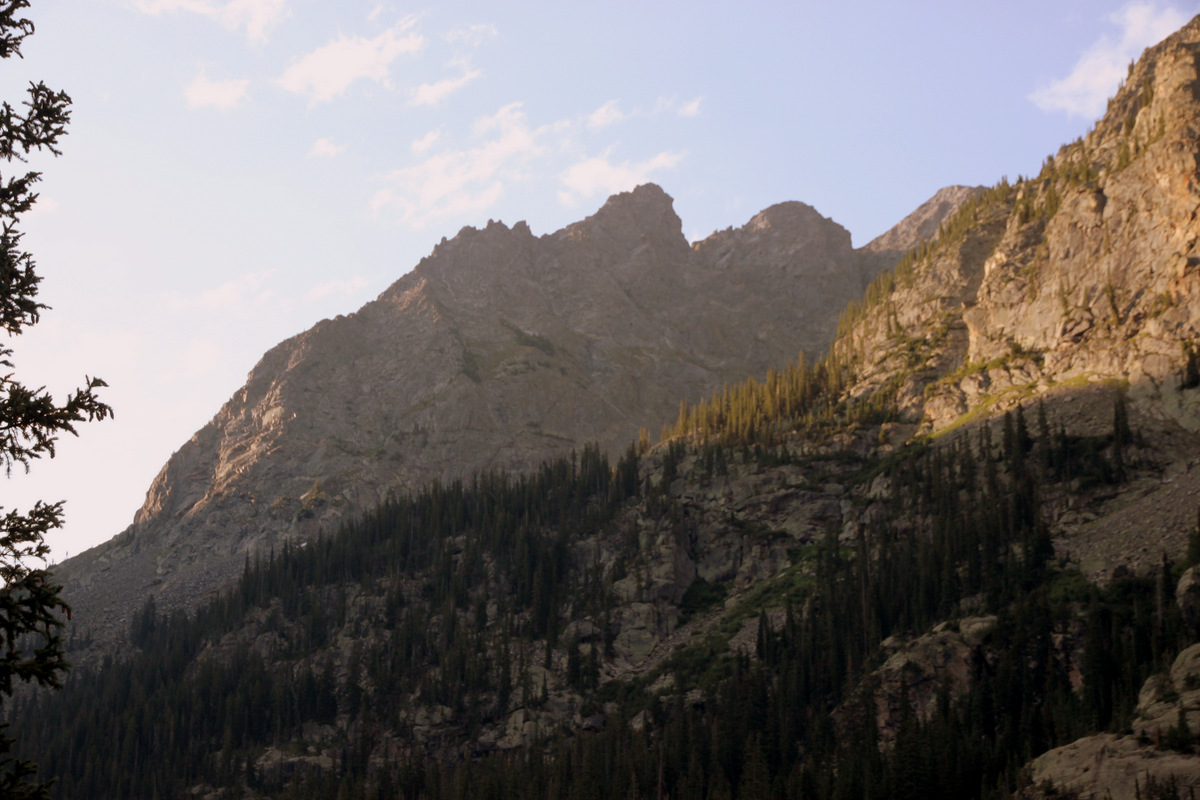
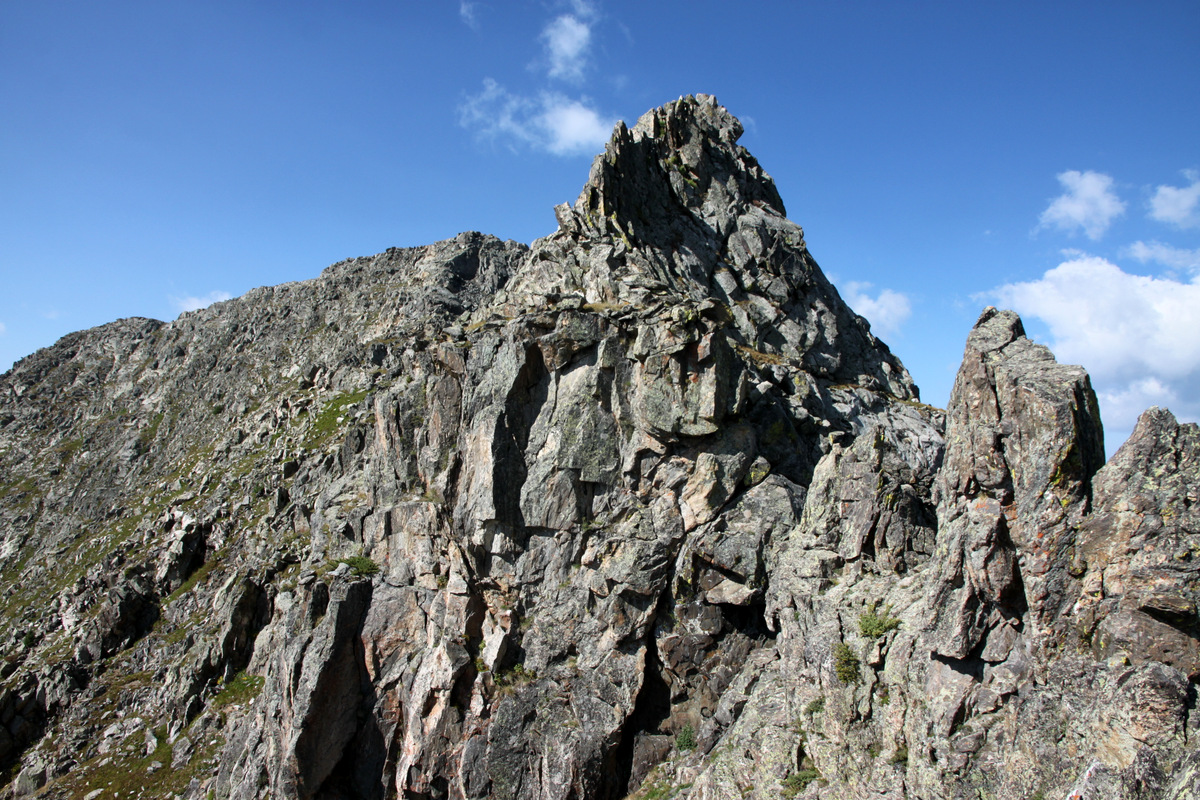
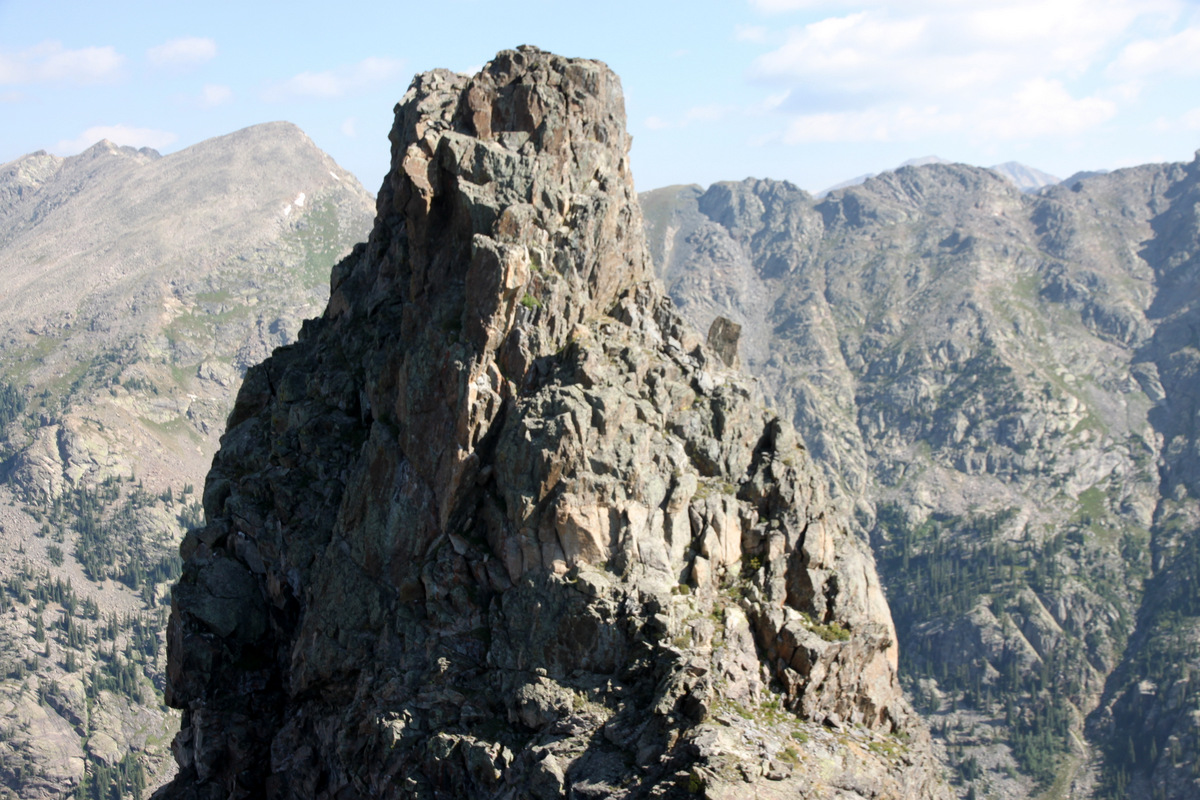
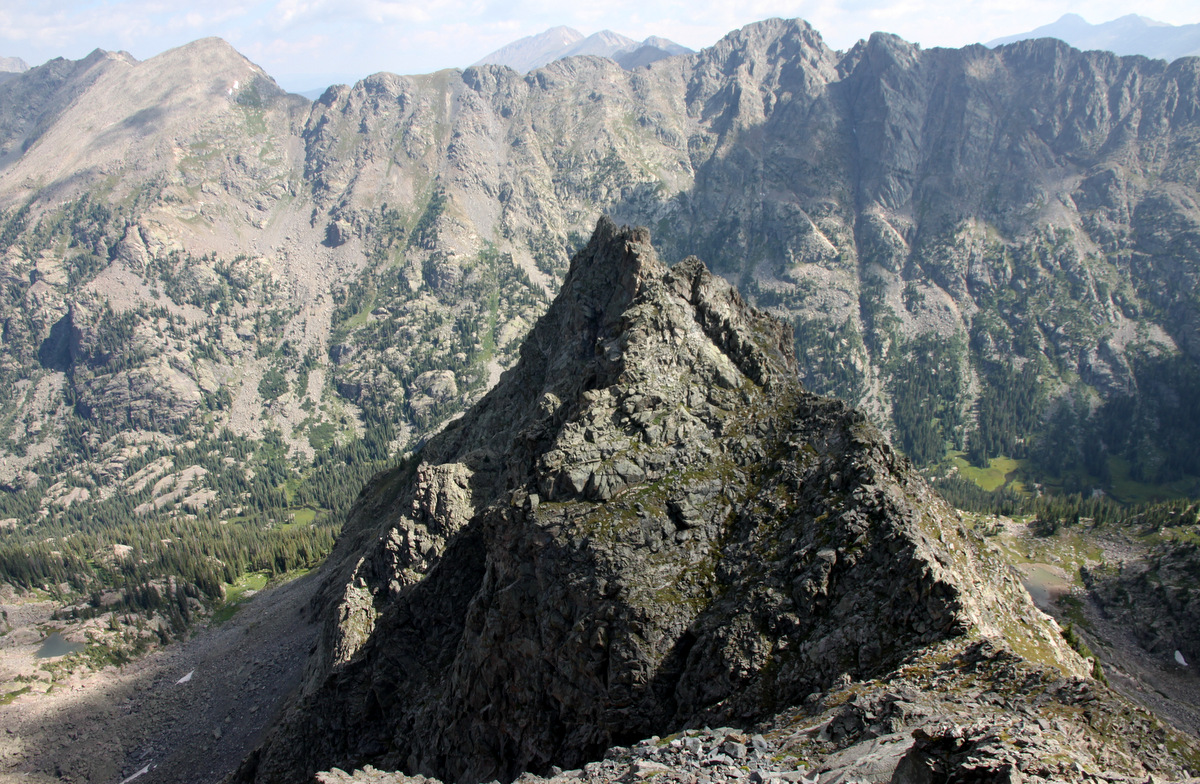
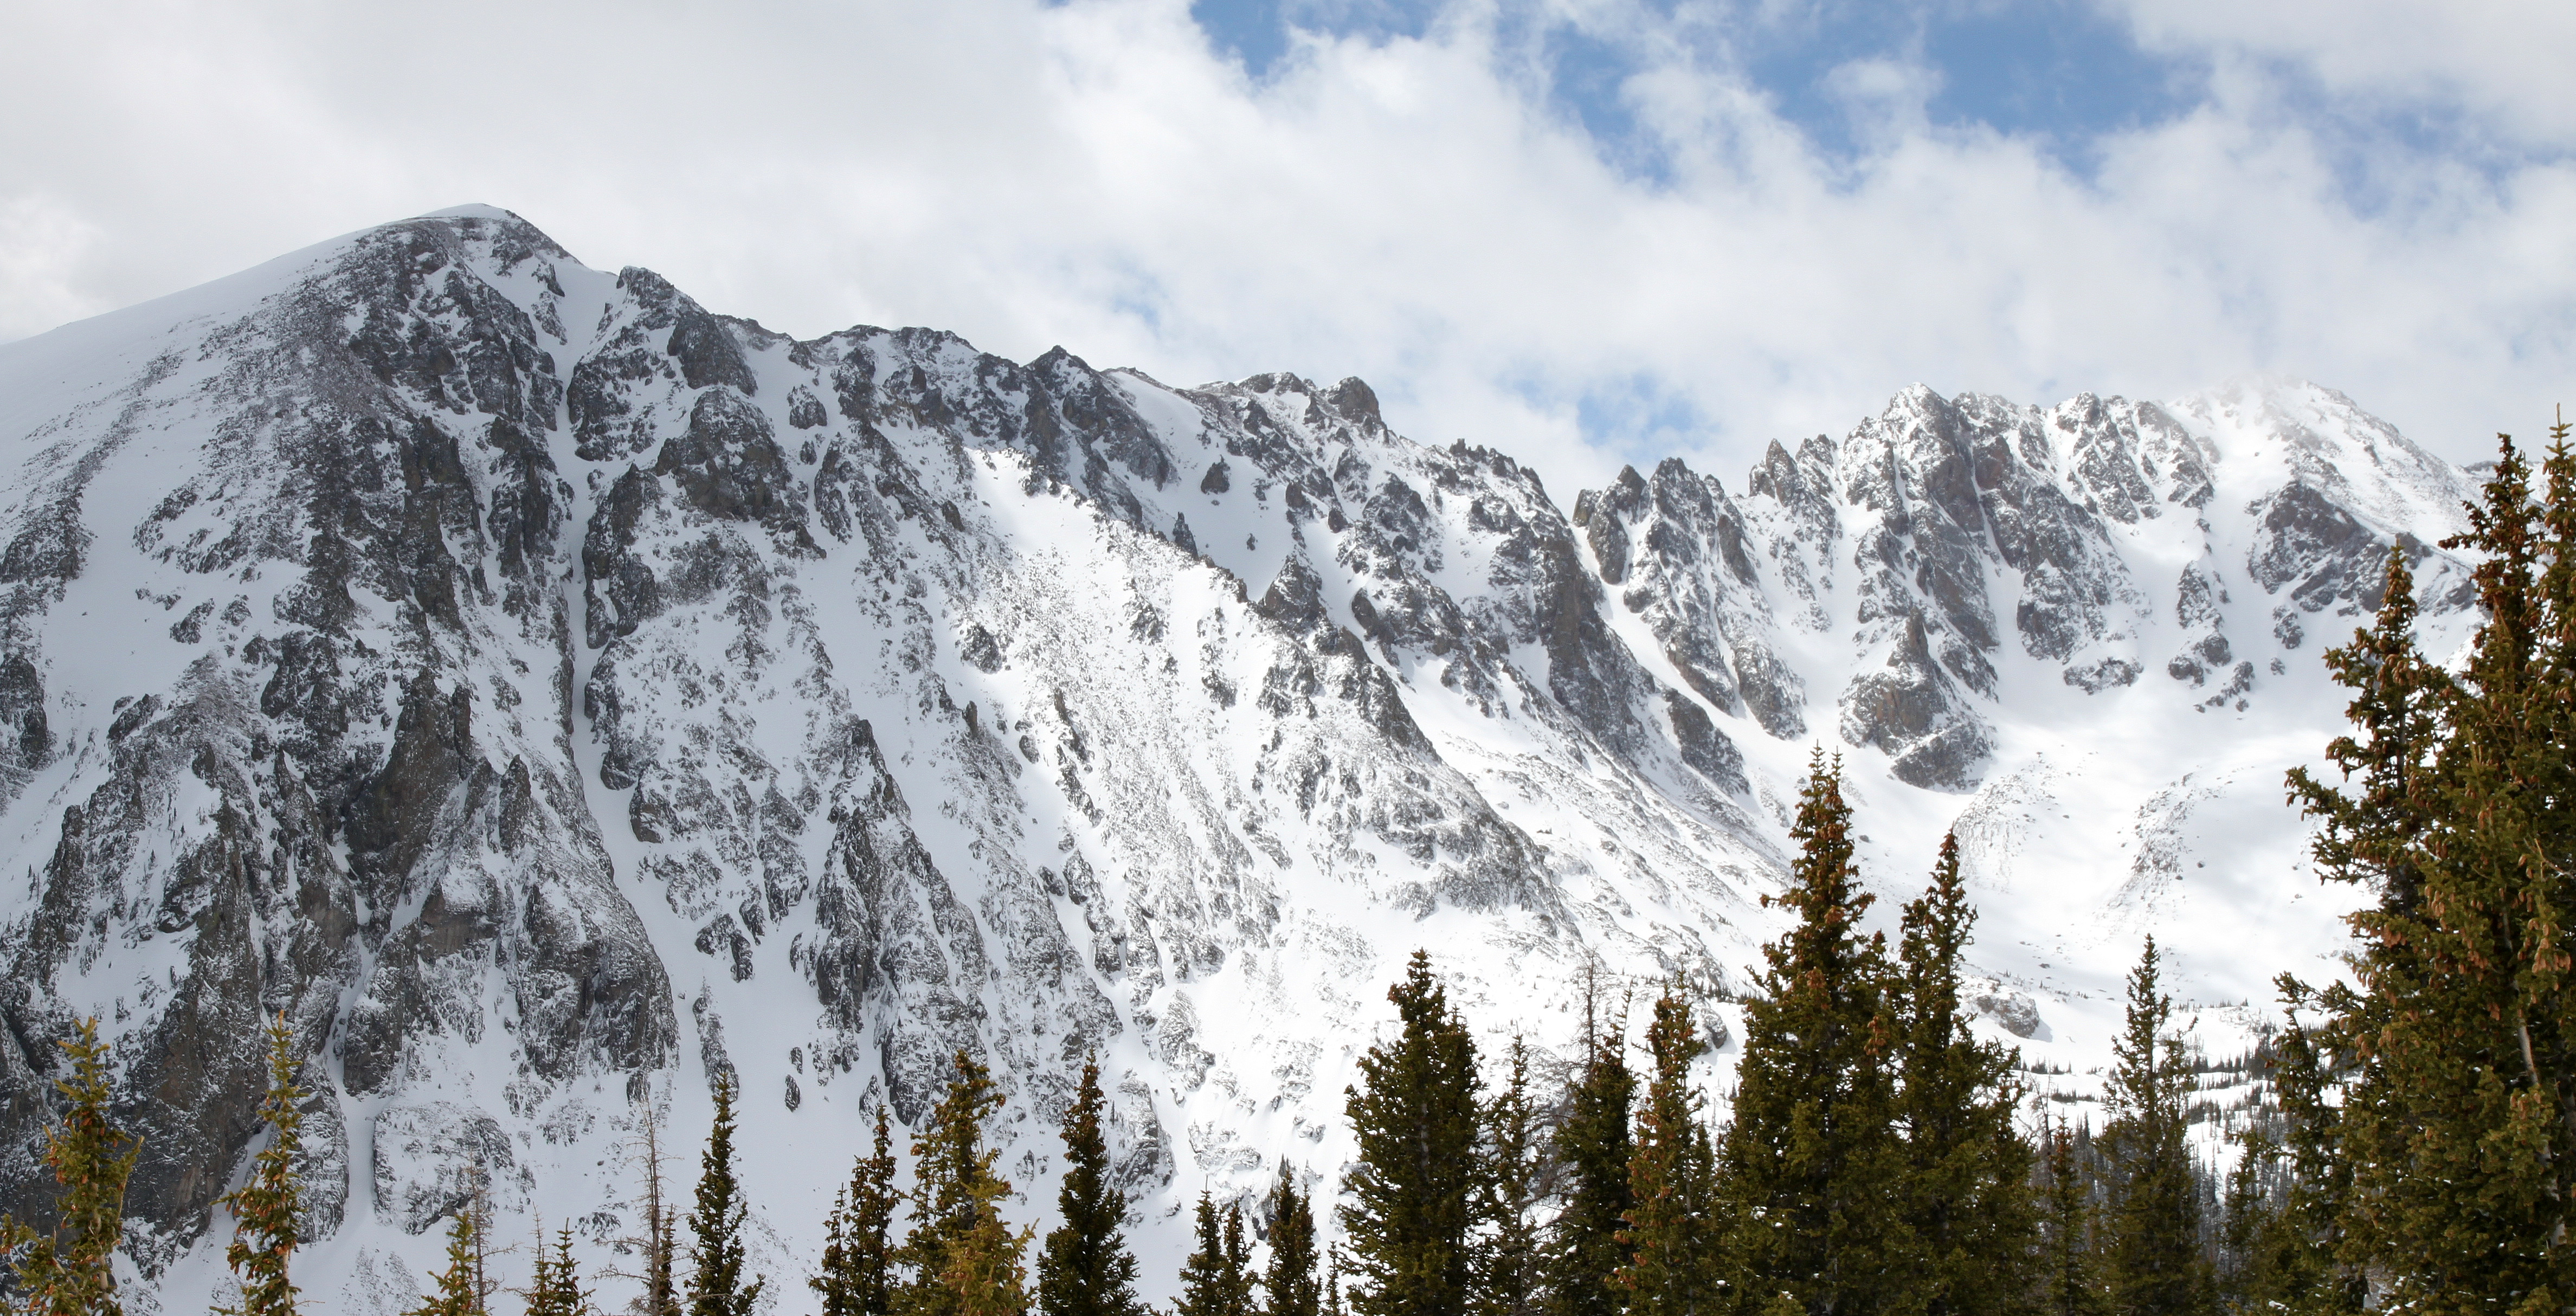
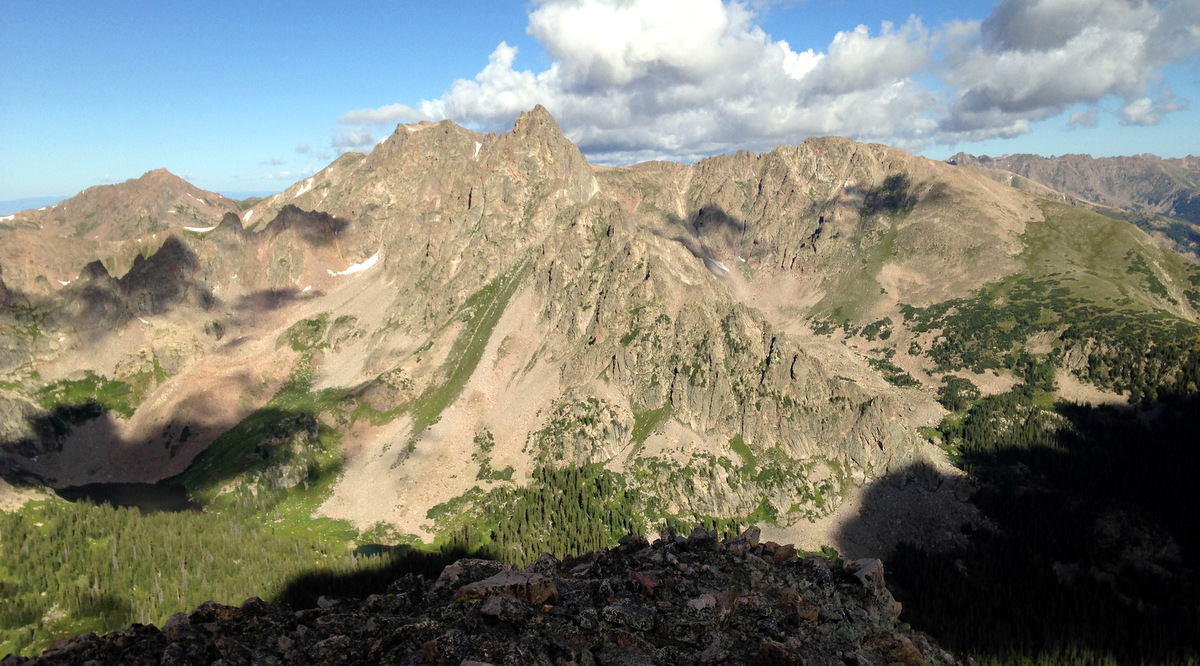
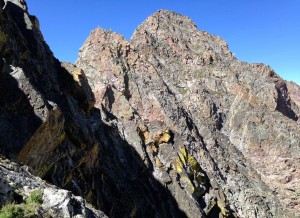
Looking at the “meat and potatoes” of Red Diamond Ridge from East Red’s summit over to Red Peak
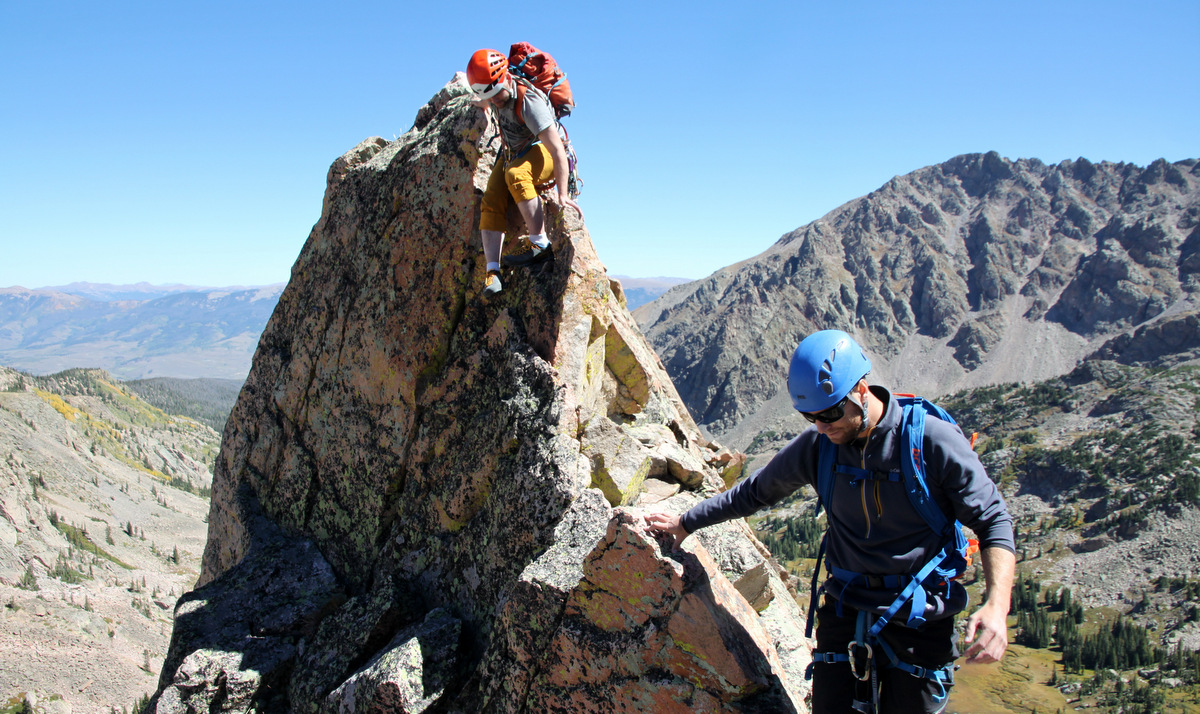
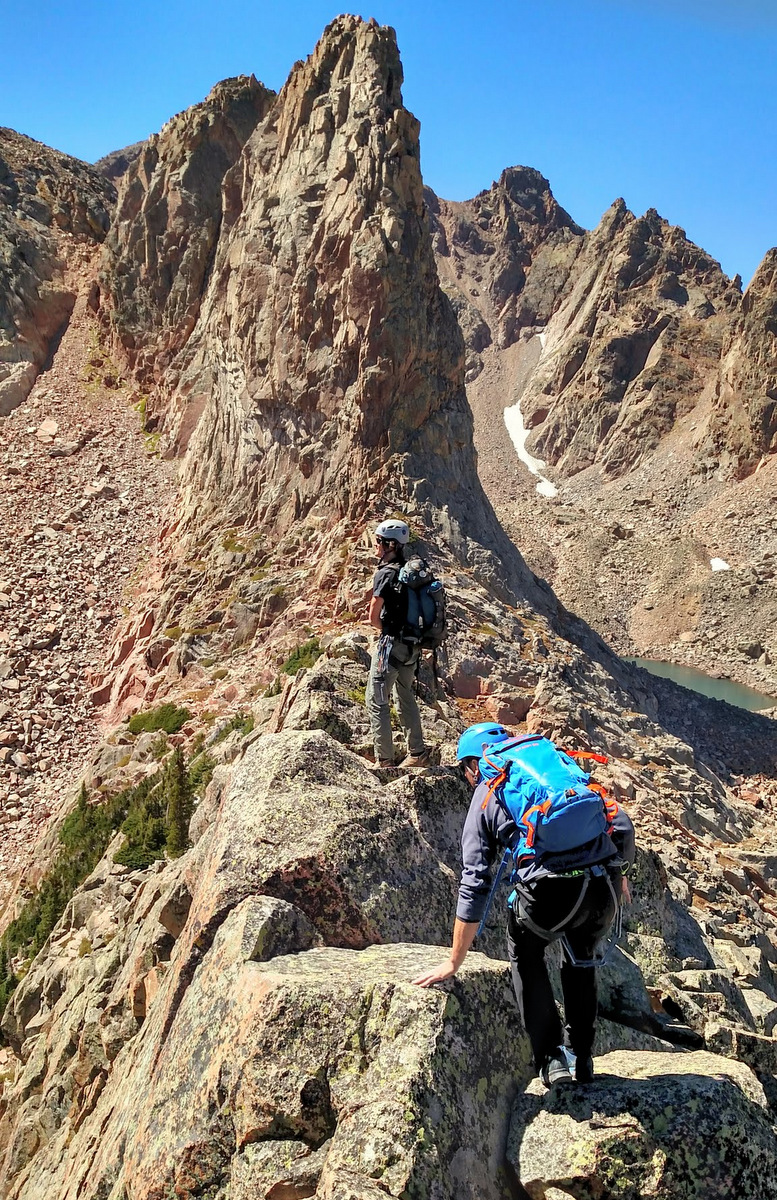
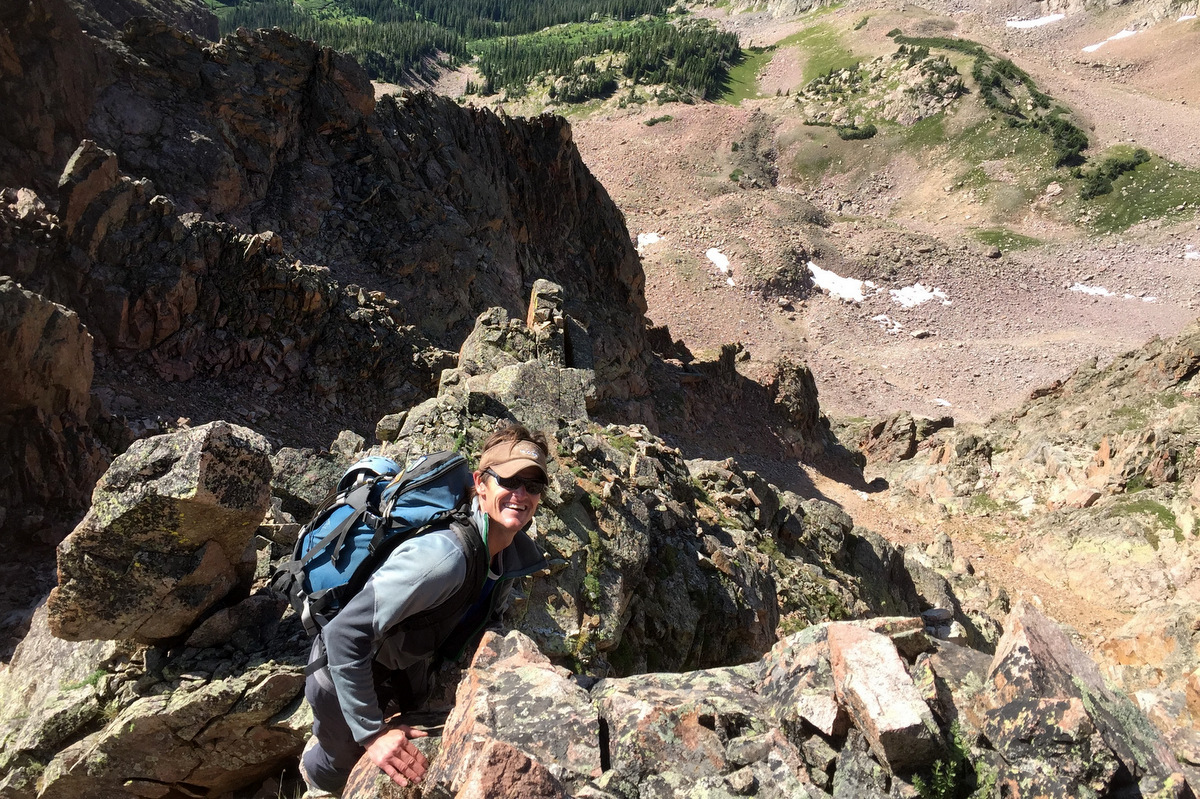
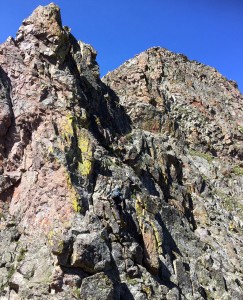
We didn’t stay long on East Red’s summit as we knew we had the bulk of the day ahead of us. Some minor class 3 scrambling led us down and up to the top of a large tower and a cliff edge. This was not downclimable at all. We could have rappelled and saw a few large solid blocks in which to anchor too, but we didn’t feel the need. We backtracked a hundred feet and found a class 4 downclimb to the south to reach the tower’s western base.
Initial scrambling. Photo by J

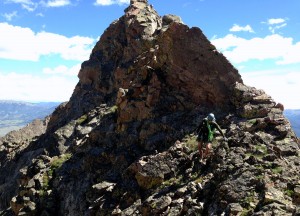
J at the top of the tower with Red Diamond Ridge laid out in front of us
J on the class 4 downclimb on the tower’s south side

J making a few airy moves to get back on the ridge proper from the ledge on the tower’s south side

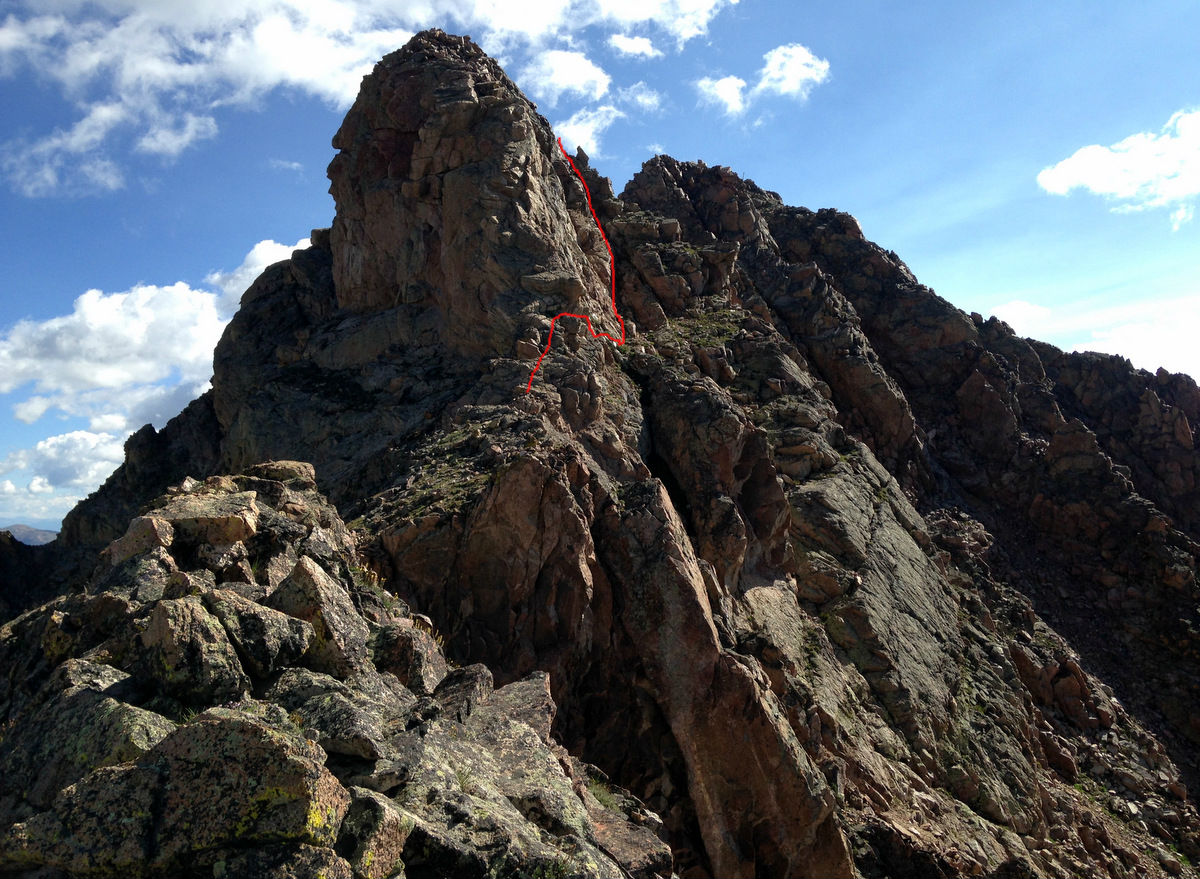
Looking east at the tower from below and our downclimb shown in red. Click to enlarge
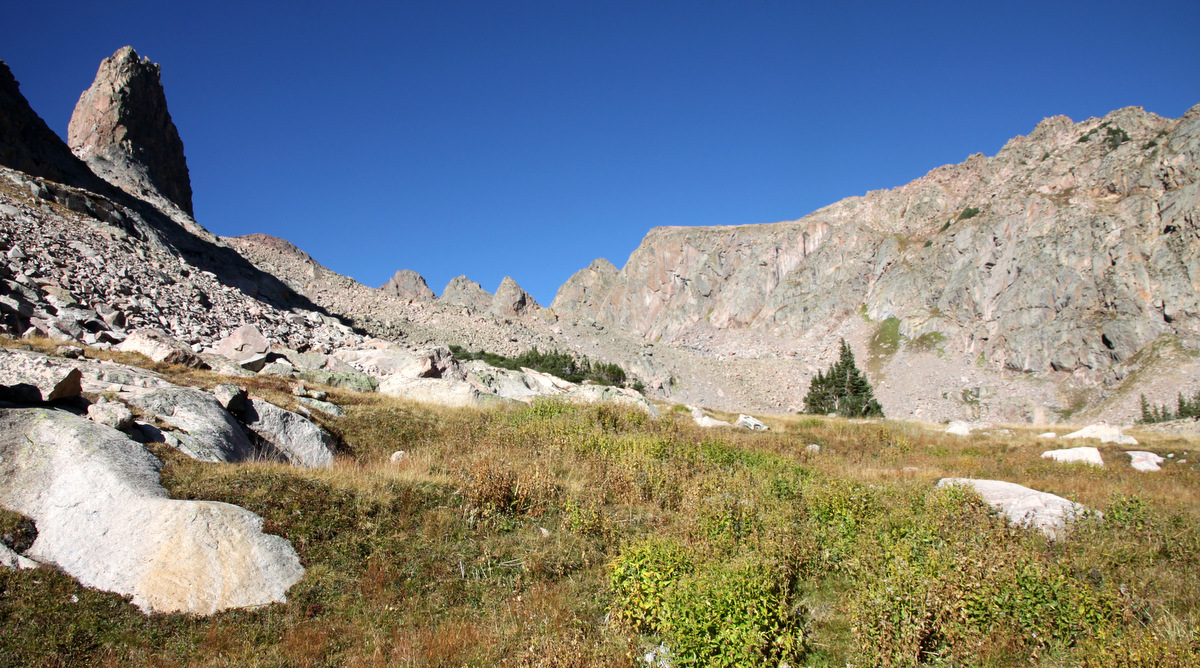
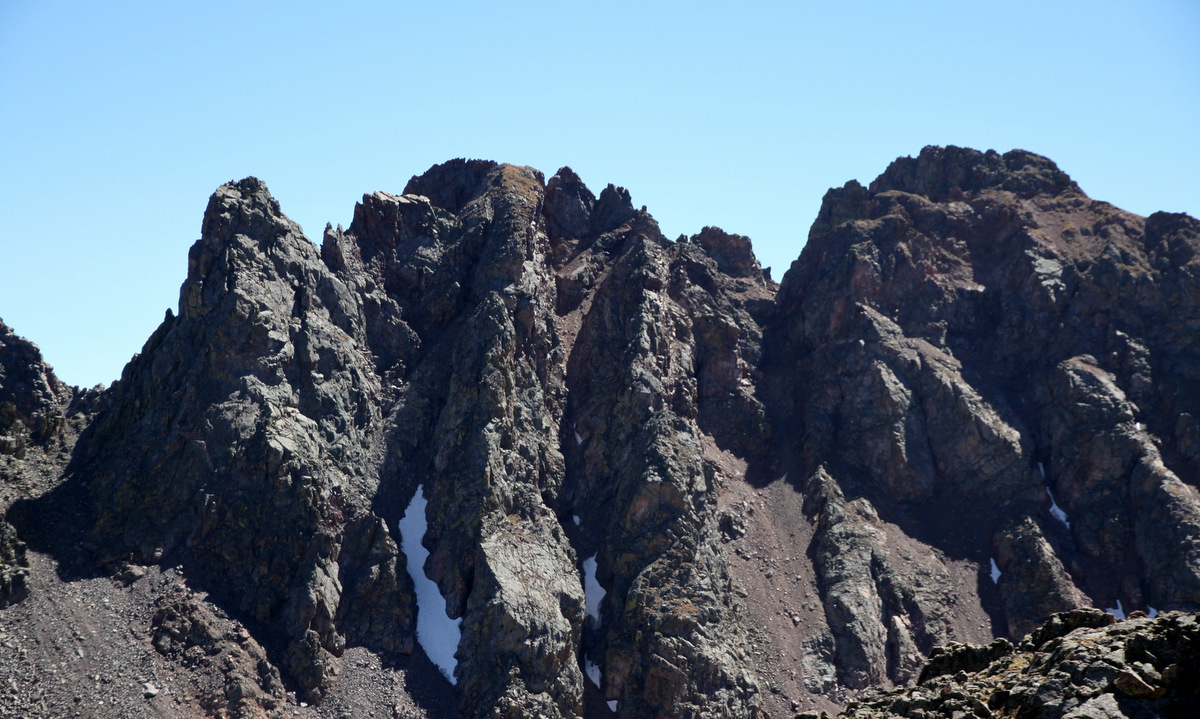
A relatively walkable section ensued until we came to some knife blade looking spires which were mighty enticing to try and climb, but for time’s sake and the fact that they looked extremely unstable as well as not gaining us anything (vertical-wise) because we needed to drop down anyway, we skirted just below them to the ridge’s north side on some class 3/4 rock.
J staring down these spires

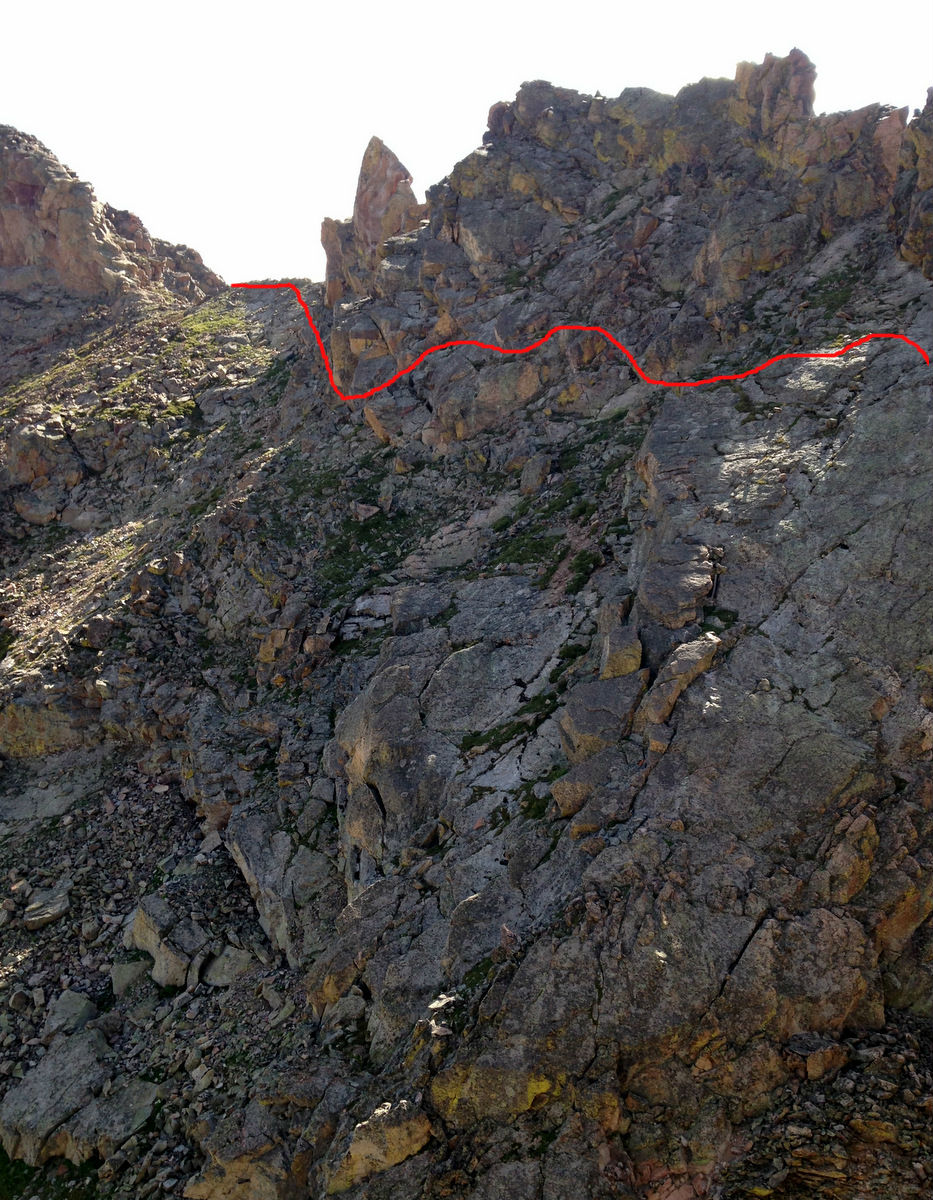
Our approximate route just to the north of the spires as seen from across the low point saddle of the traverse. Click to enlarge
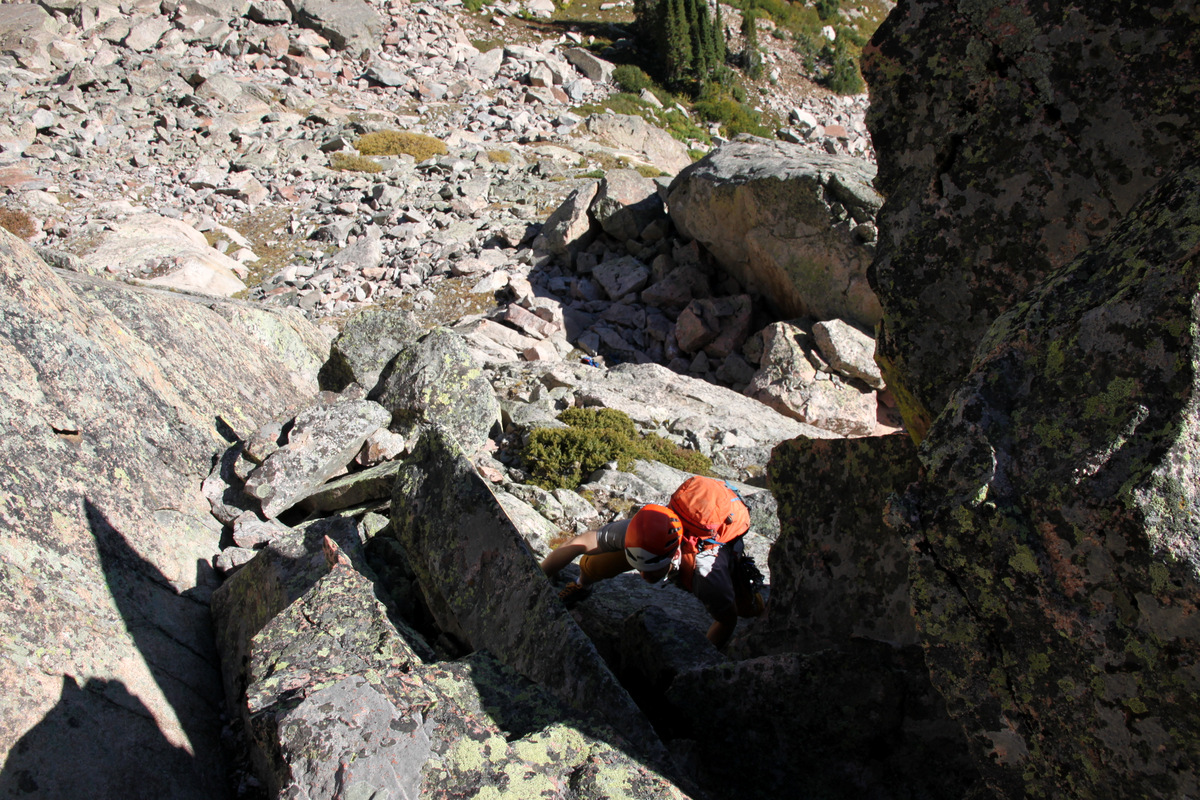
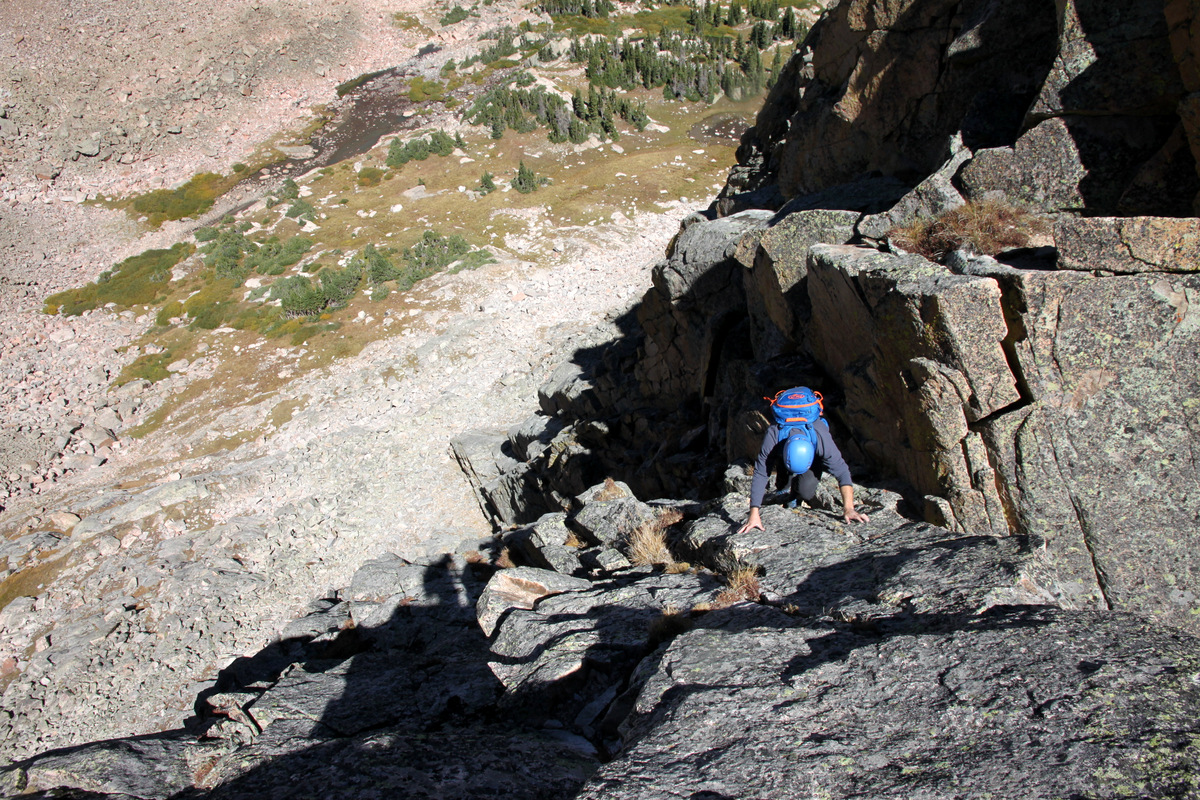
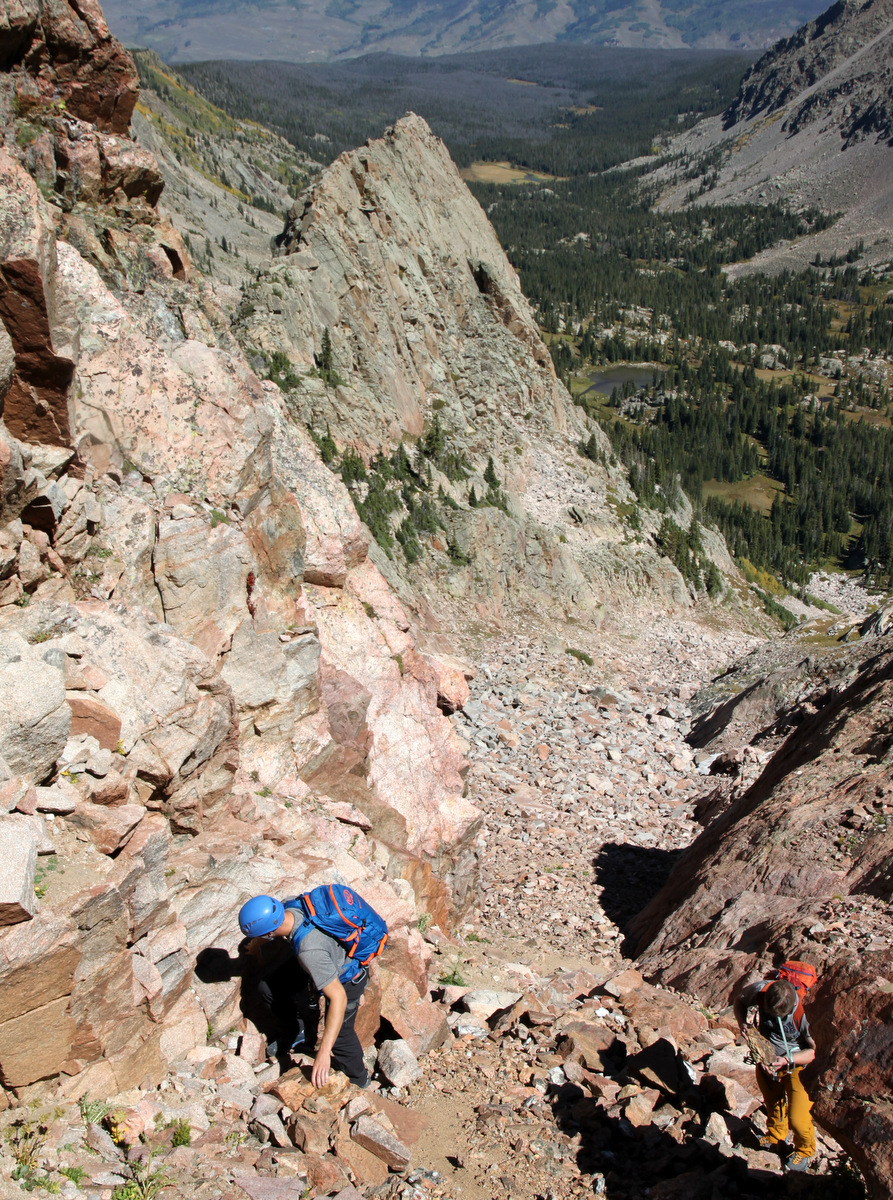
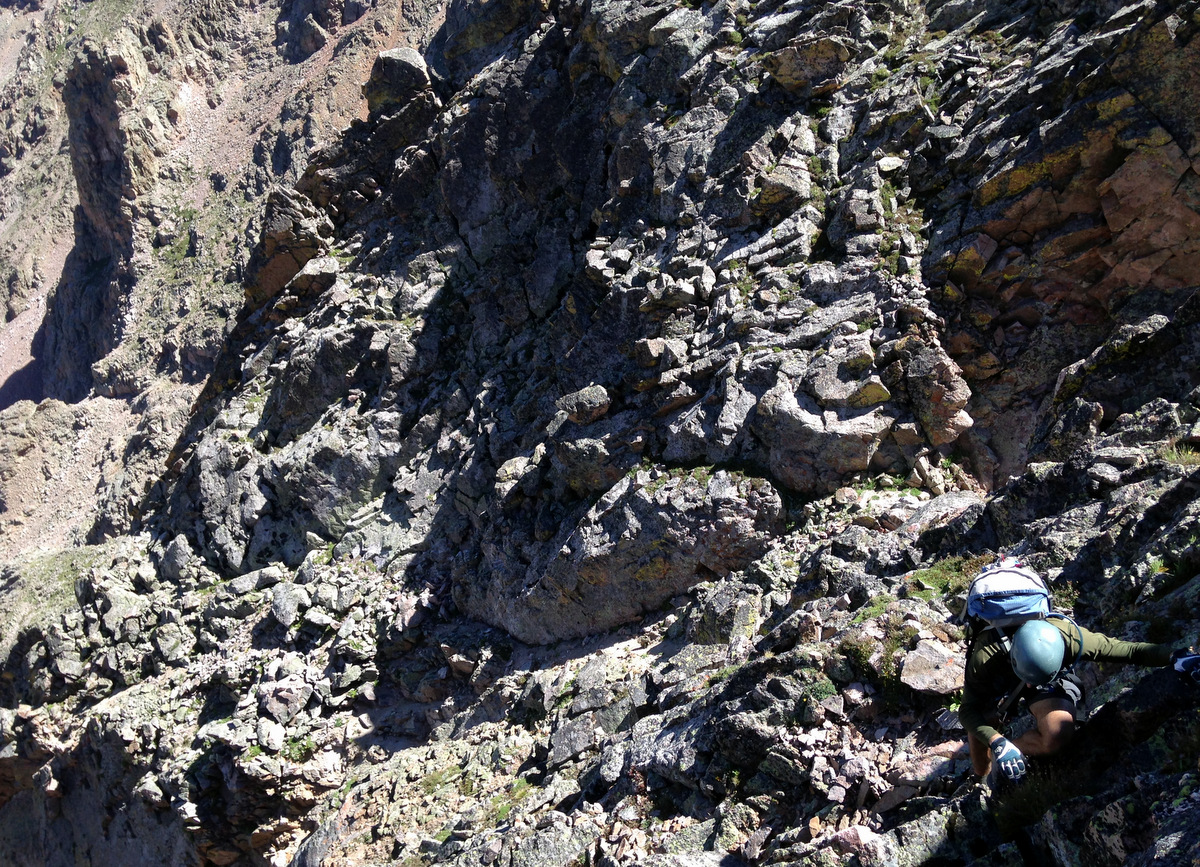
It was then maybe two hundred feet of class 3/4 downclimbing to the low point saddle between East Red and Red Peak.
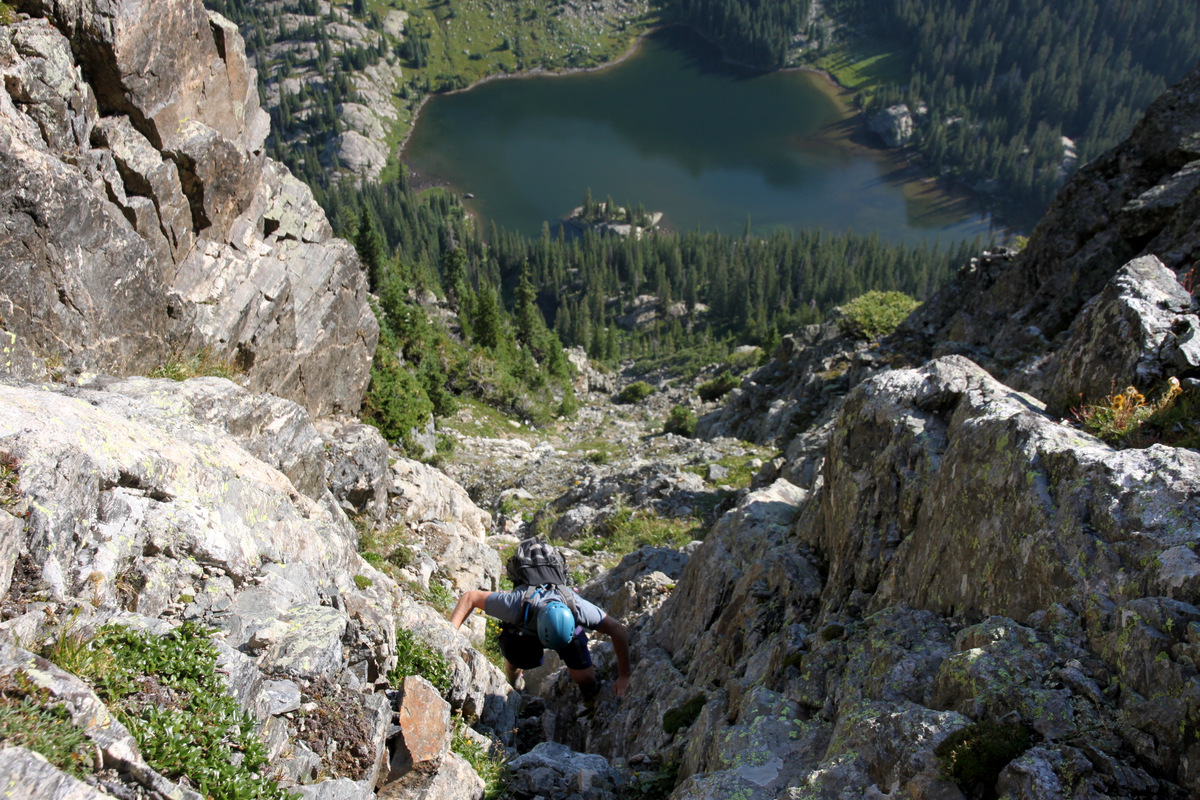
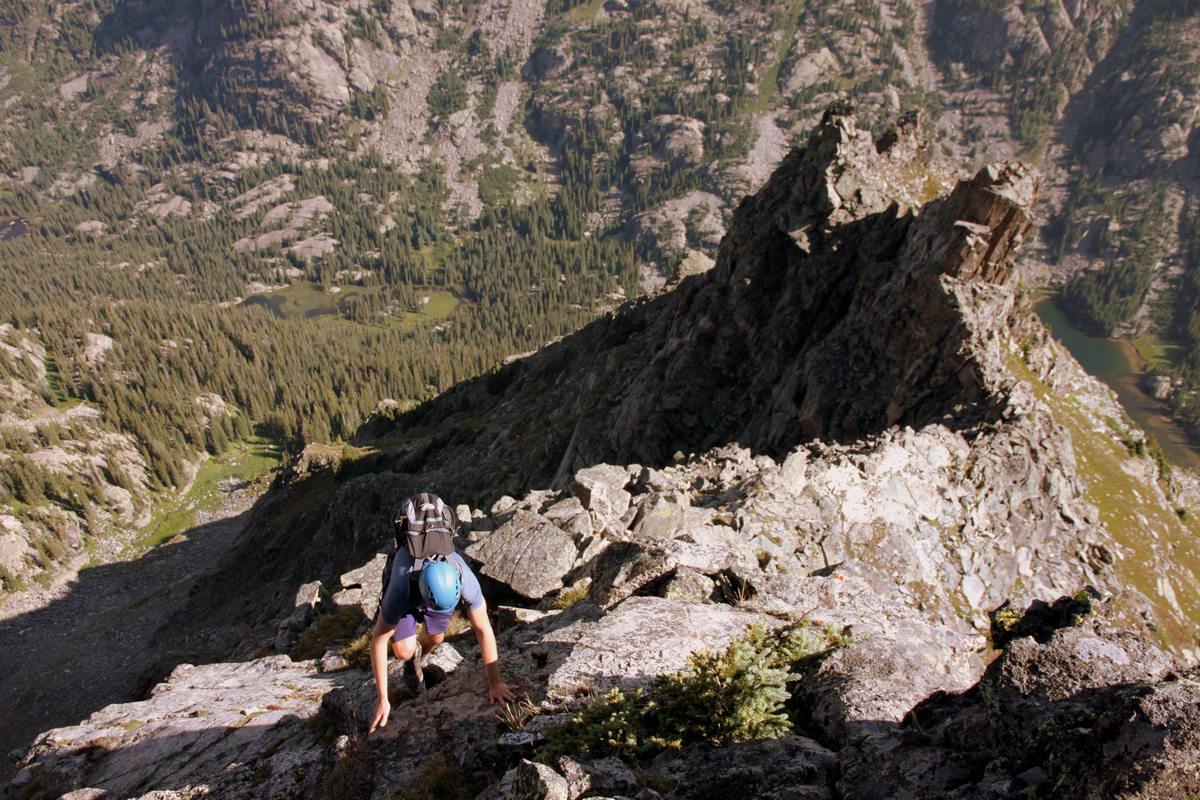
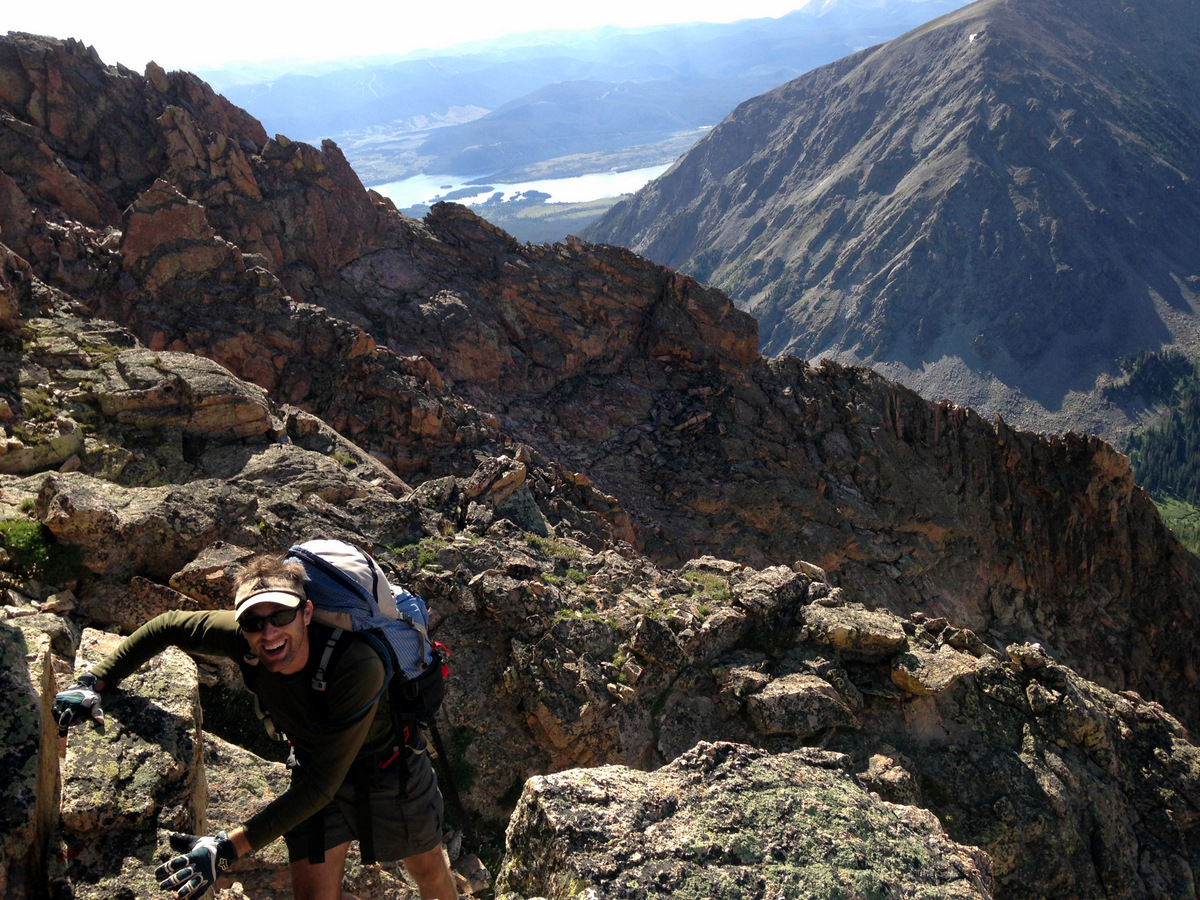
Me starting the descent down to the low point saddle of the traverse. Photo by J
J almost to the low point of the traverse with the class 3/4 headwall that we downclimbed behind

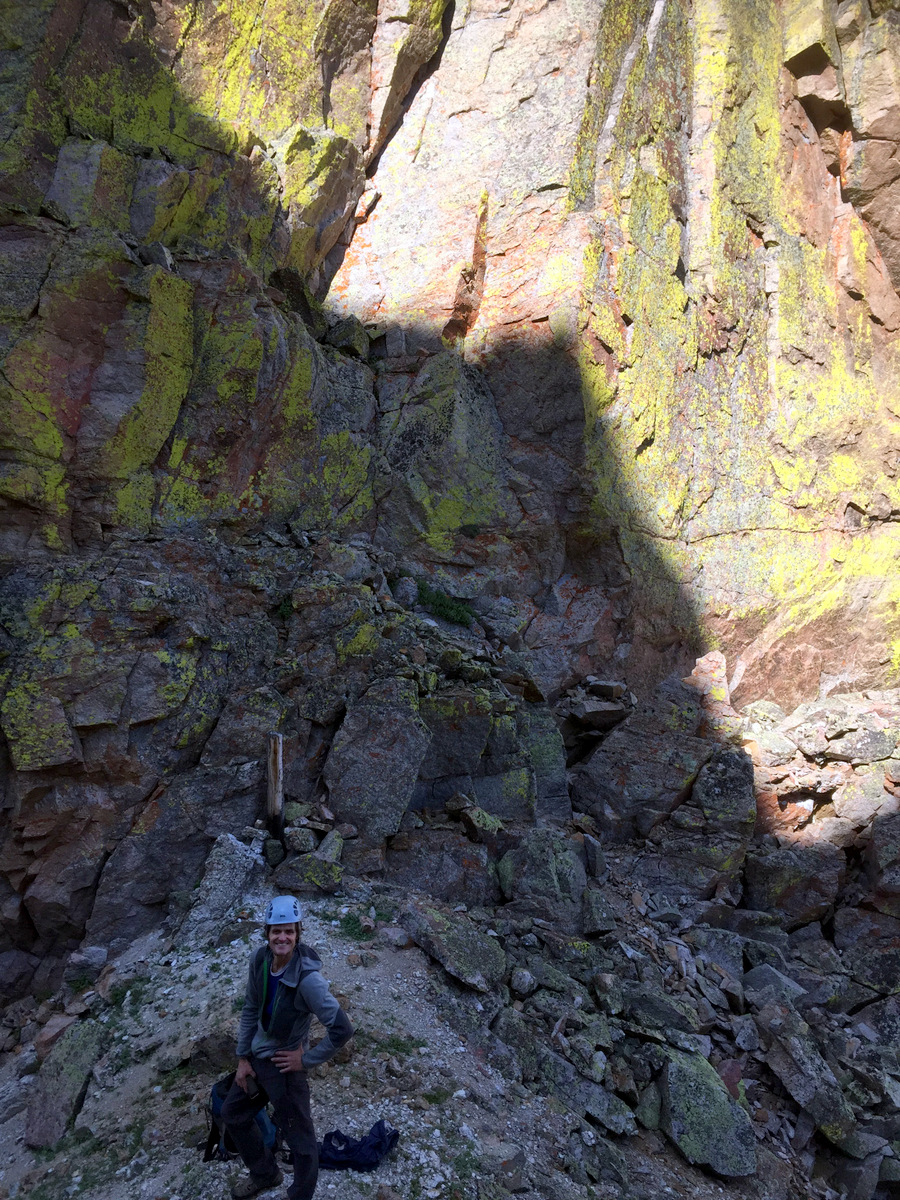
Me at the shady saddle. Photo by J
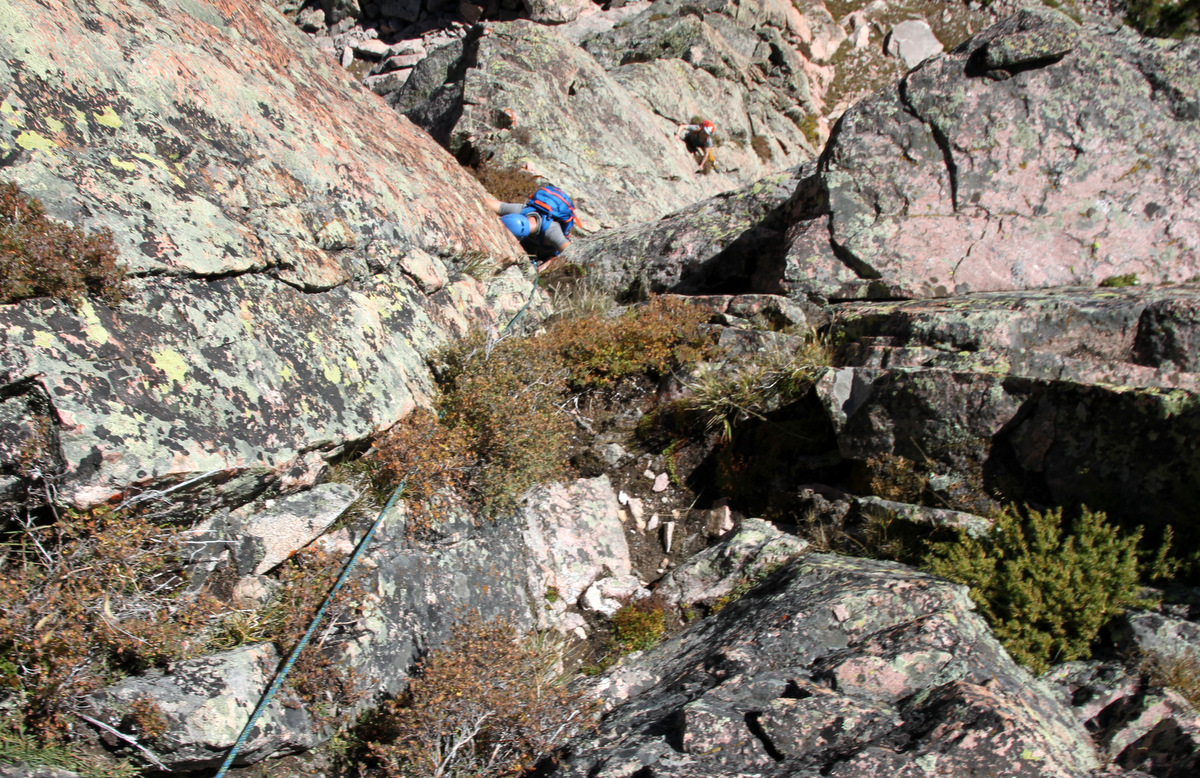
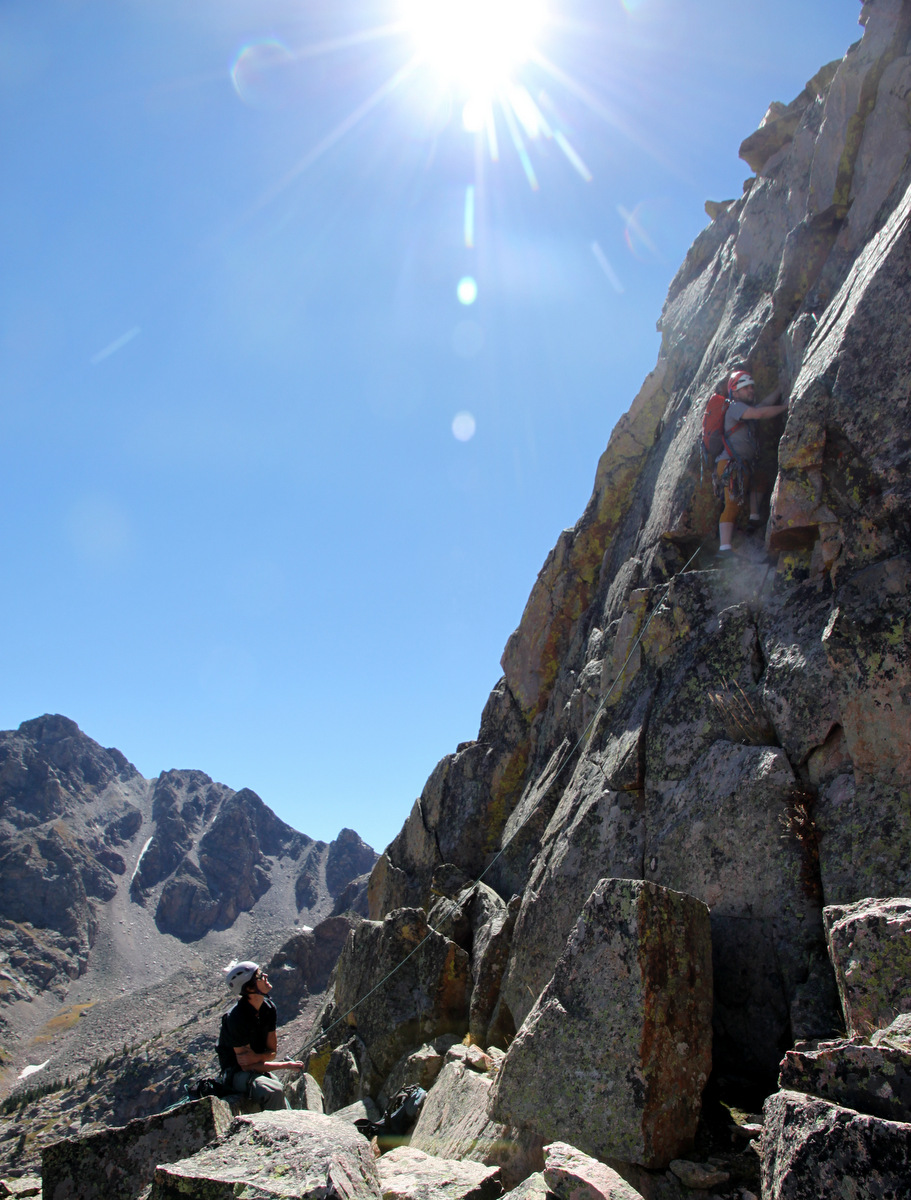
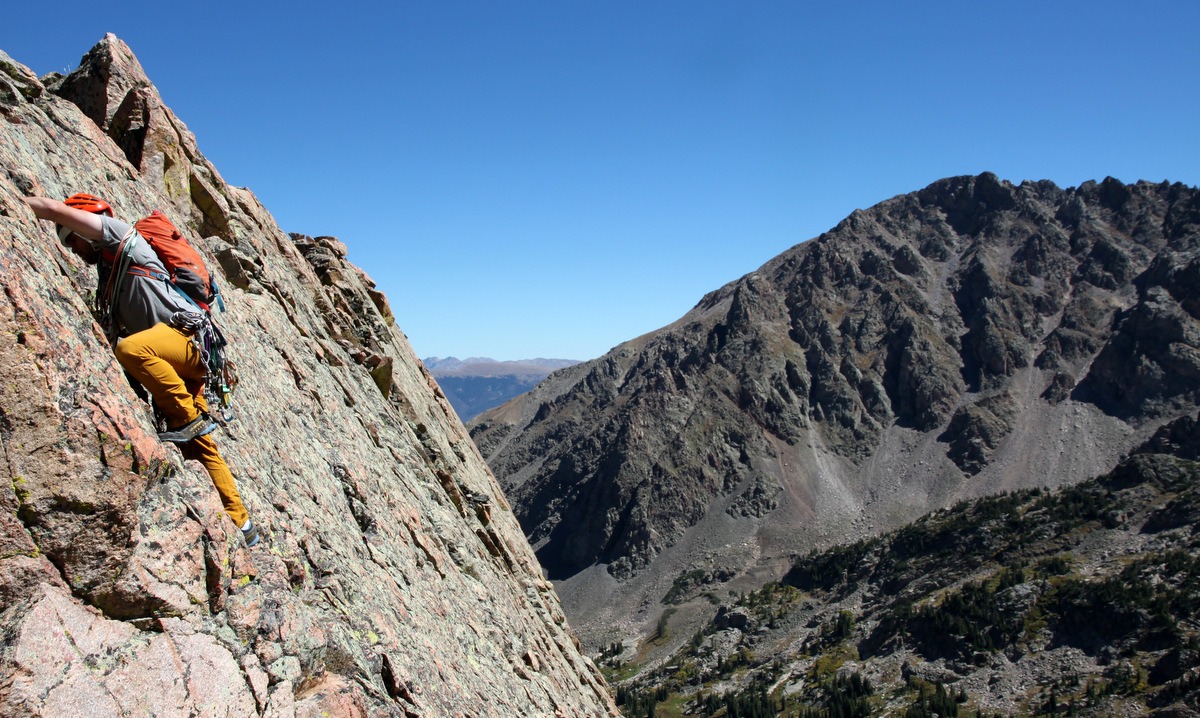
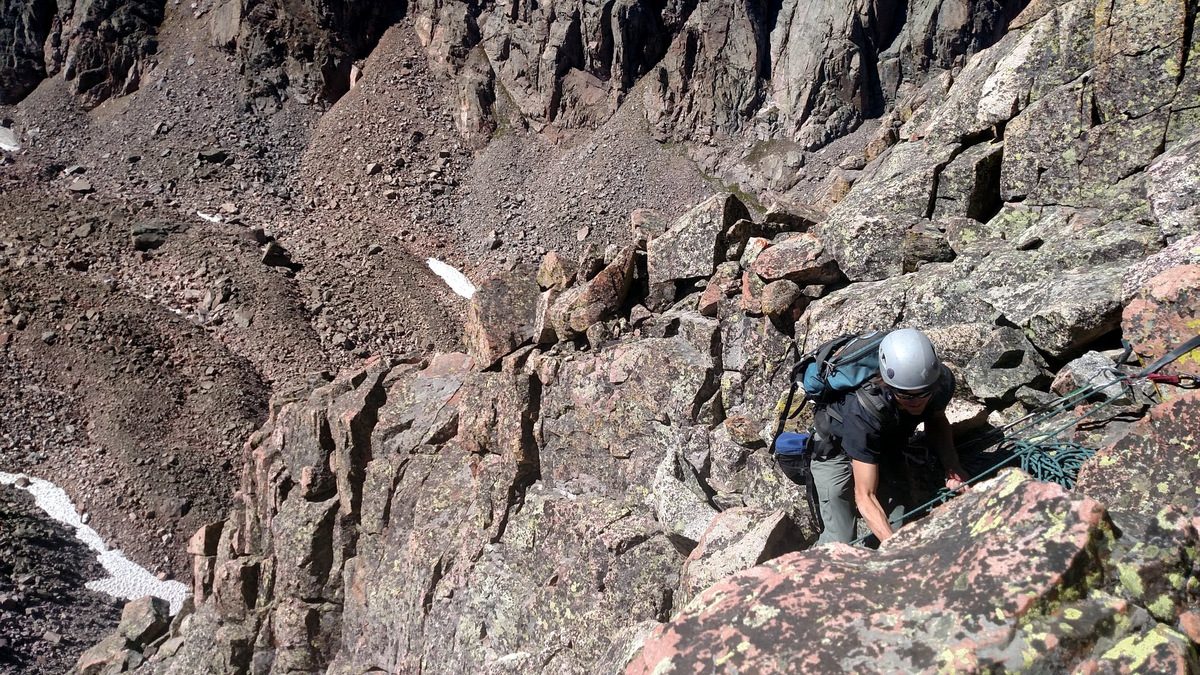
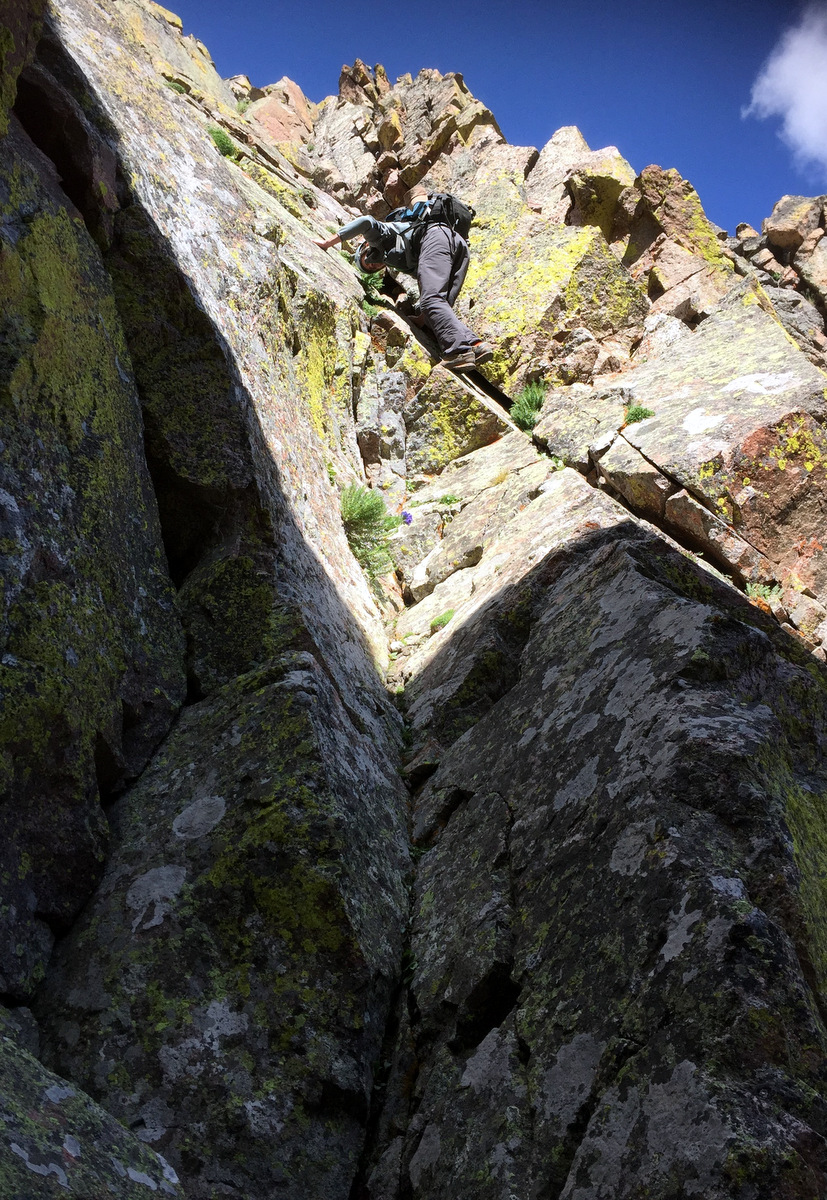
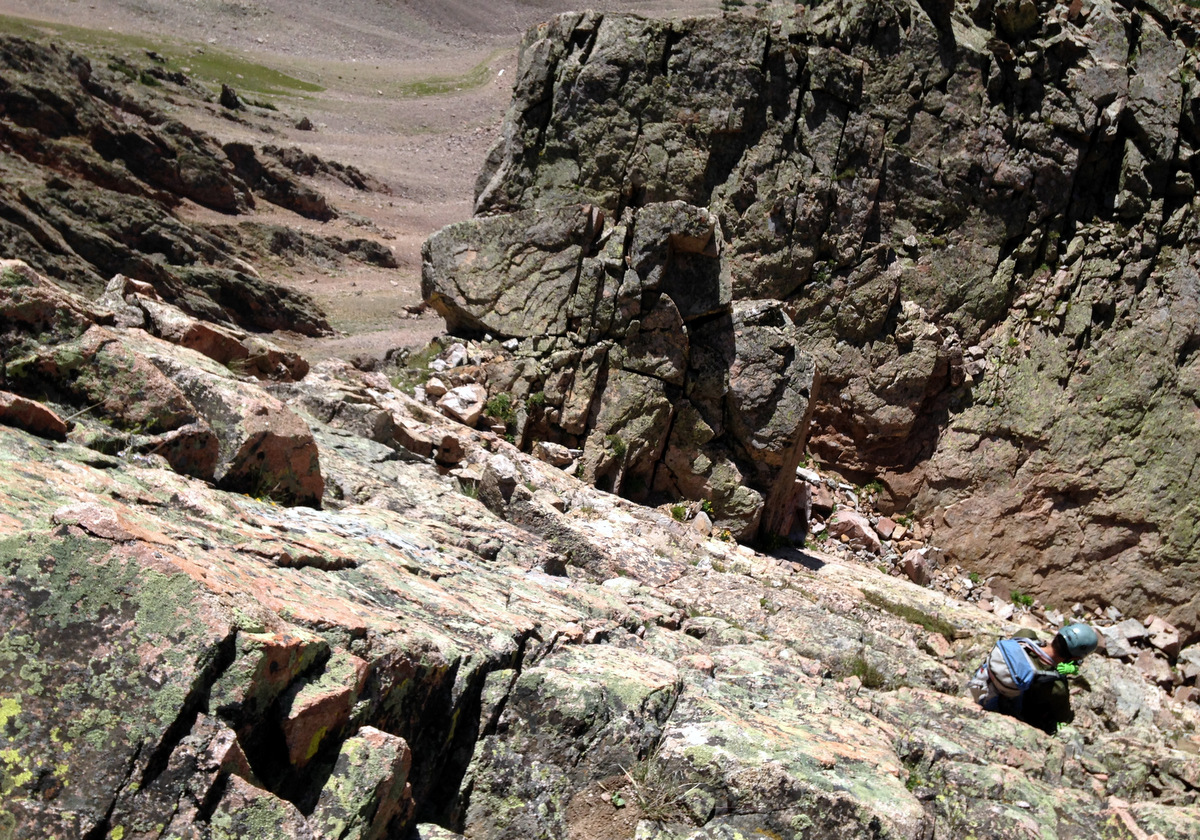
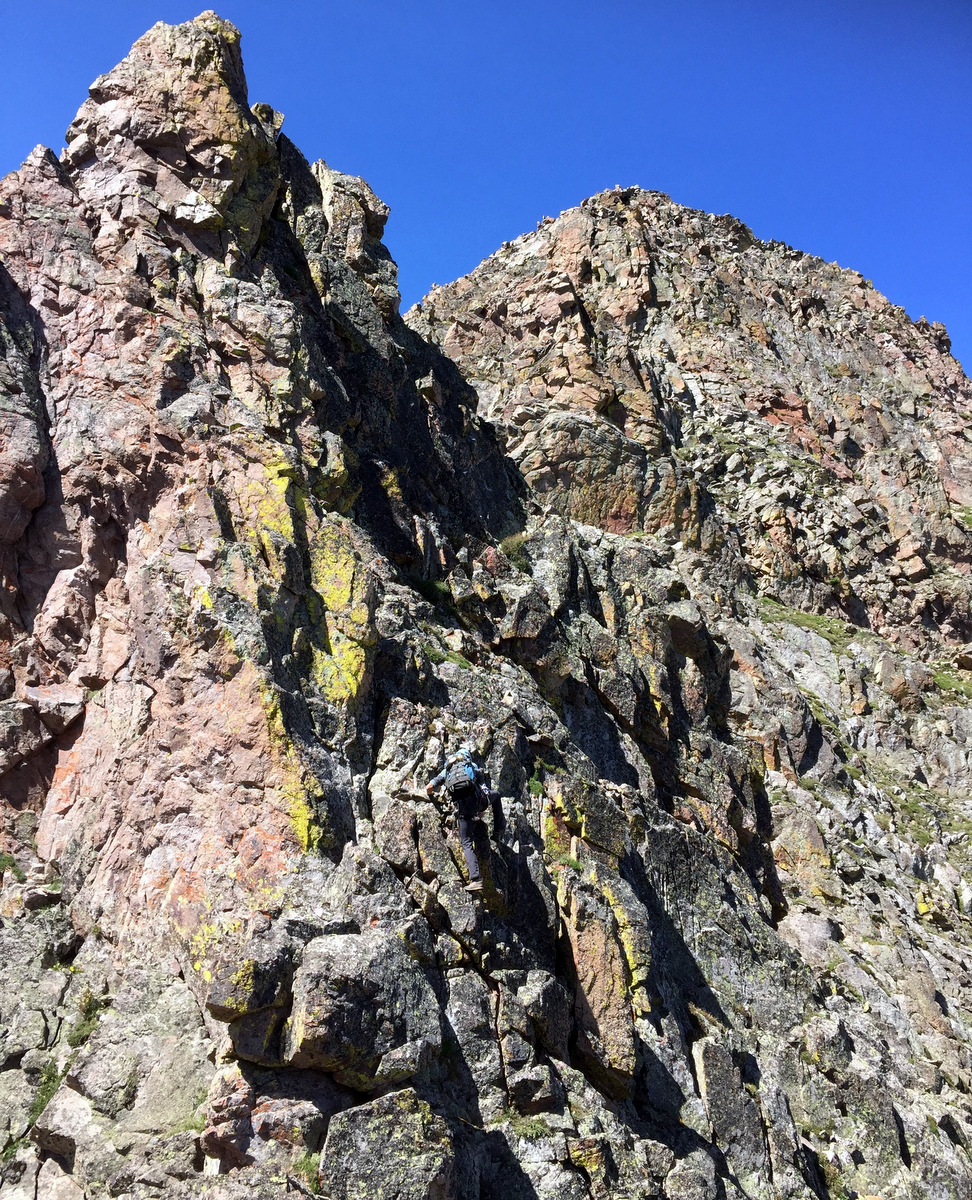
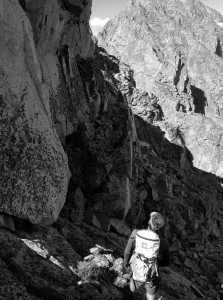
We then discussed our options as the direct route west of the low point looked to be extremely hard trad climbing and we only had a light alpine rack. Nevertheless, we spotted a steep gully feature about 10′ down to the saddle’s north that provided a weakness – the only weakness it seemed. To avoid a large boulder in the gully, which completely blocked upward progress, we strayed to the right and climbing a hundred feet of exposed 4th class/low 5th up a dihedral back to the ridge proper.

Me climbing the dihedral. Photo by J
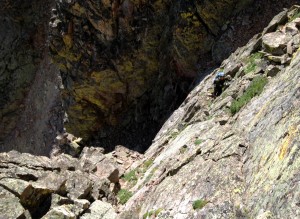
Looking down the dihedral and J on a ledge
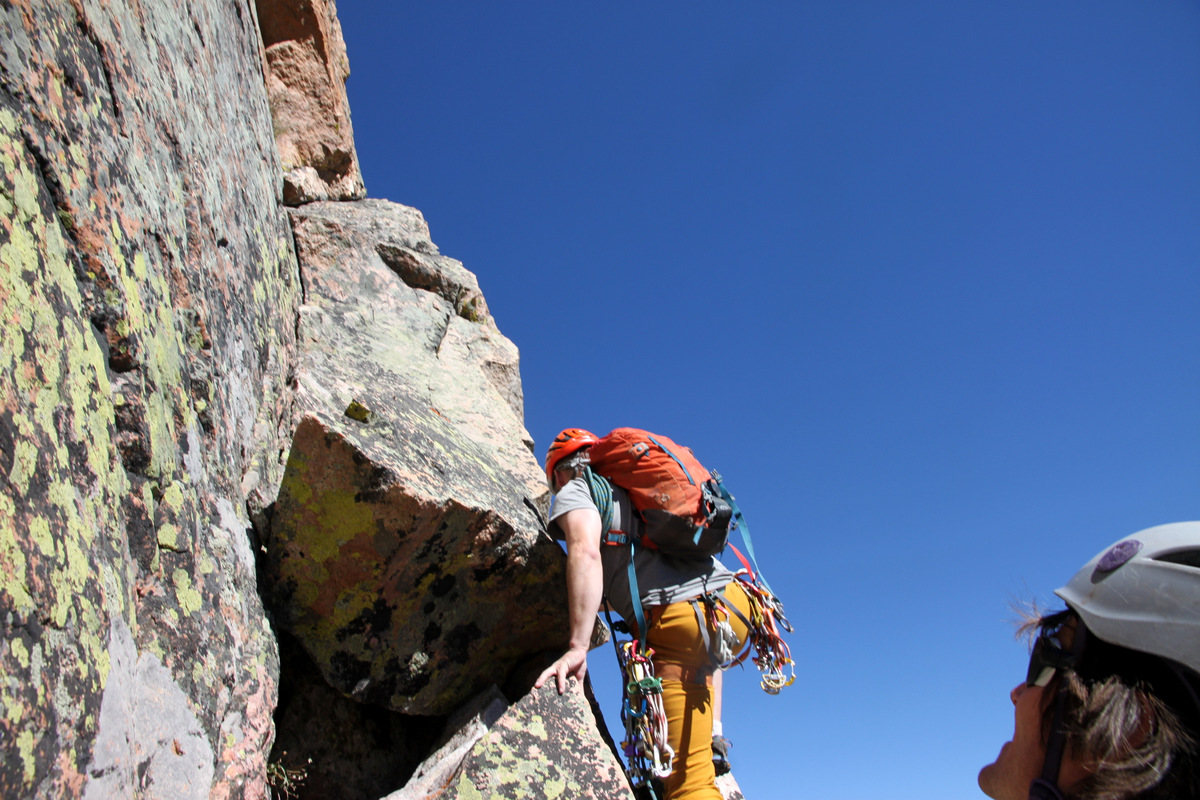
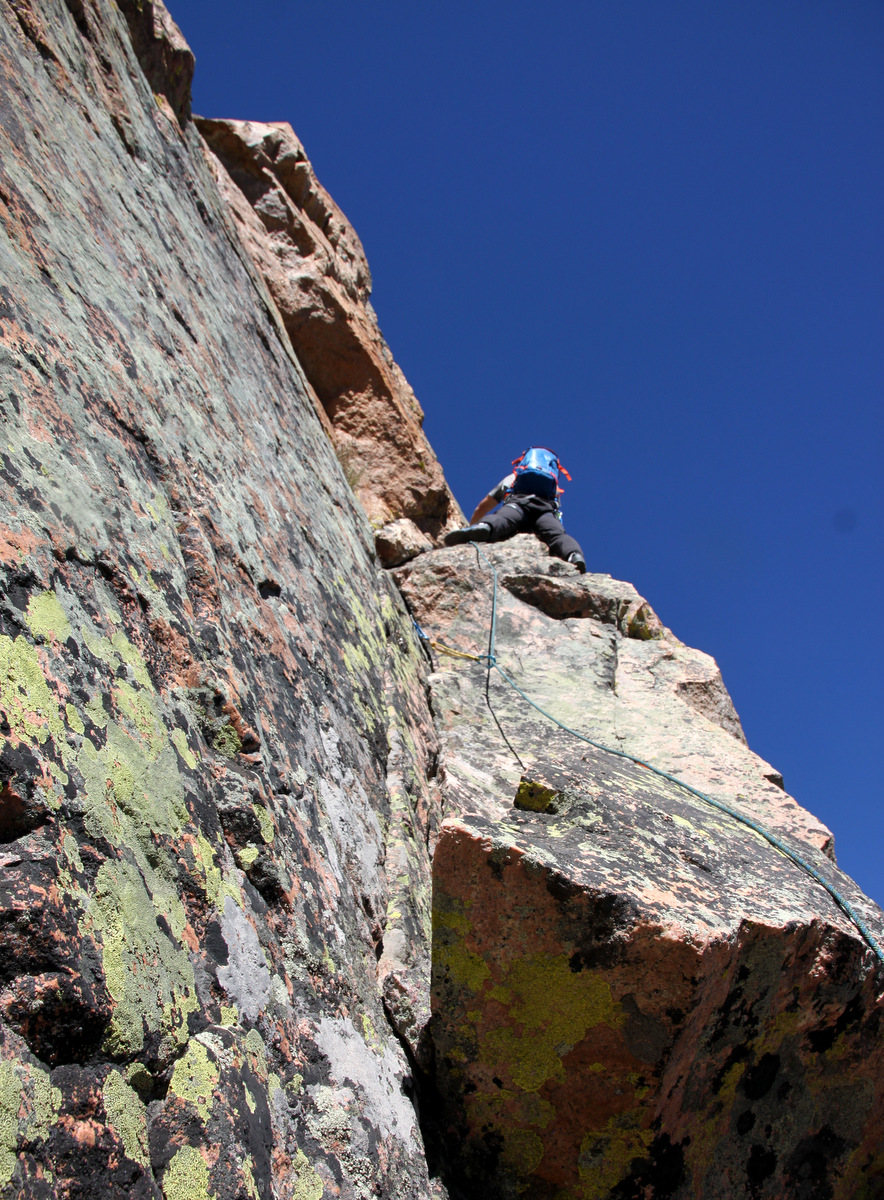
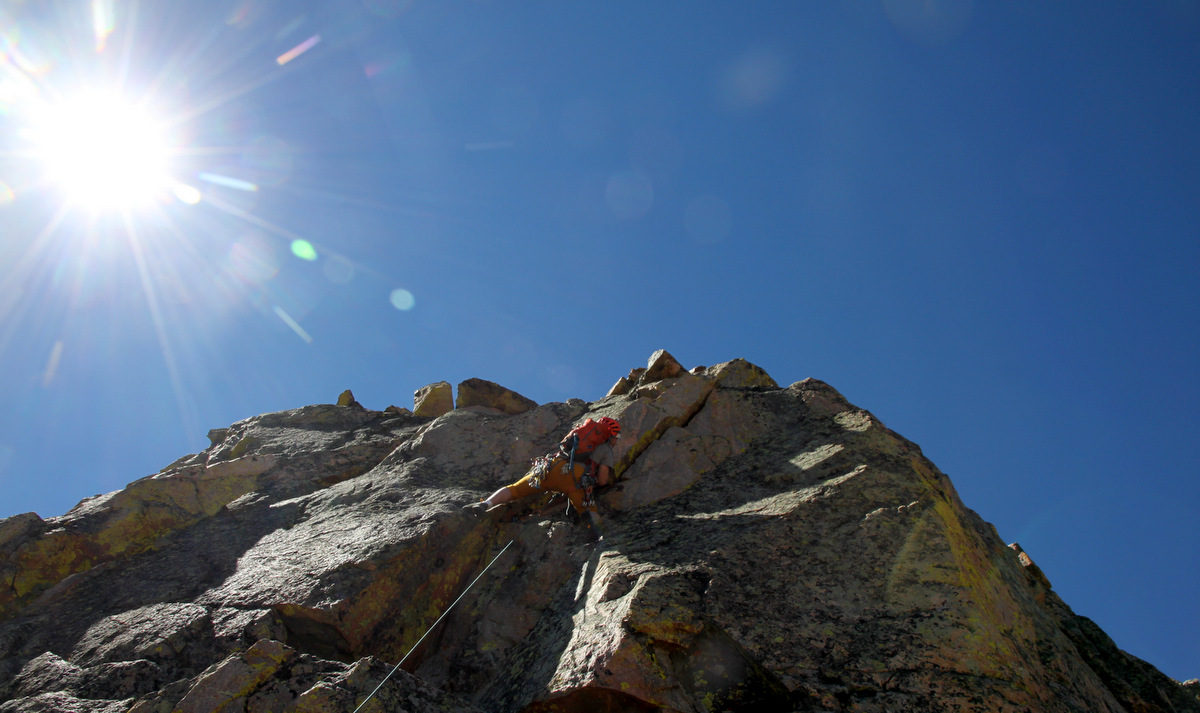
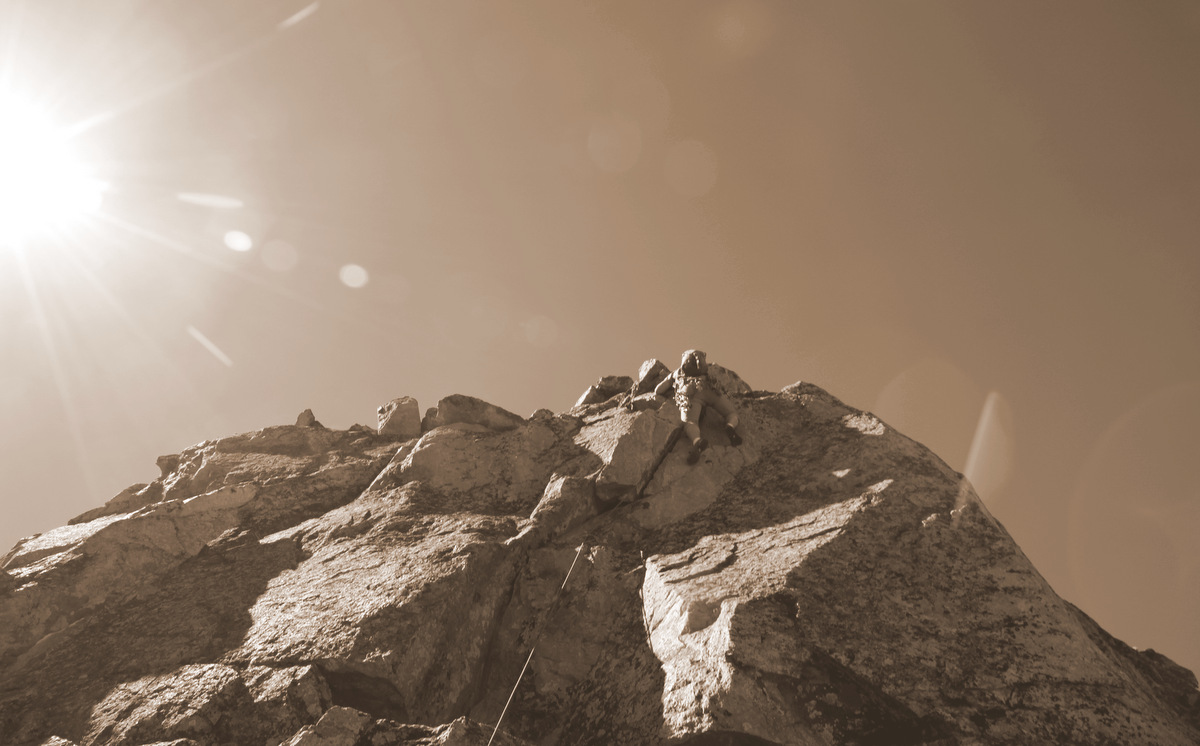
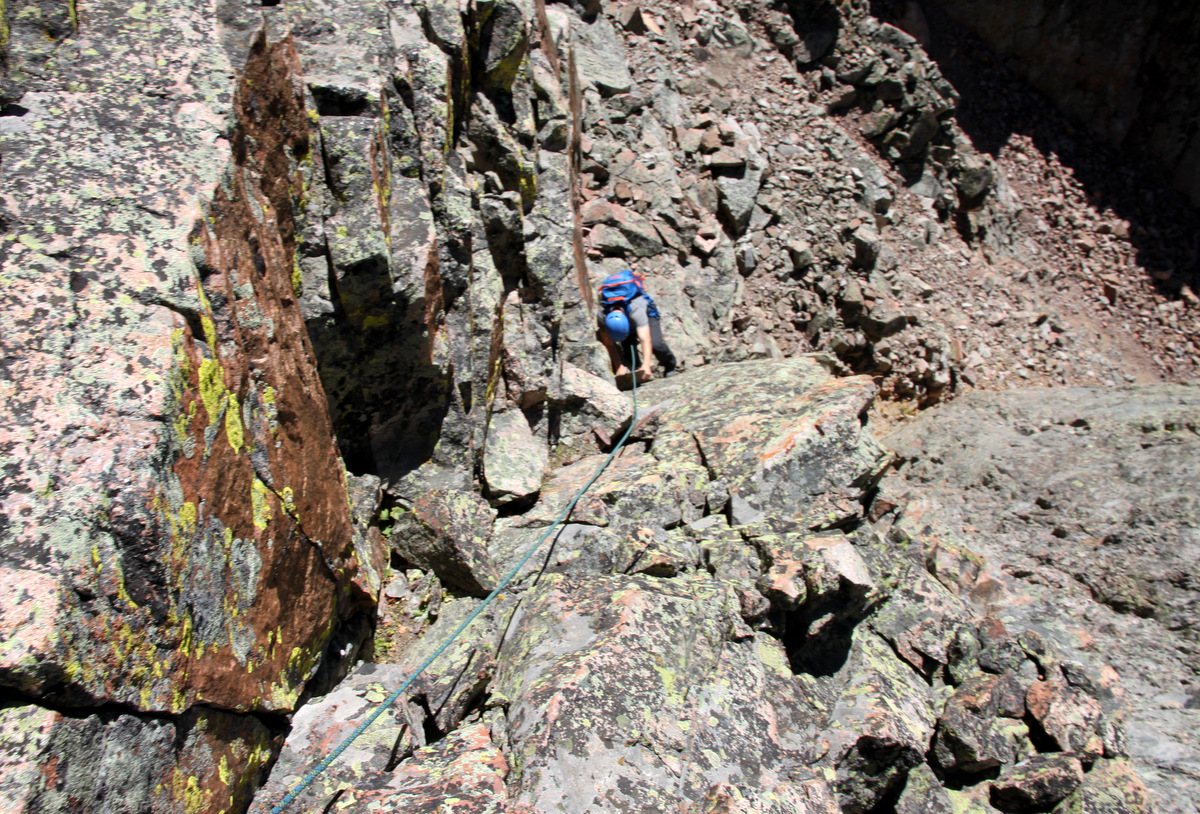
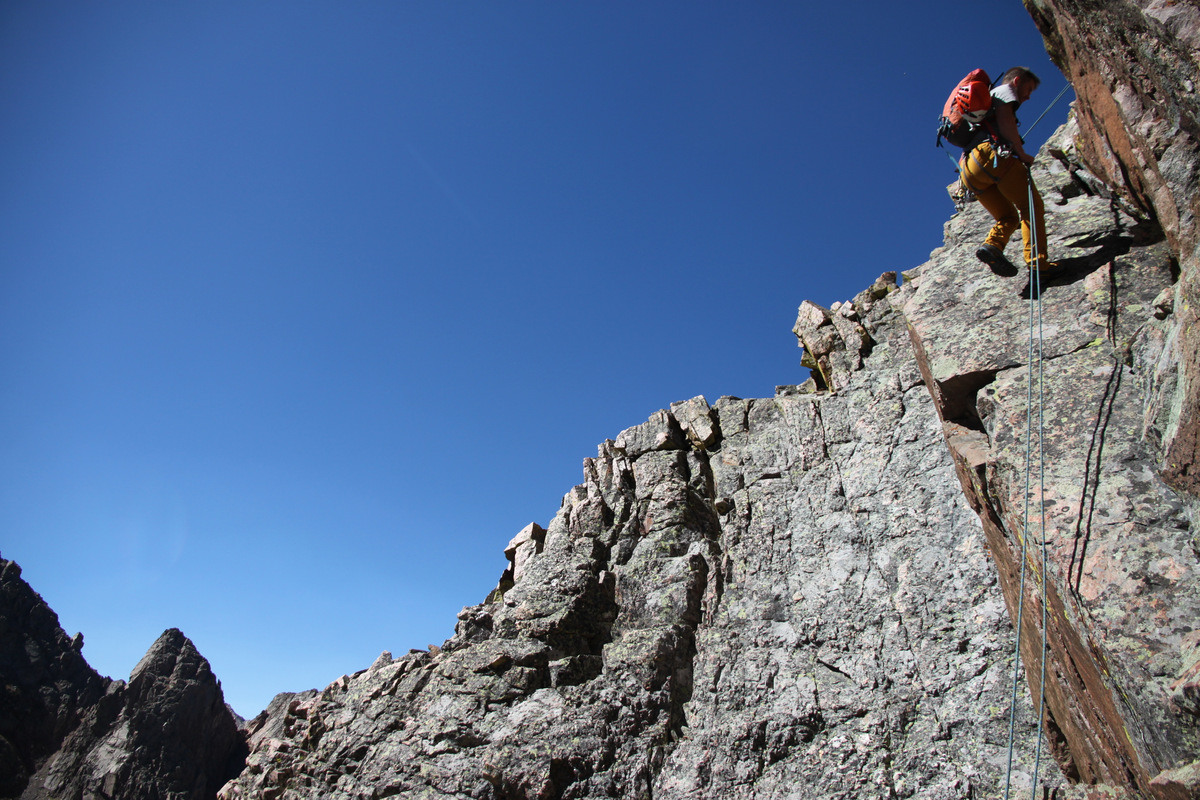
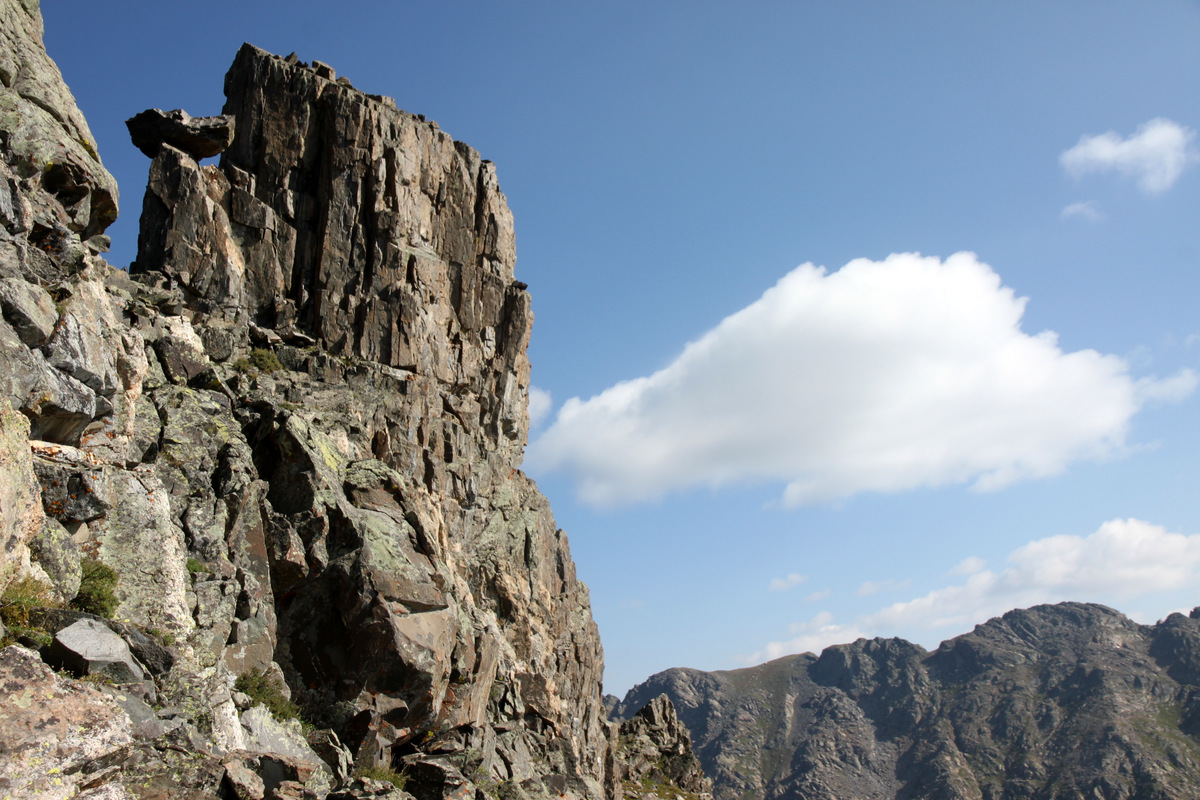
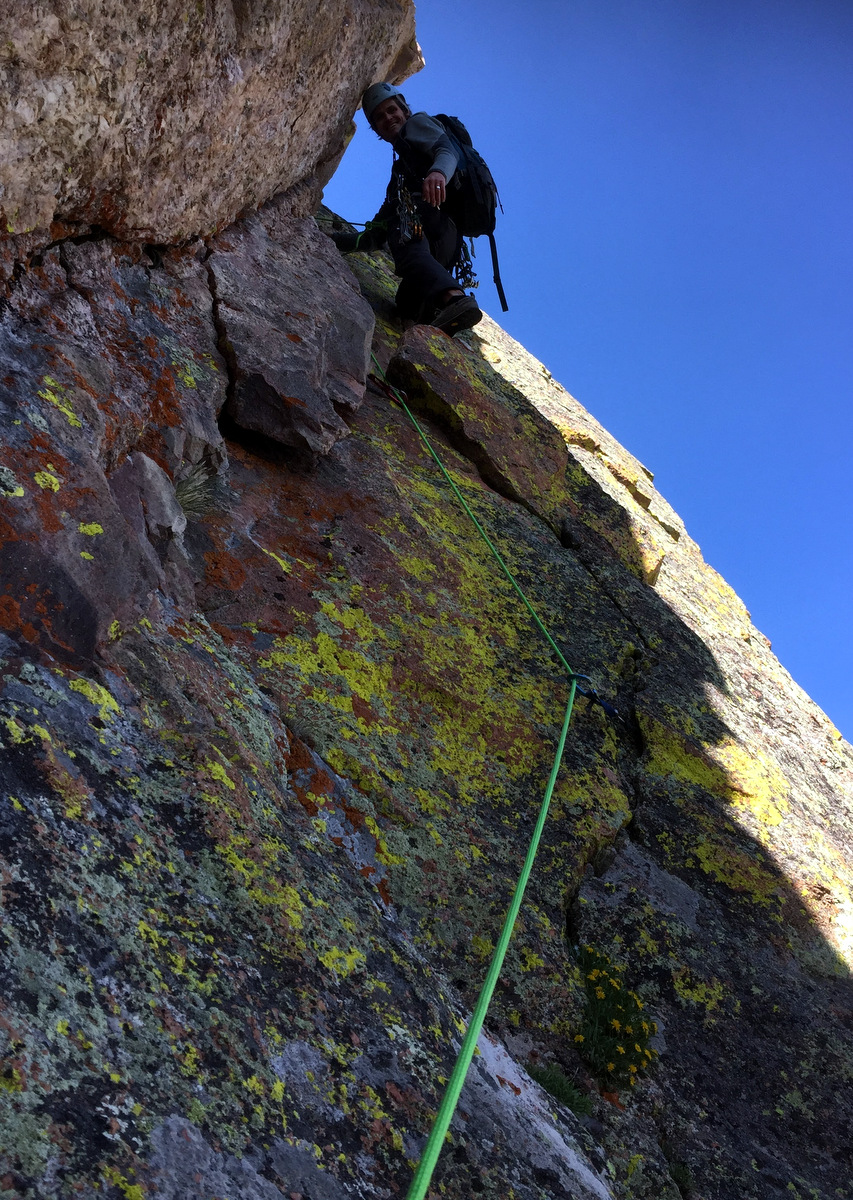
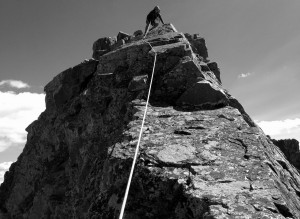
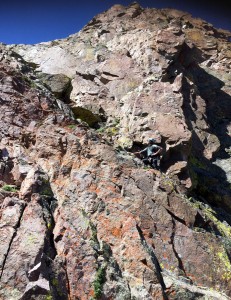
After a restful grass ledge, we glanced up at our next objective. A large 5th class looking tower with serious exposure on all sides. We searched for a viable route and I found a good looking 50′ dihedral on the tower’s northeast side in the shade. We scrambled to a very small ledge and roped up. The dihedral was probably no more than 5.4-5.5, but the exposure was very serious – thus the rope and rack. J and I were asking ourselves if we were getting a bit “conservative” in our old age, but then realized that we weren’t at all. I don’t believe we would have ever thought of free soling that especially not knowing if the holds were secure. I mean we’re family men now! A few good placements and we were up on the tower’s summit.

Me leading the 5.4-5.5 dihedral halfway through the traverse. Photo by J
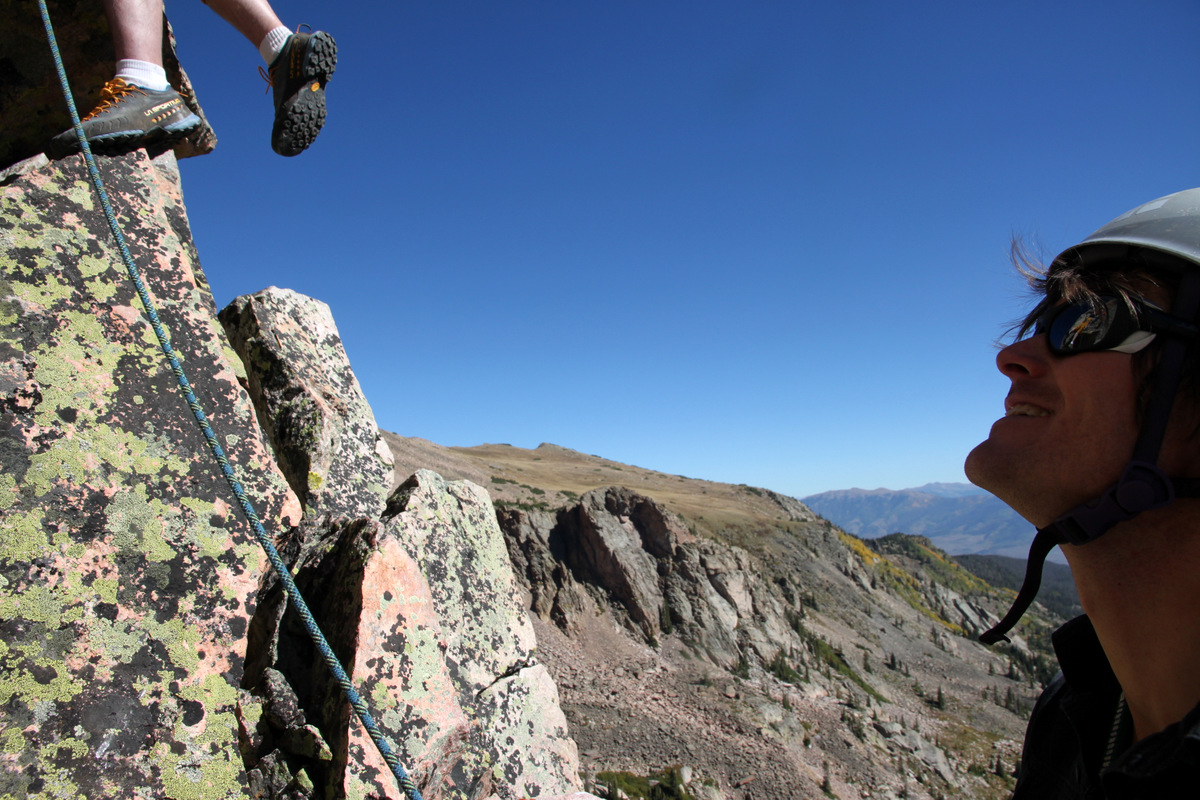
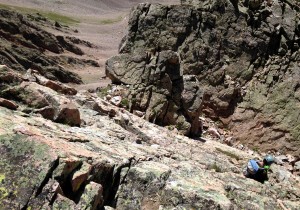
What came next looked to be simple enough until we realized the downward sloping nature of the ramp with very little holds on rock laden with lichen and big time exposure and drop offs on either side. Yes, we wanted the rope again. J belayed me from the tower’s summit and I placed a cam halfway down, set up an anchor where suitable at the end of the ramp, and brought J down to me.
J coming down the sloping ramp. There were some very awkward moves in here including a butt scoot with horrible holds
We then downclimbed some class 4 rock to a small notch and made our way up to some nice grass ledges once again. What followed was a westward traverse over class 3/4 rock on the ridge’s north side as going to the ridge proper would not have gained us anything (vertical-wise). Plus, again, the ridge proper looked completely unstable with teetering blocks. This westward traverse on the ridge’s north side eventually led us down to another small saddle.

J coming out of the notch with the end of the downward sloping ramp behind him
The class 3/4 westward traverse
J making headway
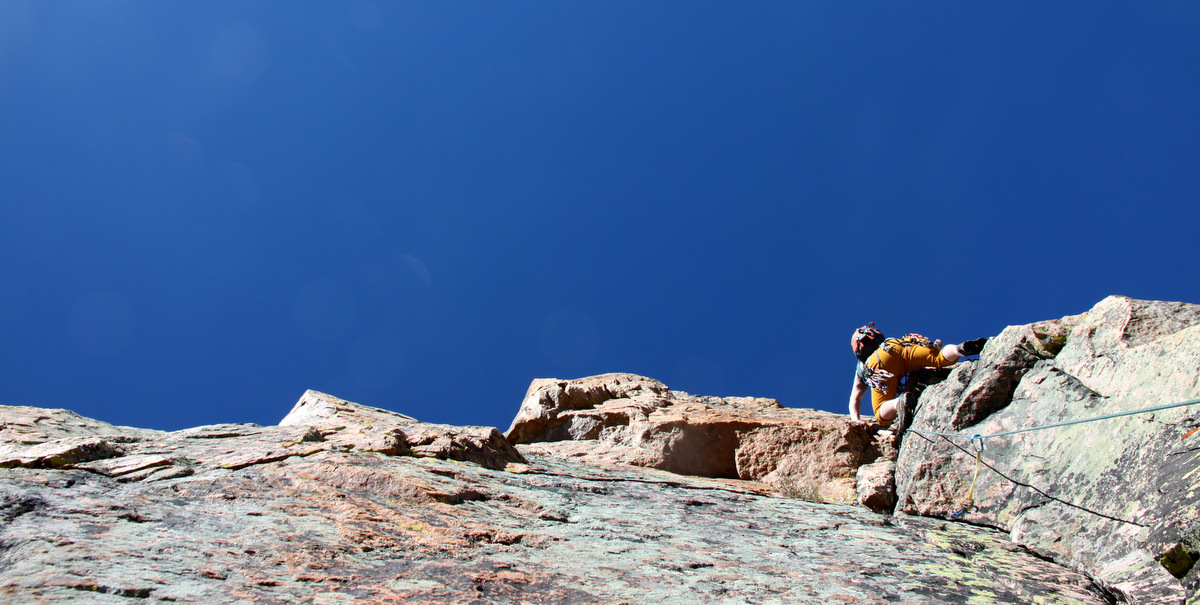
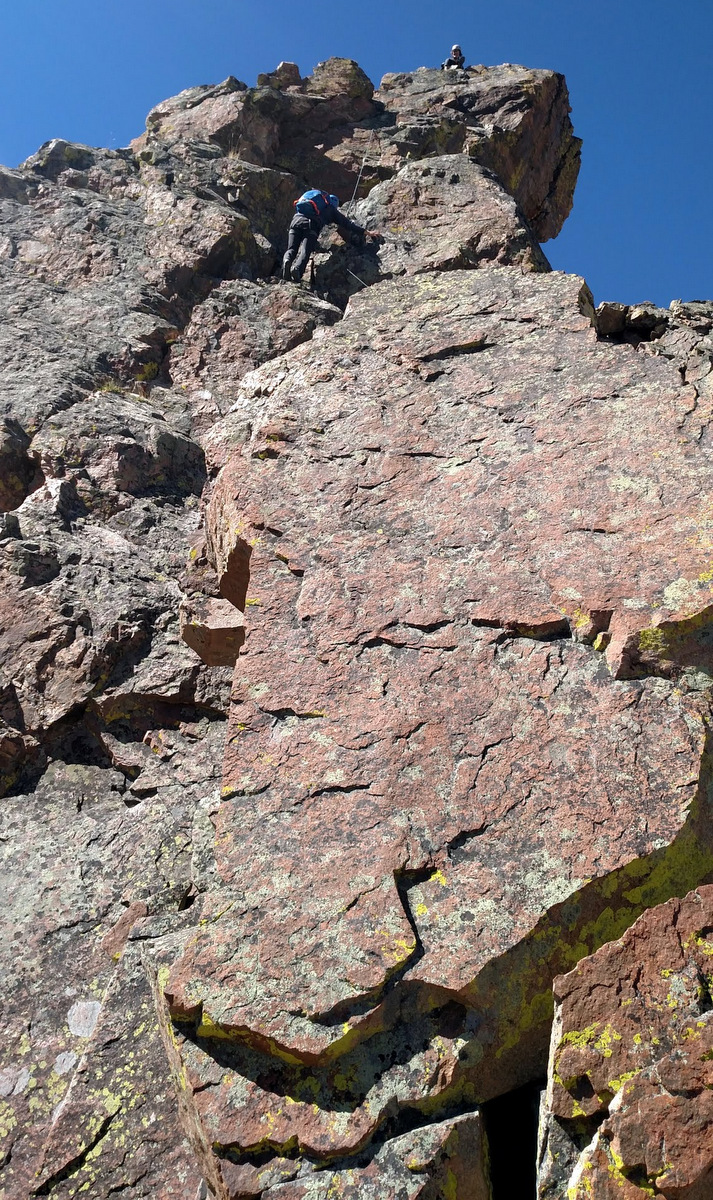
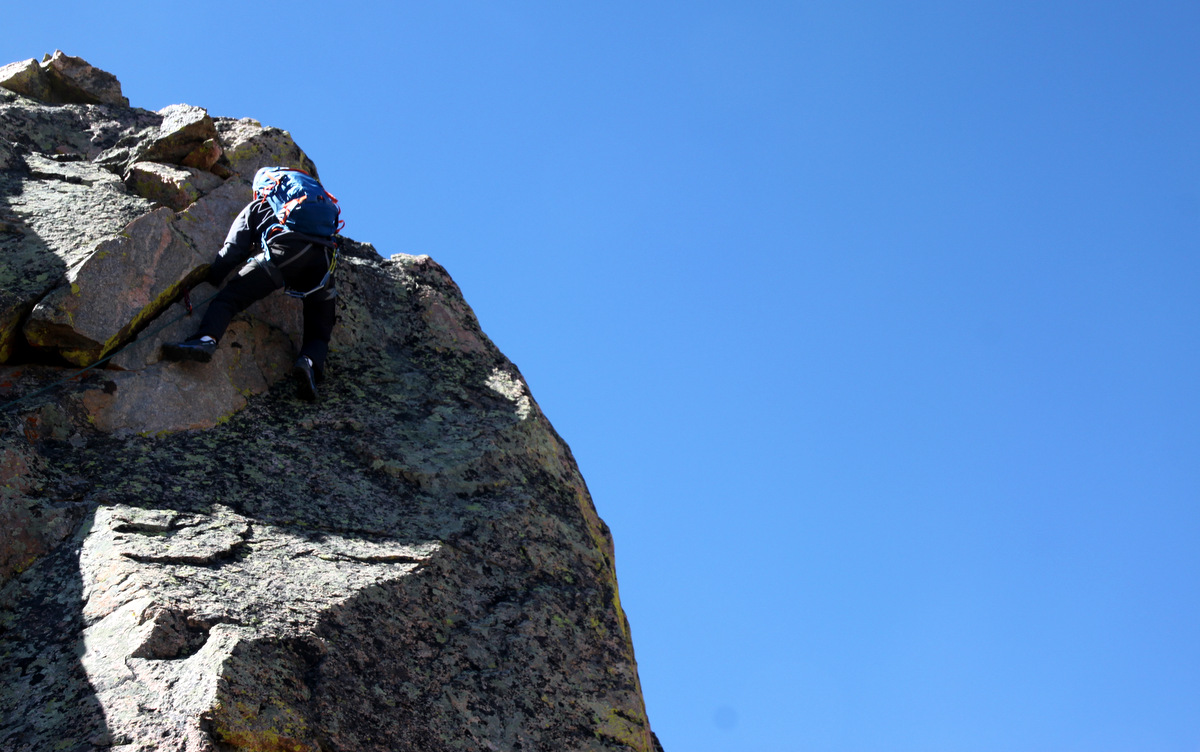
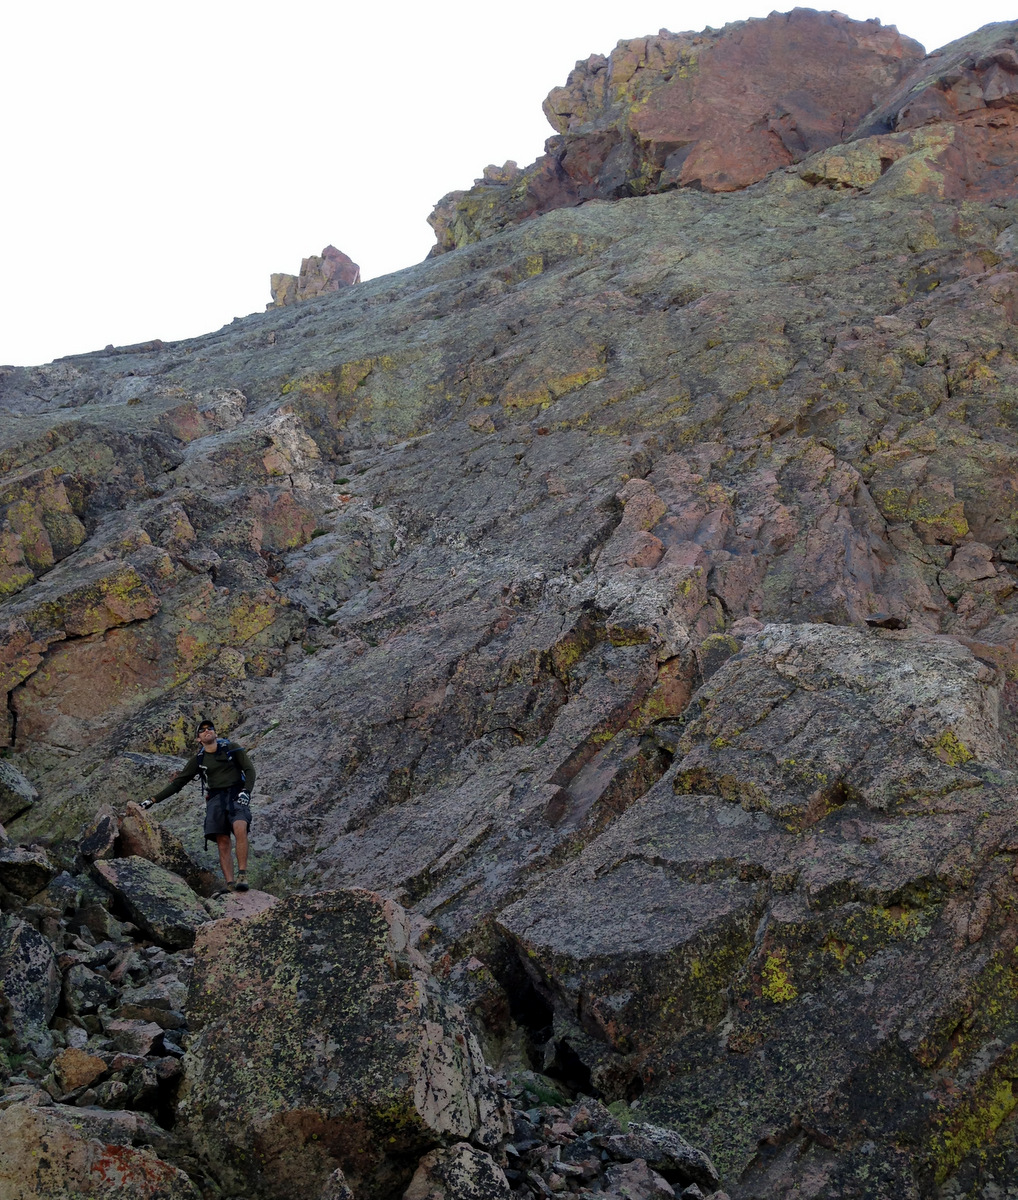
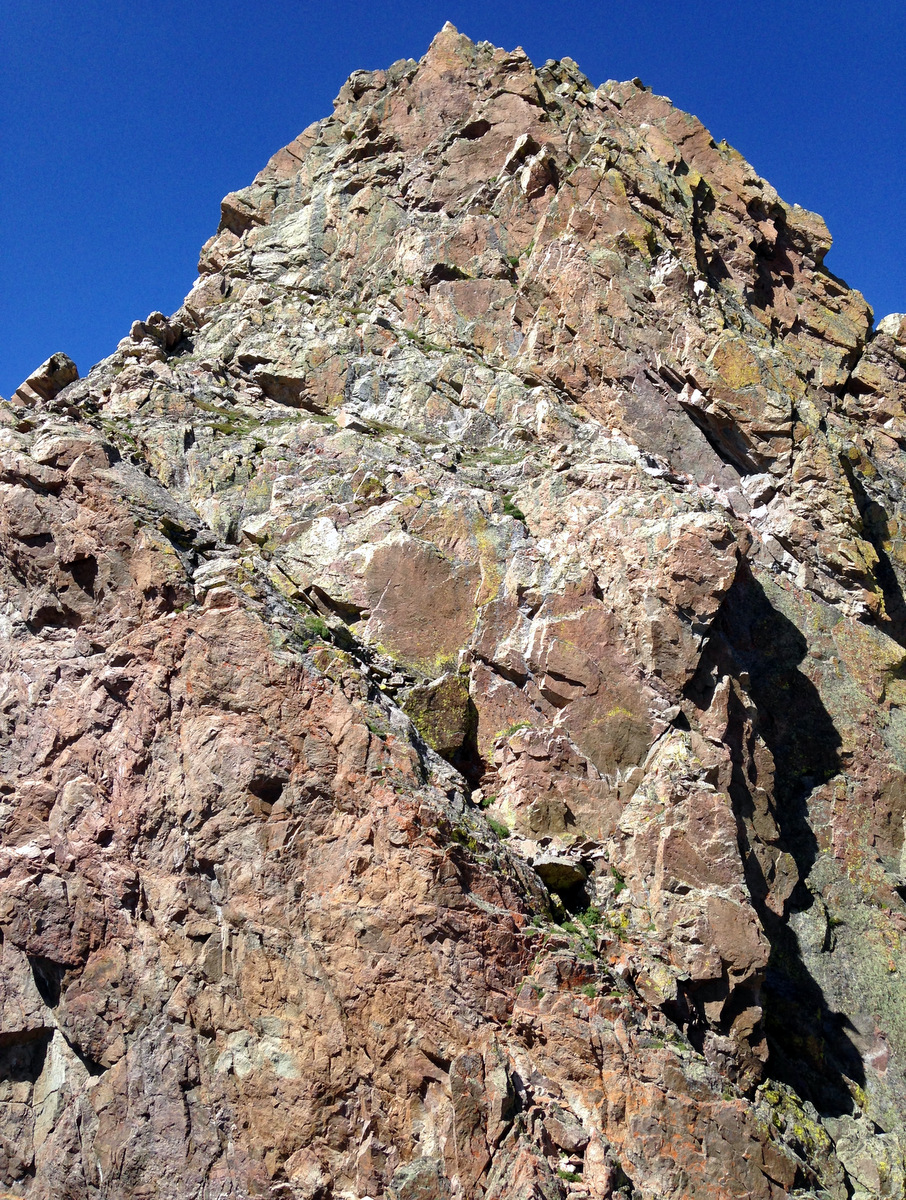
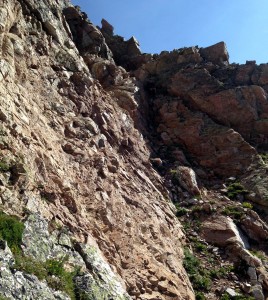
The large headwall in front of us had a leftward-trending steep grass ramp that we took hoping it would lead somewhere. The ramp was downclimbale if we got completely stuck, but easier ground above it gave way to some exposed but doable low 5th class climbing on the ridge’s north side to the summit of this headwall tower.

The large headwall with the leftward-trending grass ramp we climbed
Me on the ramp. Photo by J
J and the exposed north side of this large headwall tower
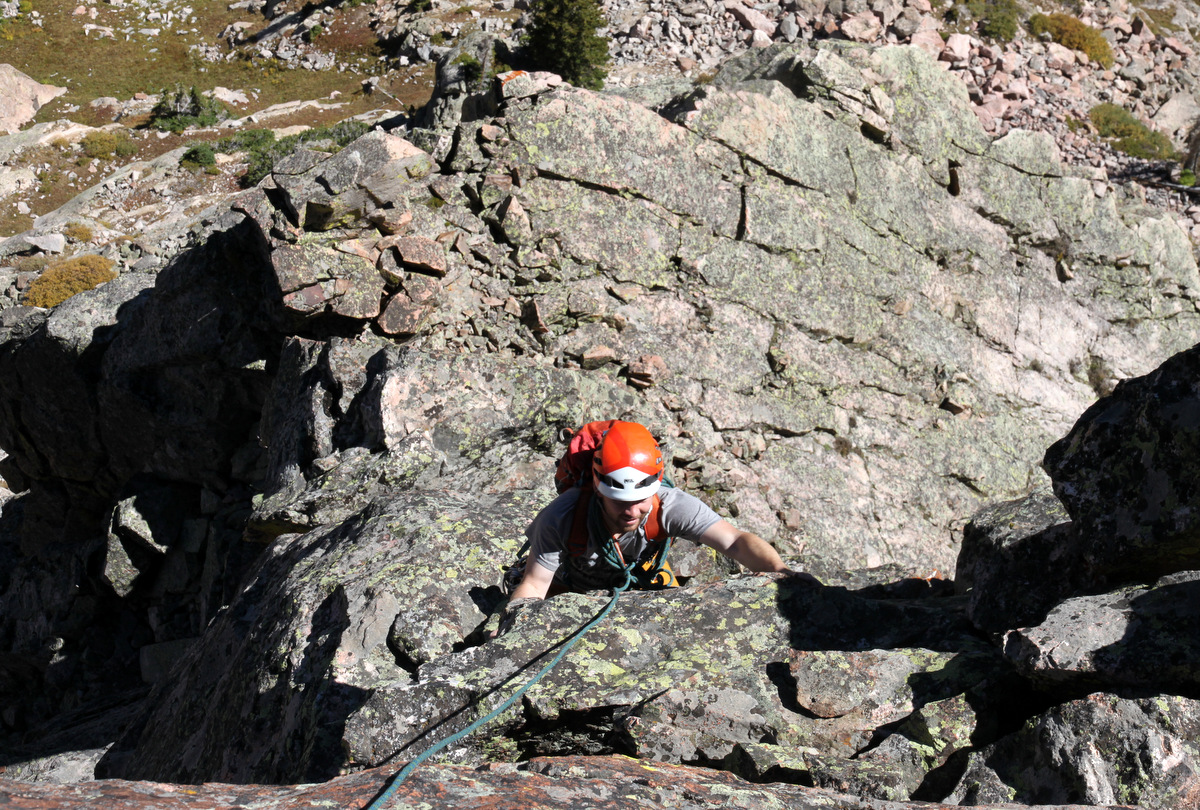
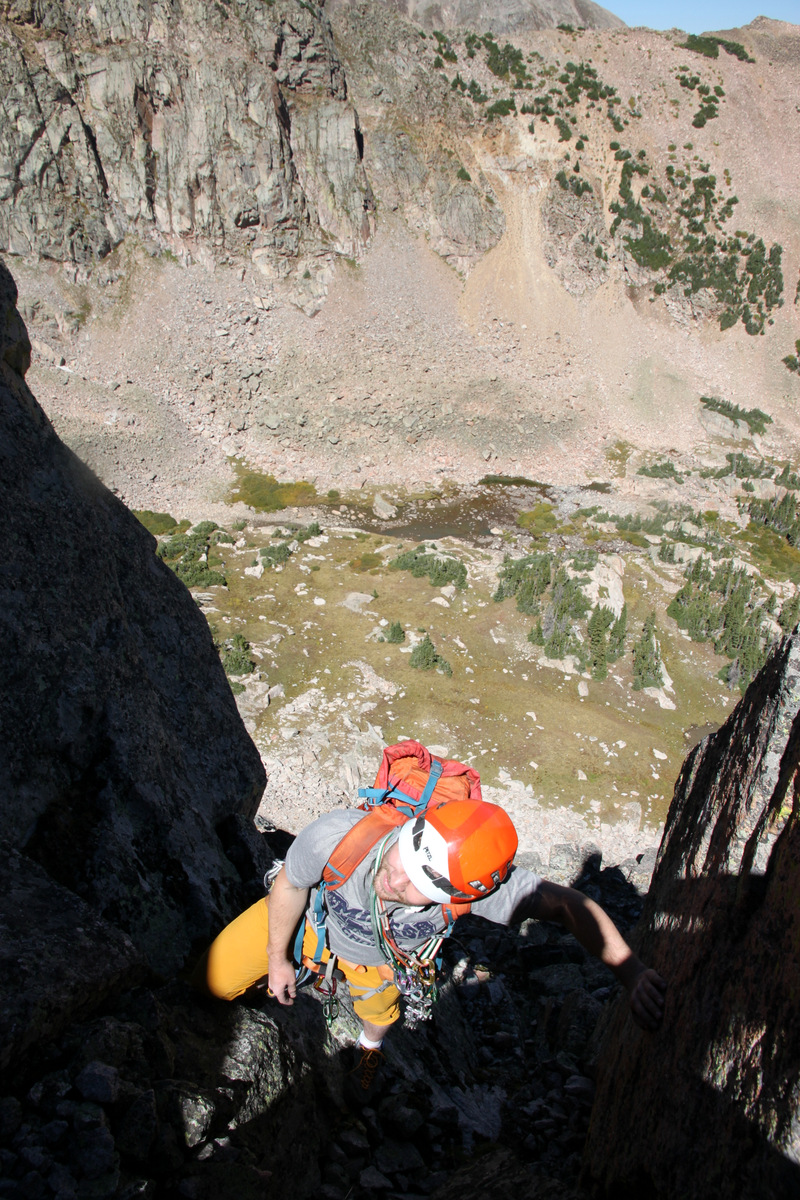
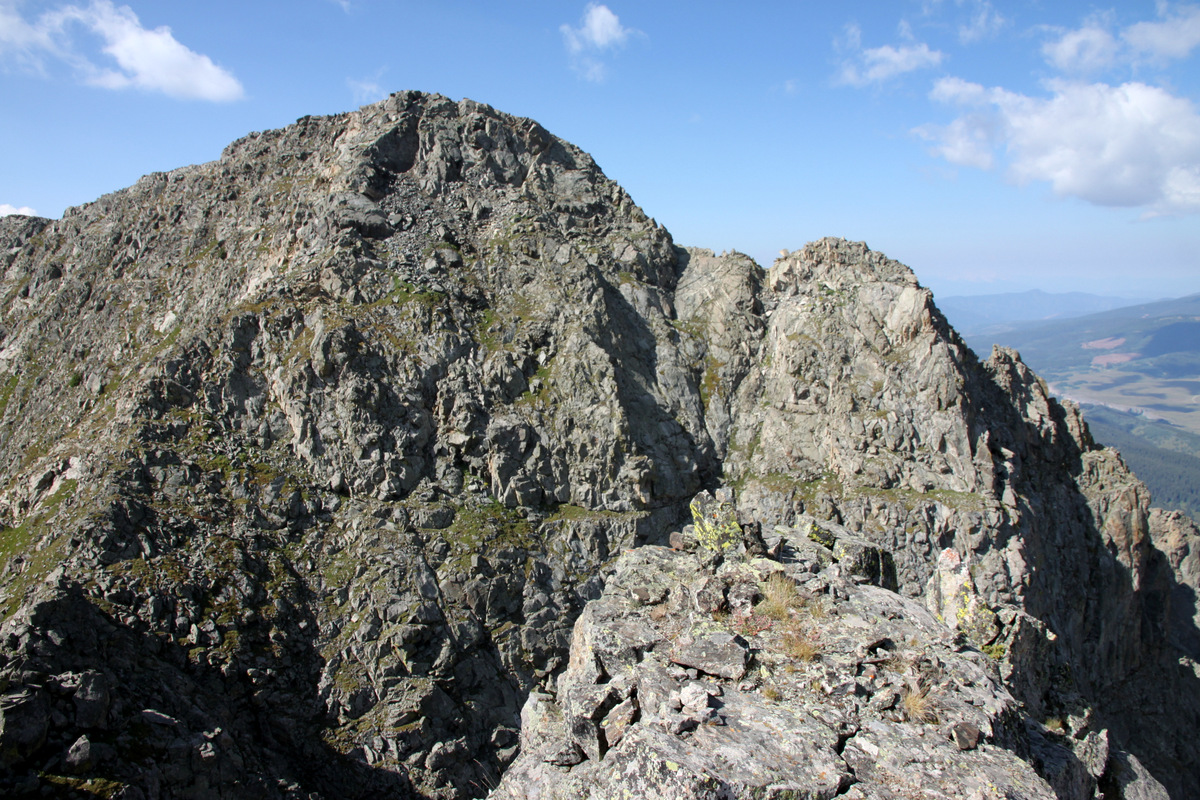
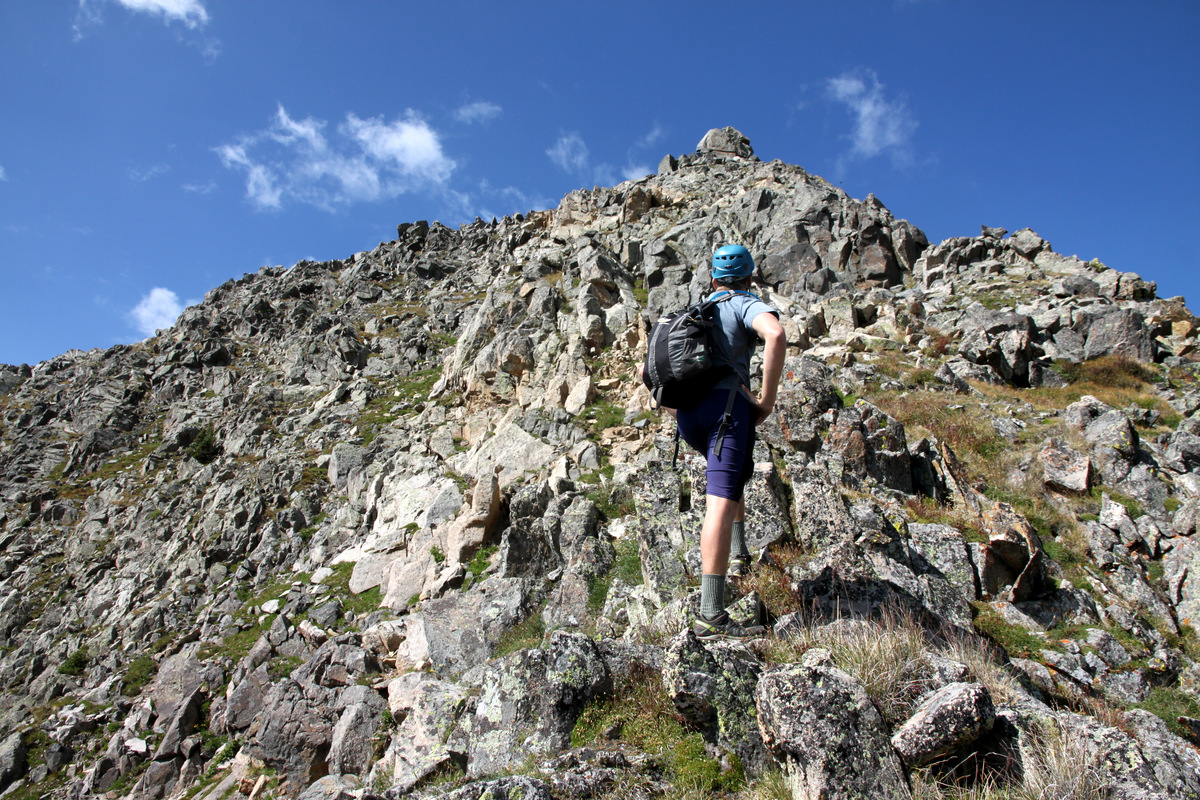
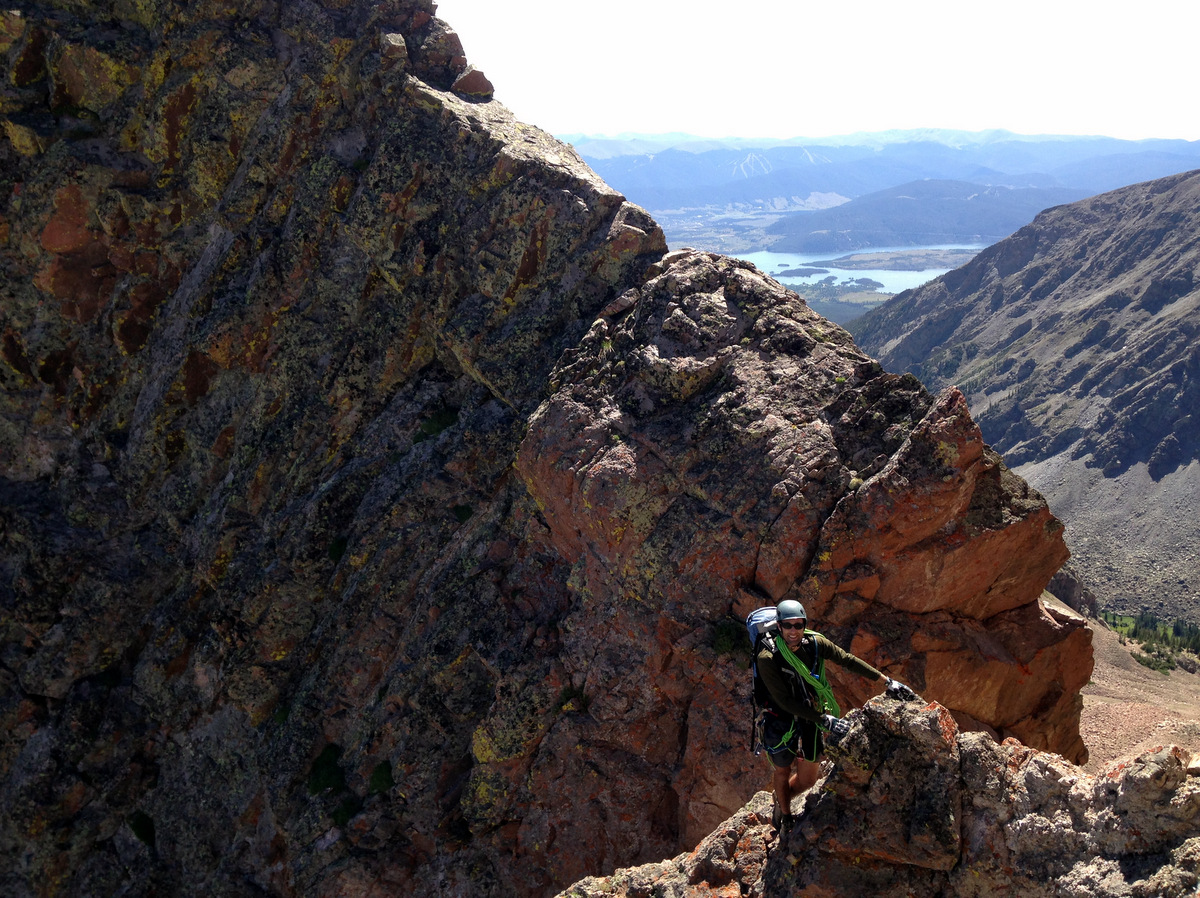
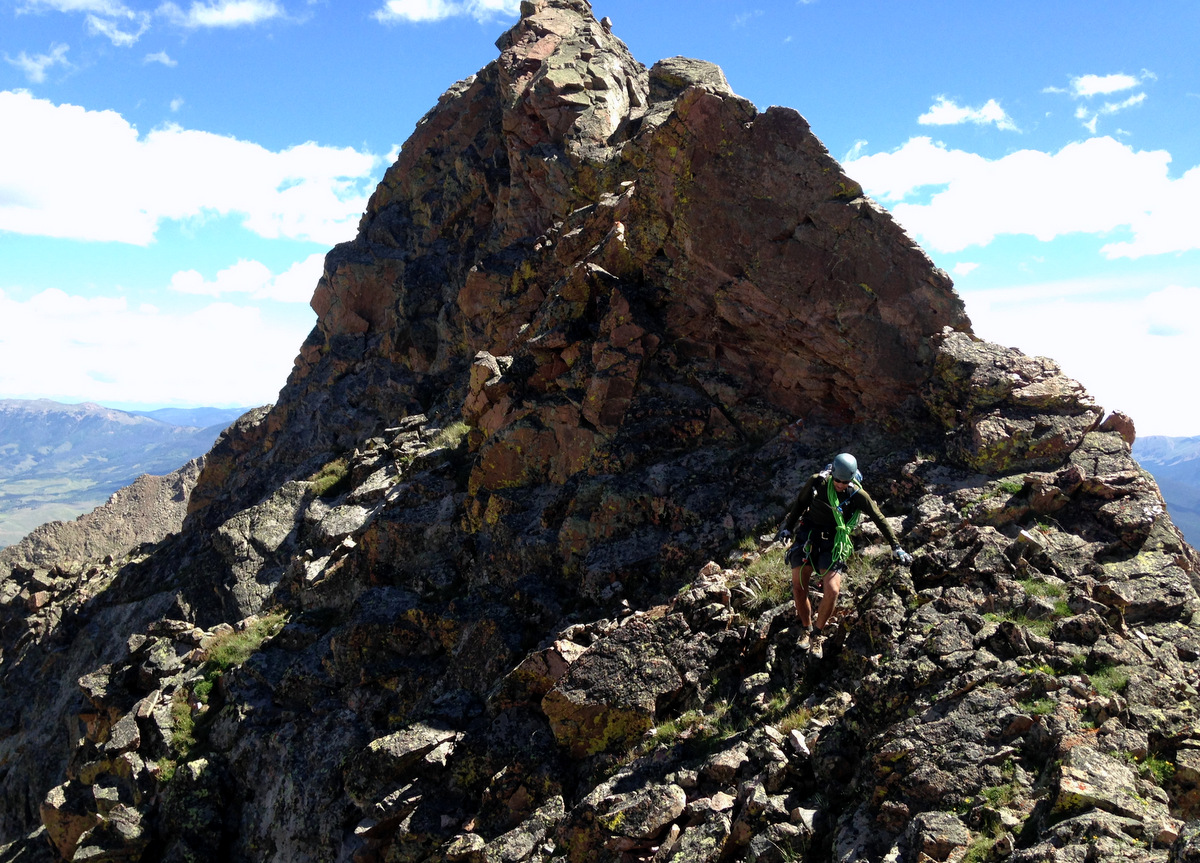
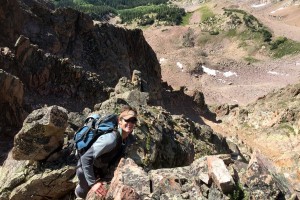
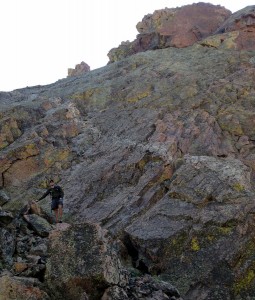
From this point on the ridge proper, delightful class 3/4 scrambling continued pretty much the rest of the way up to the summit ridge plateau of Red Peak. There were many lines to choose from, but in general we stayed on the ridge crest or slightly on the north side.

J on the class 3/4 scrambling that ensued
Sort of a “Where’s Waldo?” picture. Can you spot me? Photo by J
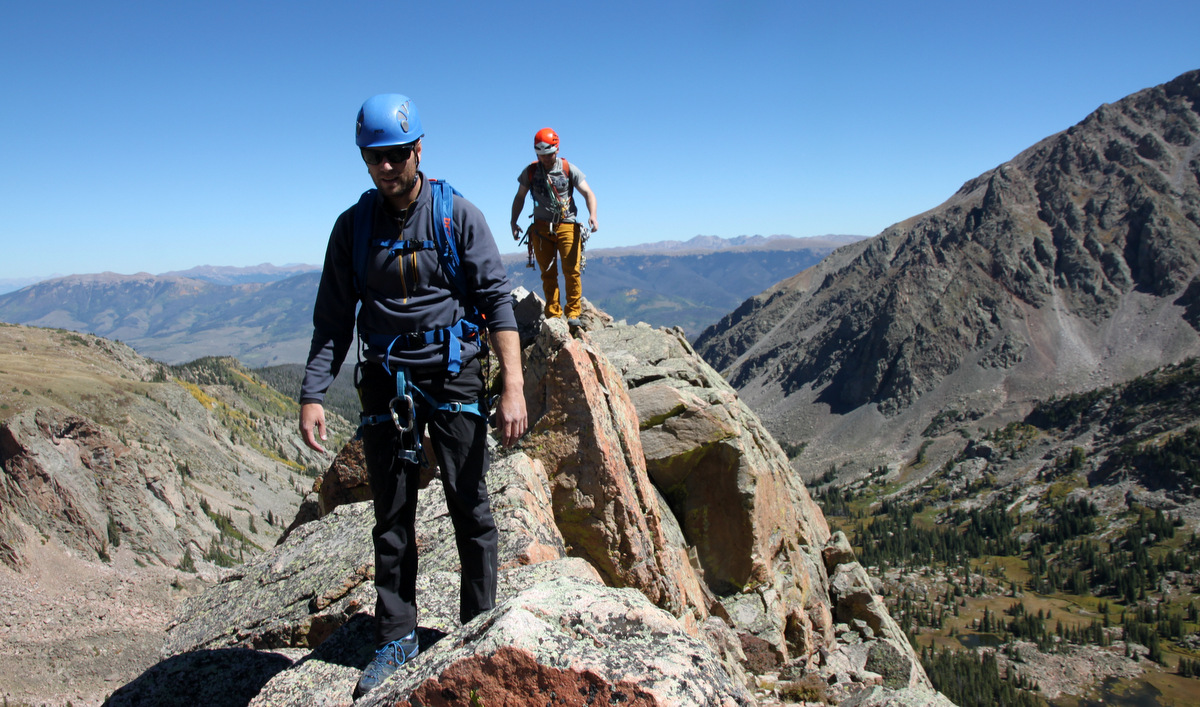
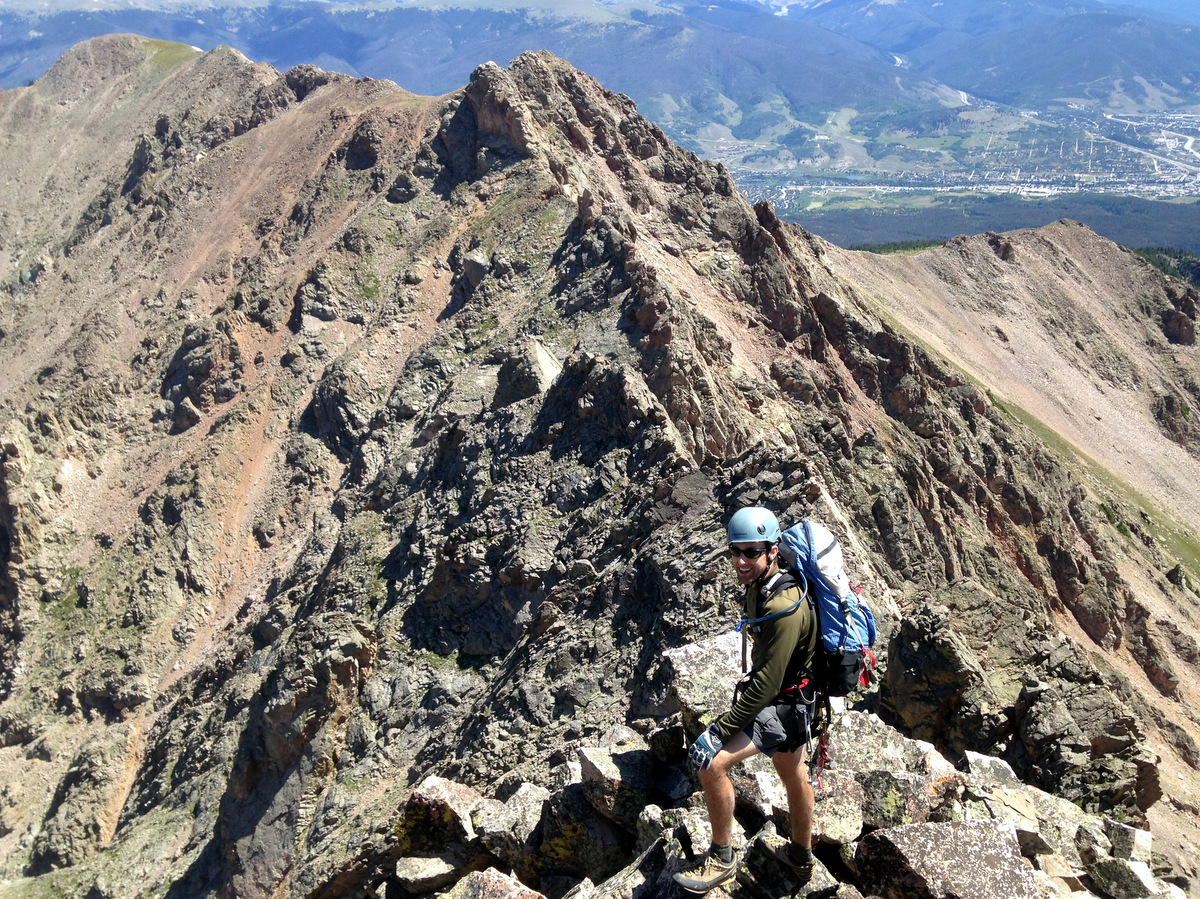
We were both saying to each other at this point that we felt pretty beat and just plain exhausted. We both believed we were a bit more tense (mentally) on this traverse than others. Obviously, being tense leads to expending extra energy. I chock it up to being just out of scrambling practice. It had been awhile. Nevertheless, we topped out on Red Peak’s summit ridge and traversed a few more ups and down before cresting the main Red Peak summit.
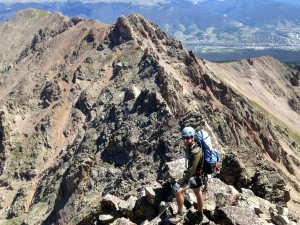
J and Red Diamond Ridge behind
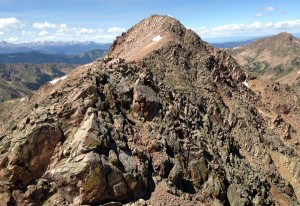
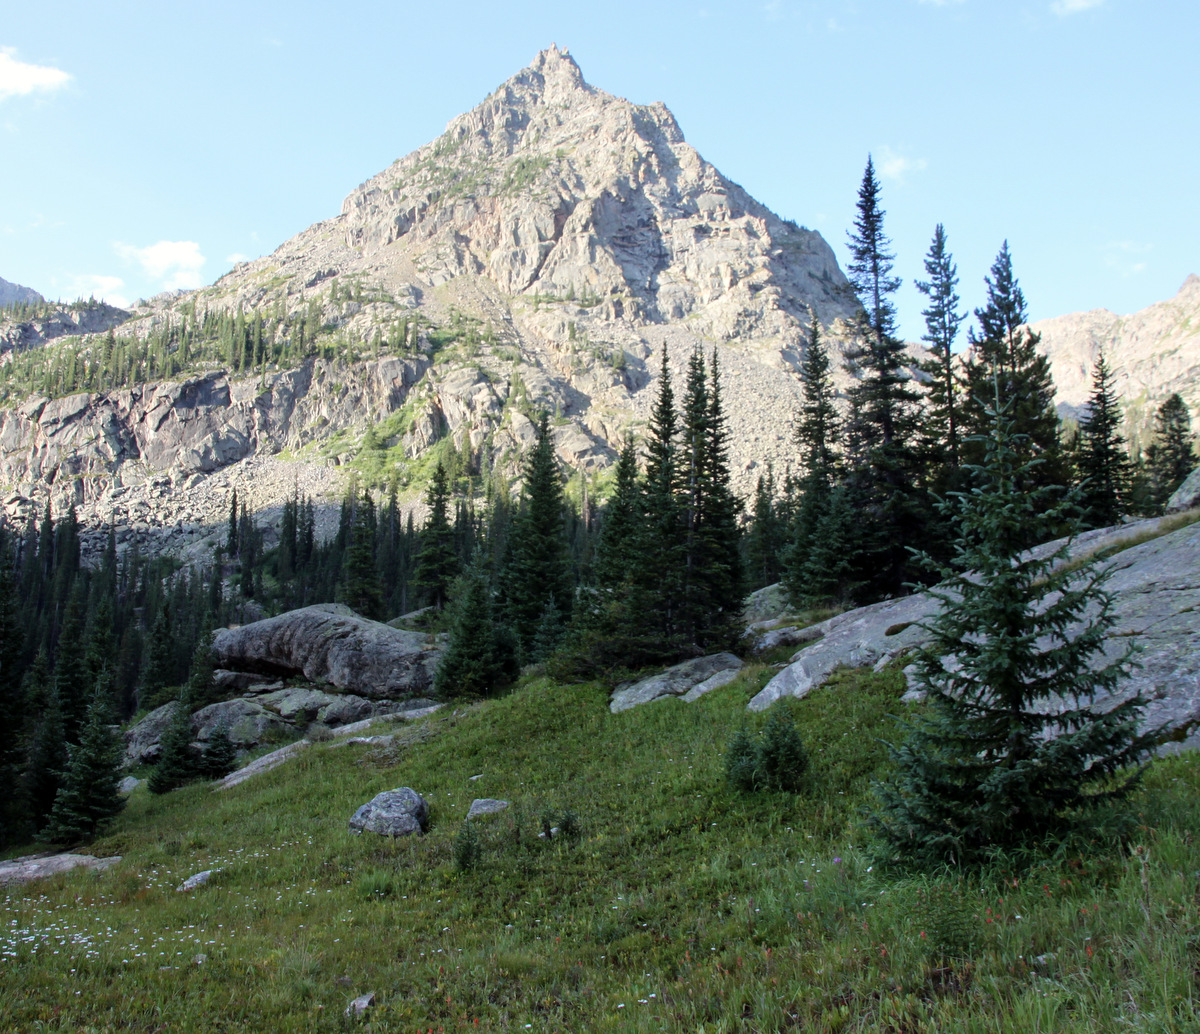
Red Peak summit (13,189′) comes into view

A bit more scrambling

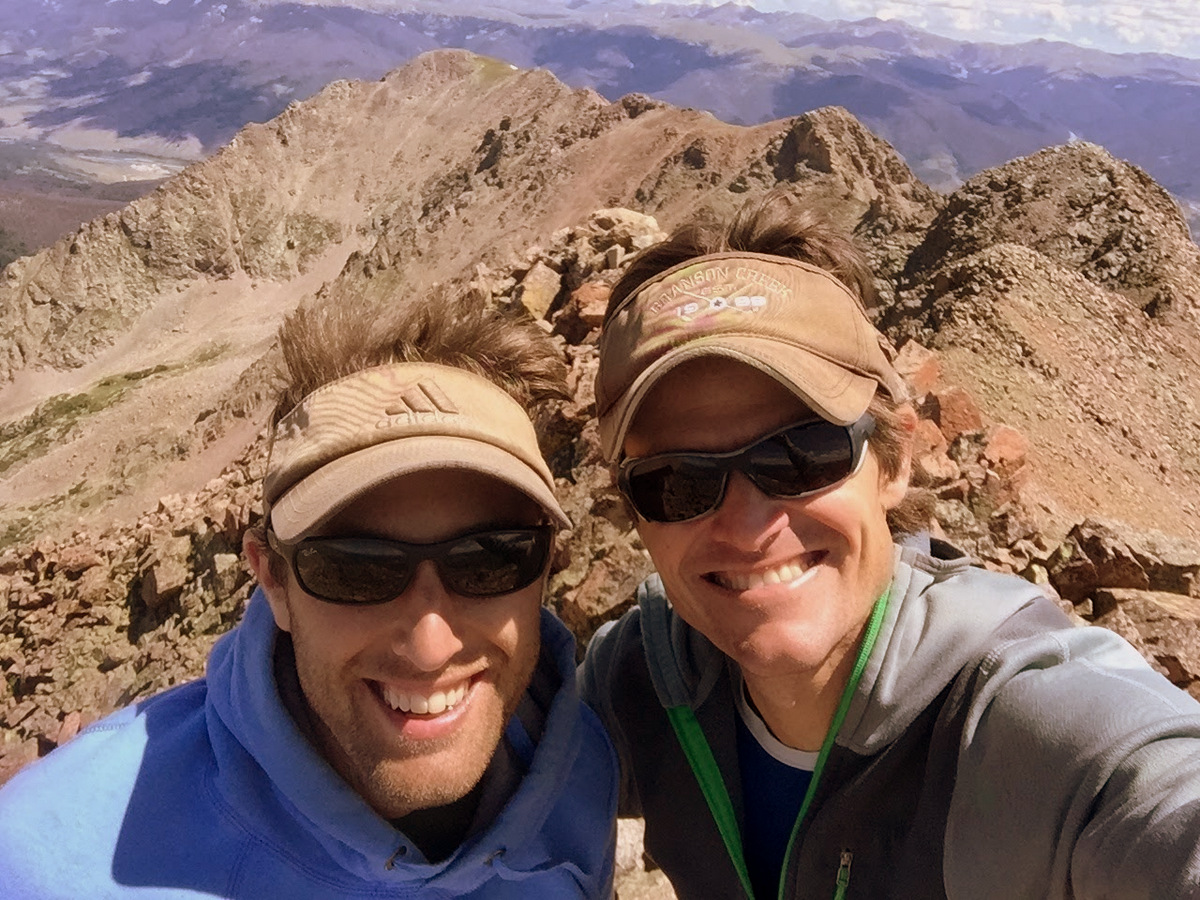
Red Peak summit (13,189′) with the complete Red Diamond Ridge behind us. Our second summit of this peak. The first time was when we traversed the Zodiac Spires 2 years prior
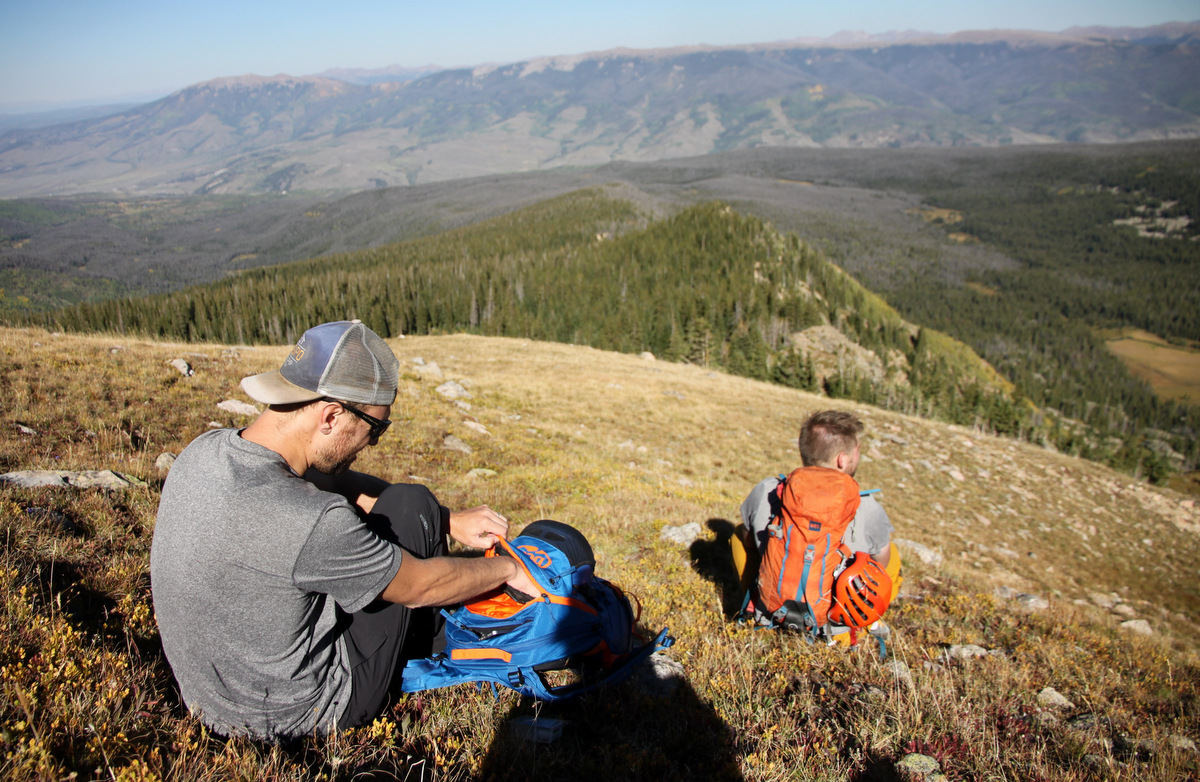
It was a fine summit. However, it was a bit breezy and thus chilly. We had our sandwiches and some Gatorade and water and then continued west to descend the south ridge down to the beautiful Red Buffalo Pass where we took a much needed rest.

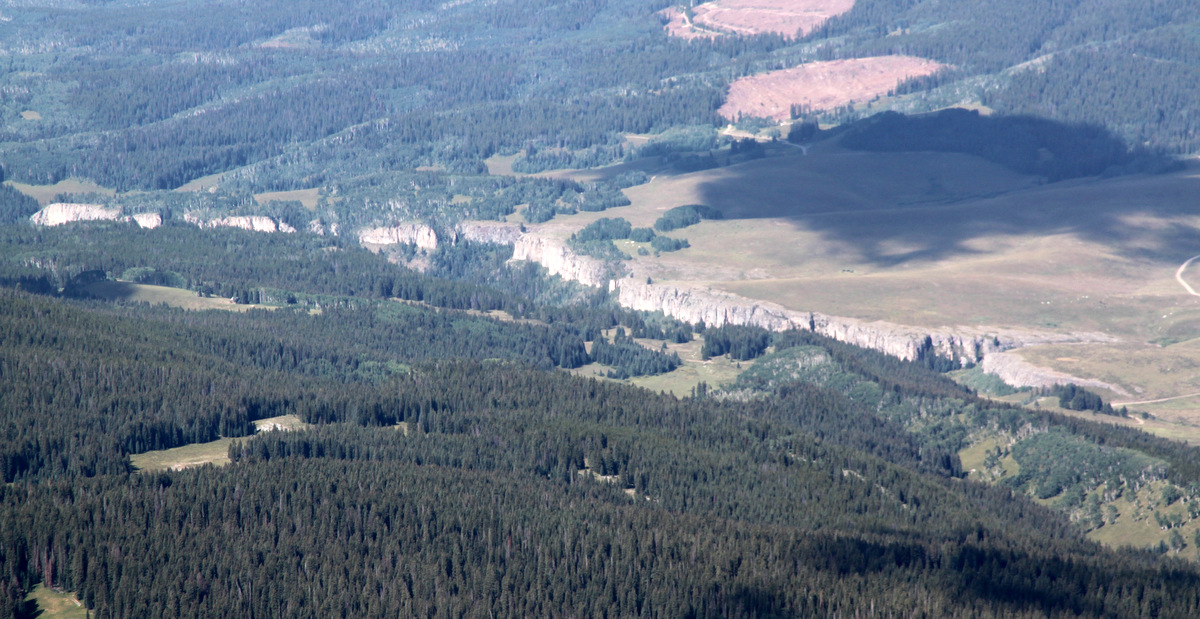
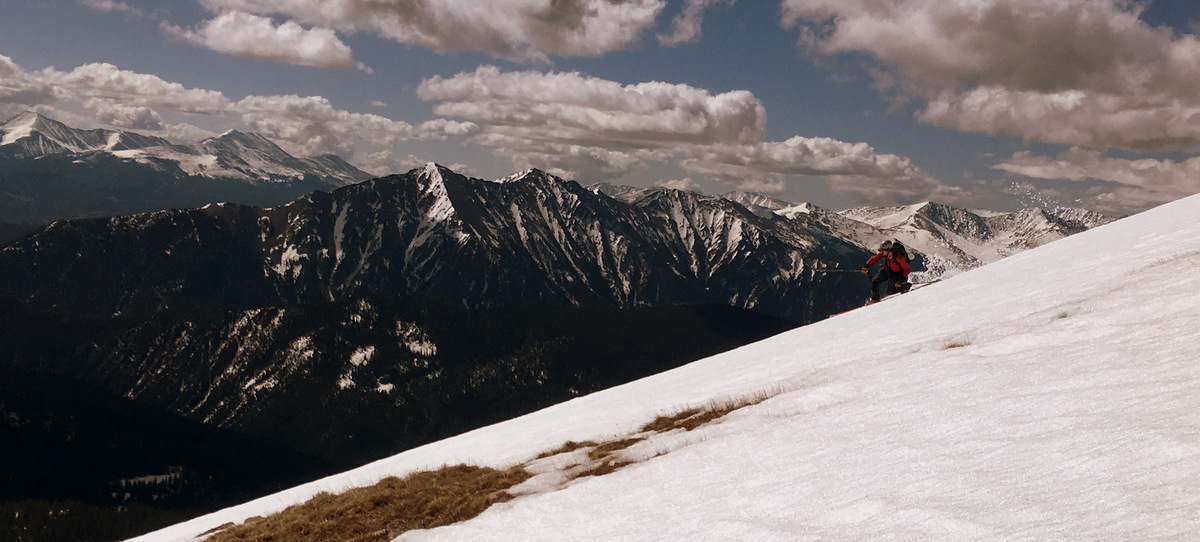
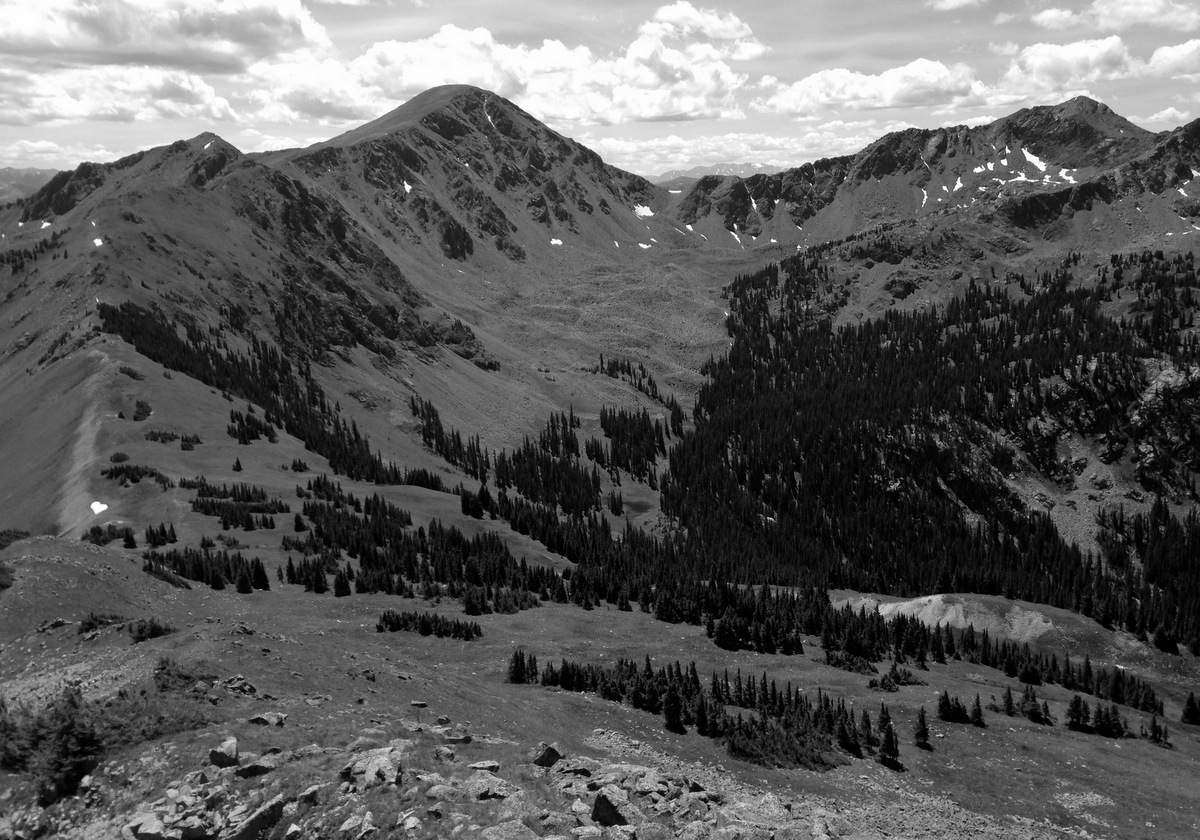
Descending Red Peak’s south ridge to Red Buffalo Pass (left) with Deming Mountain (center) and West Deming (right) in the distance
It was such a gorgeous day and there wasn’t hardly a chance of any storms on the horizon. At this point, I got a text from good buddy Dillon Sarnelli who was on the Tenmile Traverse just on the other side of Buffalo Mountain and I70. What a day to do that traverse as well. Congrats to Dillon and Zambo. I had much more energy now and we cruised out the Gore Range Trail into the South Willow Creek drainage.
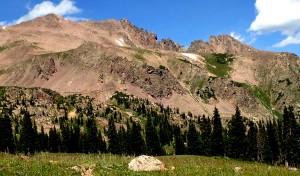
Red Diamond Ridge as seen from the meadows east of Red Buffalo Pass
It was a beautiful deproach until we made the right turn onto the South Willow Creek trail split (where we had left the confines of any trail 6.5 hours earlier) and started the few hundred feet of vertical gain back up to the four-way intersection. We just decided to book it and broke a good sweat and cruised back to J’s Volvo arriving at around 3:30pm for a 9 hour day.
I have no idea on the roudtrip mileage and vertical. Its probably somewhere in the 12-13 mile day with maybe 4,500′-5,000′ of vertical gain with all of the ups and downs, but who knows. I really don’t keep track all that much anymore. Its not what’s important. What’s important is that J and I got out again together in our favorite range and tackled a ridge we had long wanted to do and did it safely. We still felt like we were the only ones out there all day despite the few parties we encountered closer down in the valley on the Gore Range Trail and Buffalo Mountain Trail. Its special to us that we can still feel that sense of solitude. It may not always be the case. The mountains are indeed getting crowded. But, hopefully the Gore will continue to inspire and challenge those that seek adventure, relative solitude, lofty summits, and gnarly ridges. Many thanks to Stan for pioneering this ridge 2 decades ago. We both agreed it is one of the finest of Gore ridge traverses.
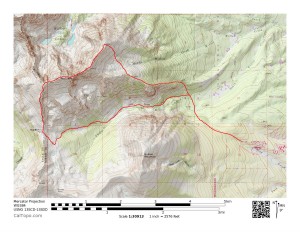
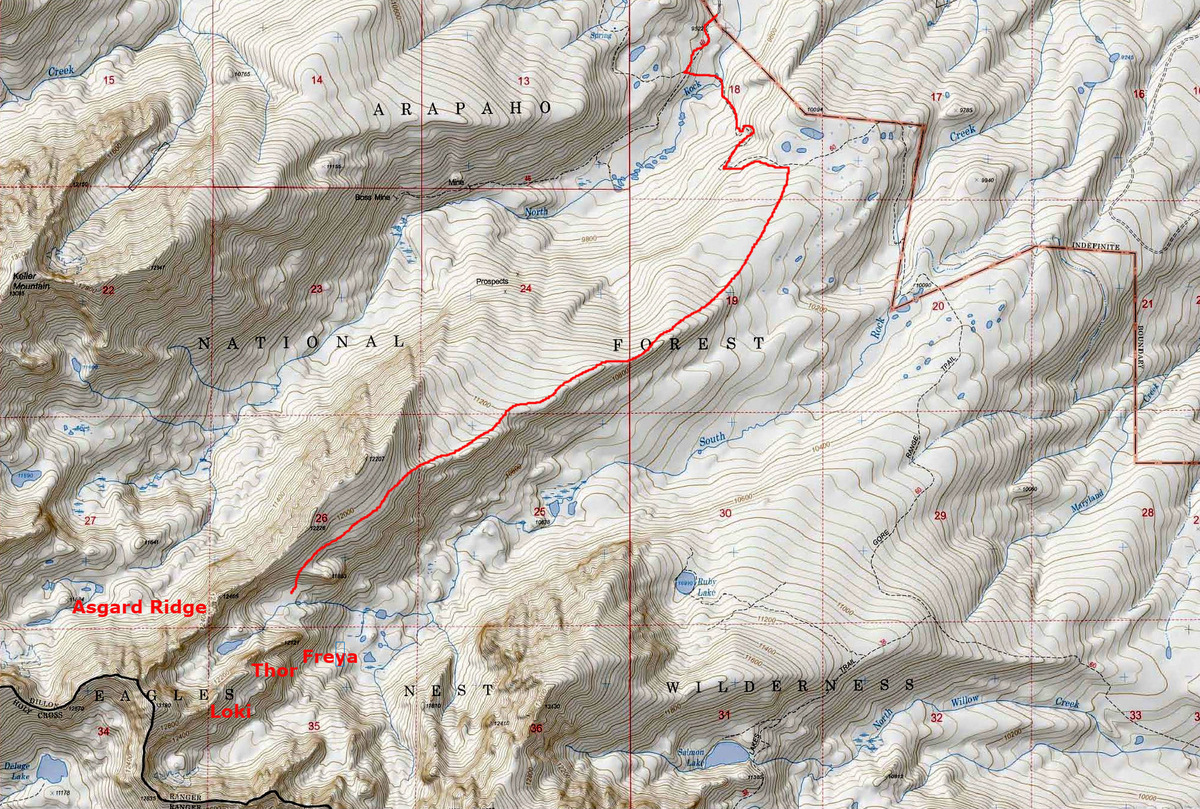
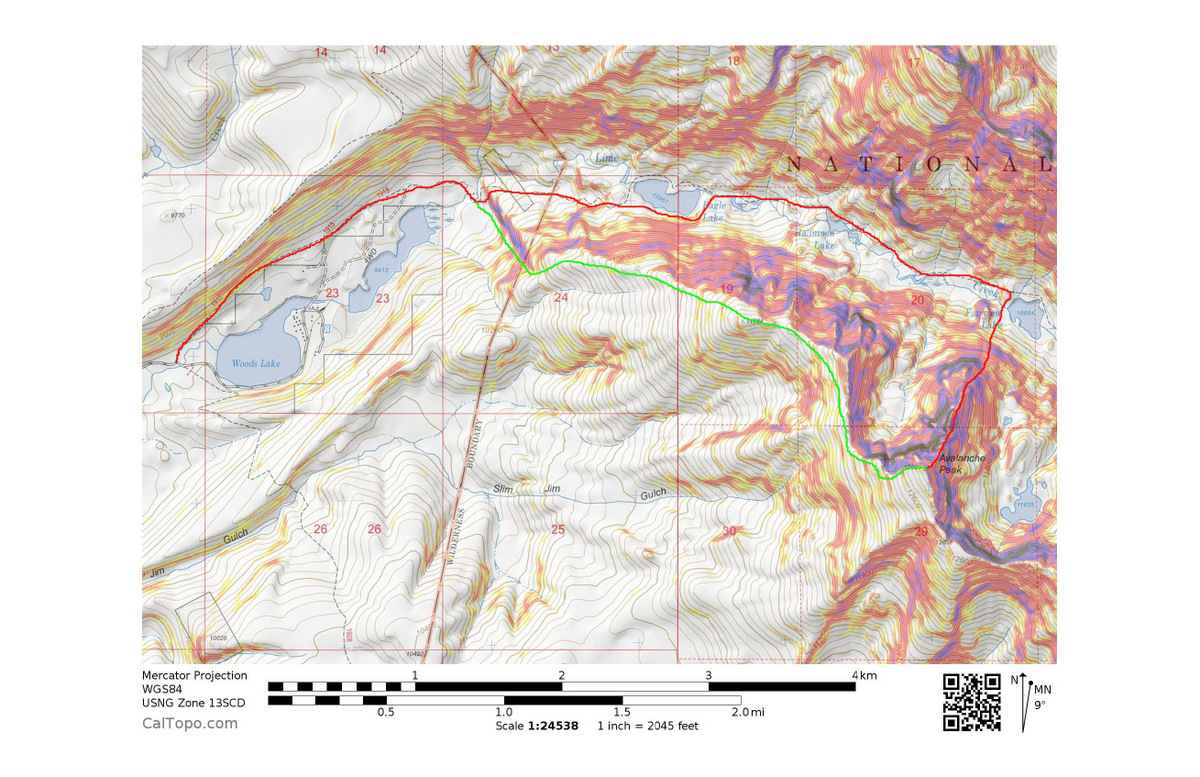
Our Red Peak massif loop via Red Diamond Ridge shown in red


 Follow