New & improved 7 summits site w/ blog!

Hey friends & family,

I/we just wanted to take a minute to introduce our new & improved 7 summits website! The new site is nearly complete thanks to the wonderful Jerry with JR Customization! The new site’s appearance & functionality is worlds better than my old elementary & homegrown site I spent countless hours fidgeting through to look acceptable. Jerry was/is able to transfer all of our old 7 summits trip reports & pictures over to the new site, which has been absolutely wonderful. Its still being tweaked and updated over the next little bit, so bear with all of us. Actually, this is a first post of mine, so is a test run in iteslf. I hope it posts OK.

Kristine & I are off to Australia in 6 days to visit our good friend Henry Herring, travel around, and of course climb Mt. Kosciuszko! “Kozzy” will be my 6th of the 7 summits and Kristine’s 5th of the 7 summits.

Thanks for tuning in and we’ll be in touch!
Cheers!

Brandon & Kristine

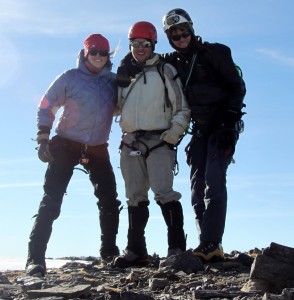
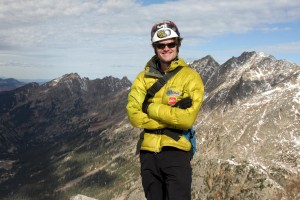
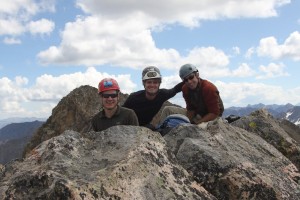
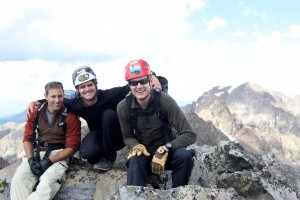
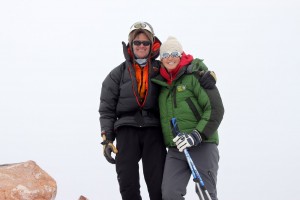
Kristine & me on the summit of Mt. Shasta (14,162′) on May 20, 2012, our first California 14er


The Saw

I haven’t seen much beta (any really) on this section of ridge in the Gores dubbed “The Saw”, so figured I’d include some text and pictures for those wanting to get some isolation and solitude in the middle of Colorado’s best range. Having scrambled Ripsaw Ridge from Peak C to Peak G last Fall, I wanted to see what Peak H and beyond had in store. I’ve heard many different opinions on where Ripsaw officially ends, whether at Peak H, Peak J, West Partner, or Frisco. Well, who knows…its all subjective. However, I like to get names right when possible and per Gore Galore on this site and his information from Robert Ormes “The Saw” is indeed the ridge from Peak H to Peak J, Peak J to Peak P doesn’t officially have a name, and Peak P to West Partner is “Rockinghorse Ridge” given it’s name by the four distinct towers on West Partner’s north ridge. Personally, I like Ripsaw Ridge ending with Peak H, The Saw from Peak H to Peak J and then onto Peak P since it’s all very similar ground (endless towers), and Rockinghorse Ridge starting from Peak P to West Partner. Peak H seems like a natural barrier and distinction between Ripsaw & The Saw since the ridge drops considerably in elevation south of Peak H. Nevertheless, the plan was to traverse The Saw & Rockinghorse Ridge from Peak H to West Partner and camp another night in Upper Piney Lake basin. However, the mosquitos were so bad and we were so not prepared for them that we had to get out that day. We aborted on Rockinghorse Ridge and descended between Peak P & West Partner. Rockinghorse Ridge will have to wait a bit longer.

I’ve wanted to get back into the Gores asap after some Casacades ski mountaineering ventures and taking some folks on the Gore Grand Traverse 2 weeks prior. My good friends J, Chuck, and Baba (who used to live in Vail but had flown in from New Hampshire the day before) and I packed up and made the long backpack into the Upper Piney River Basin from Piney Lake on a late Friday afternoon. I’ve only ever been as far as the Peak C southwest couloir turnoff, so heading further south on the faint Upper Piney Lake trail towards the base of the Spider’s north face was a treat. We eventually found a vague horsepack trail that led in the direction we wanted to go, i.e. the Upper Piney River Basin. After some steep side-hilling, we leveled out and broke out of treeline into the swampy upper basin before Upper Piney Lake. Not having brought any mosquito repellant, no tent, and b/c of the fire ban, our battle with the horrendous mosquitos was fully on. I’ve been in some bad areas for mosquitos (the worst before this was in the Winds attempting Gannett Peak way back in high school). But, this took the cake. It was absolutely horrendous, so we set up our bivouac high on a good slab of rock, ate our burritos, and got in our sleeping bags fast. I haven’t slept much worse than I did that night, despite the gorgeous surroundings, with mosquitos biting and buzzing all night at my face. It was too warm to put my head under my sleeping bag. Up at 5am and leaving our bivy at 6:30am, we headed up the relatively easy south slopes of Peak H.
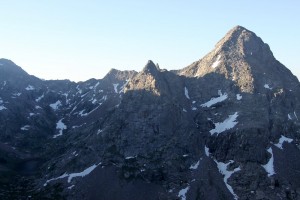
Peak 12,200' & The Spider (12,692') from Peak H's south slopes

Peak 12,200′ & The Spider (12,692′) from Peak H’s south slopes
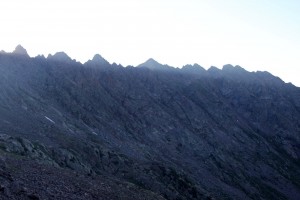
Sunrise over The Saw from Peak H's south slopes

Sunrise over The Saw from Peak H’s south slopes
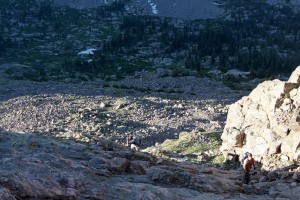
The minor class 3 gully we ascended on Peak H's south slopes

The minor class 3 gully we ascended on Peak H’s south slopes

After about an hour and a half, we topped out on Peak H on a spectacular morning. Peak H has two summits separated by the top of the “Straight Arrow Couloir” dropping off to the southeast. We found a register on the north summit with a very short list of entries dating back to the early 70s. We then looked to the southeast at the intimidating ridge to Peaks J & P and beyond. However, we were very excited to begin the adventure.
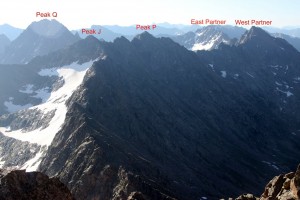
The Saw to Peaks J & P from the summit of Peak H

The Saw to Peaks J & P from the summit of Peak H

The descent off Peak H’s southeast ridge drops you several hundred feet of class 2/3 down to the ridge proper to begin the large slab section as could be seen from our bivy down in the basin. Perhaps this slabby knife-edge is why Ormes named the Peak H to Peak J ridge “The Saw”.
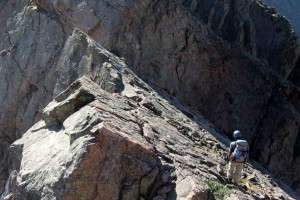
J on the slabby ridge section

J on the slabby ridge section

The slab ridge proper ended in a cliff with no climbable way over it without the need of a rope and some pro. So, we dropped 20 vertical feet to our right (south) to find a climable 4th class weakness.
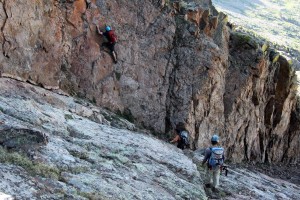
Baba climbing our 4th class exit off the slab and back onto the ridge
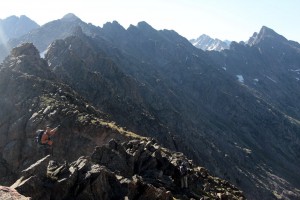
Baba climbing our 4th class exit off the slab and back onto the ridge

Some easier terrain after the initial slab section and a few towers
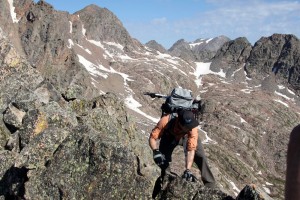
Some easier terrain after the initial slab section and a few towers

Chuck on a knife-edge portion of the ridge proper

Chuck on a knife-edge portion of the ridge proper

There are a few larger towers that make up the middle ridge section between H & J and most of these can be climbed on the ridge proper with 4th class/low 5th moves. However, one tower would not go ridge proper much less than a 5.10 I would bet, so we traversed around to the ridge’s north side for some steep and exposed grass ledge scrambling.
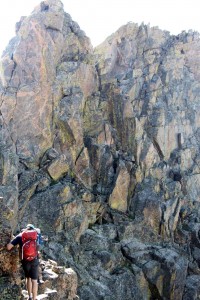
Baba approaching the few towers that encompass the middle section between H & J - we went around the upcoming tower to our left (north)

Baba approaching the few towers that encompass the middle section between H & J – we went around the upcoming tower to our left (north)
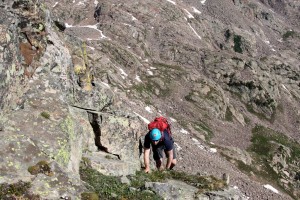
Steep gassy slopes on the ridge's north side

Steep gassy slopes on the ridge’s north side

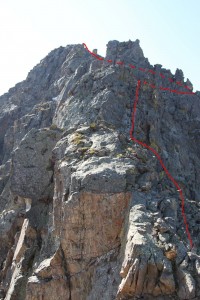
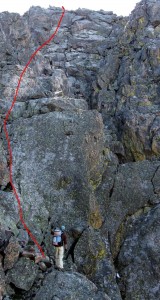
We then came up to an awesome looking tower that I wanted to find a way up and over. Fortunately, it worked out.
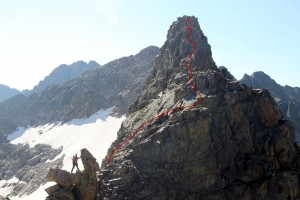
The hardiest of towers between H & J which we went up and over (route shown in red)
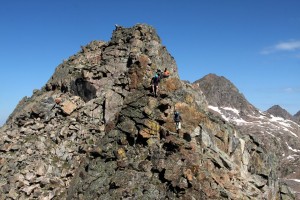
The hardiest of towers between H & J which we went up and over (route shown in red)

The crew descending the last tower after the grassy ledge system section
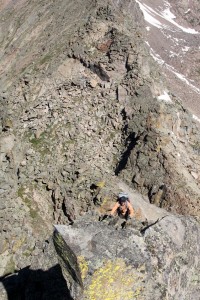
The crew descending the last tower after the grassy ledge system section

Chuck climbing the tower
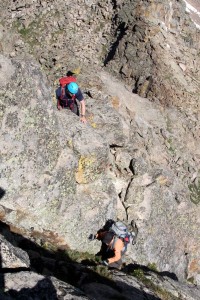
Chuck climbing the tower

Chuck & Baba negotiating the final moves up to the tower's summit

Chuck & Baba negotiating the final moves up to the tower’s summit
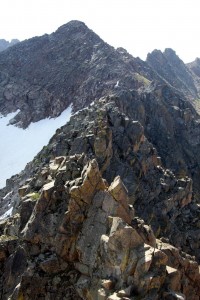
More fun sections up to Peak J

More fun sections up to Peak J

One of the advantages it seemed going from H to J and not vice versa was that every time we’d climb up 4th class/low 5th towers on their northwest side, there would be a relatively easier 3rd class descent off each tower’s southeast side. Thus, we didn’t have to down climb serious terrain, which was nice. This is something we obviously did not know before hand and just worked out for us. So, in that respect, I would recommend going from H to J.
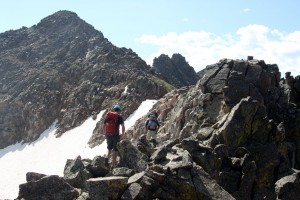
Baba & J on a semi-walking portion of the ridge
Baba & J on a semi-walking portion of the ridge

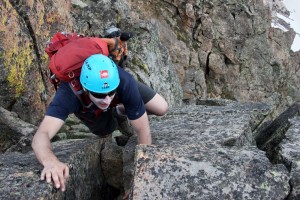
Baba making his move up another smaller tower
Baba making his move up another smaller tower

3/4 of the way across to J, Chuck spotted an old hex deep down in a crack. J & I spent 10 minutes freeing it

3/4 of the way across to J, Chuck spotted an old hex deep down in a crack. J & I spent 10 minutes freeing it

After a few more smaller towers, yet still extremely fun, it was easy class 2/3 terrain up to Peak J’s summit. J was stoked to be on Peak J We had great views of Peaks K, L, Q, R, S, & T towering above the Slate Creek Basin to our east.
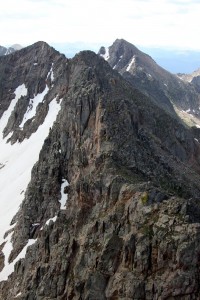
The ridge to Peak P from the summit of Peak J (West Partner in the distance)
The ridge to Peak P from the summit of Peak J (West Partner in the distance)

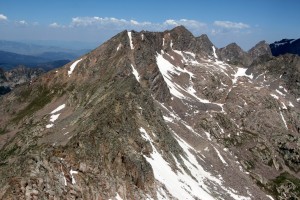
Looking back at The Saw to Peak H (the "Straight Arrow Couloir" can be seen coming down off Peak H's summit)

Looking back at The Saw to Peak H (the “Straight Arrow Couloir” can be seen coming down off Peak H’s summit)

We then set out for Peak P. This section of ridge between J & P was definitely much easier and shorter than from H to J, yet still fun all the same.
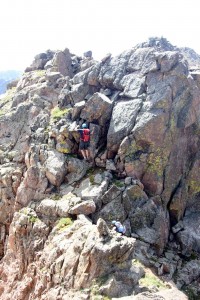
Baba climbing a relatively easy tower en route to Peak P
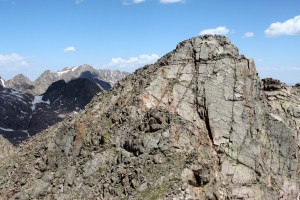
Baba climbing a relatively easy tower en route to Peak P

Leaving Peak J behind
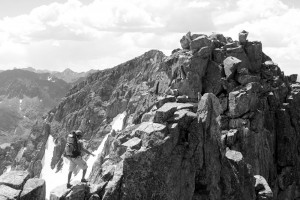
Leaving Peak J behind

J skywalking on the way to Peak P
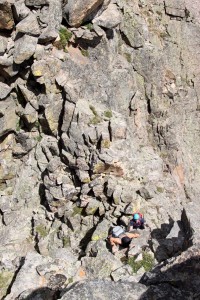
J skywalking on the way to Peak P

Chuck & Baba climbing up the one significantly exposed tower with tougher moves

Chuck & Baba climbing up the one significantly exposed tower with tougher moves

After some easier class 2/3 terrain, we reached Peak P’s summit around 1pm. I had heard of folks using the west slopes from Upper Piney Lake to reach Peak P, so this was always a descent option in the back of my mind. If we were going to stay another night out, Rockinghorse Ridge up to West Partner would have definitely been on our agenda, but we had made up our mind we were going to pack out to Piney Lake that day b/c there was nothing worse than the swarms of mosquitos in the Upper Piney Lake Basin. Even Rockinghorse Ridge was worth saving for another day in order to not have to spend another night out with the mosquitos.
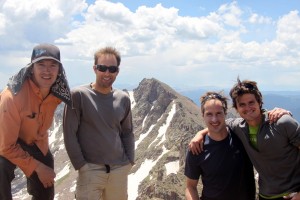
Summit of Peak P with West Partner behind
Summit of Peak P with West Partner behind

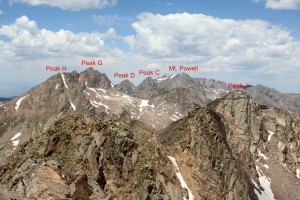
Looking back from the summit of Peak P to where we came with Ripsw Ridge & Mt. Powell beyond

Looking back from the summit of Peak P to where we came with Ripsw Ridge & Mt. Powell beyond

We then headed south towards West Partner over easy class 2/3 terrain and found some manageable terrain to descend down to Upper Piney Lake from the Peak P/West Partner lowpoint (better & safer than the descent gully between Peaks F & G to the west for those that know that one).
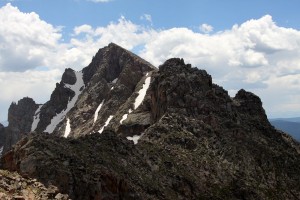
Rockinghorse Ridge to West Partner Peak from the Peak P/West Partner saddle

Rockinghorse Ridge to West Partner Peak from the Peak P/West Partner saddle

On the descent, we were all admiring the fun that Rockinghorse Ridge up to West Partner looks to be – another day.

Our descent routes from the Peak P/West Partner saddle to Upper Piney Lake (several options)
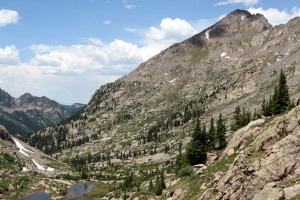
Our descent routes from the Peak P/West Partner saddle to Upper Piney Lake (several options)

Upper Piney Lake Basin with Peak H to the right

Upper Piney Lake Basin with Peak H to the right

Upon being back in the hot, mosquito infested Upper Piney Lake basin, a dive into Upper Piney Lake was just what the doctor ordered for all of us.
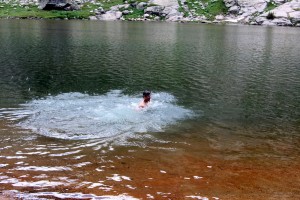
Had to do this - Upper Piney Lake dunk

Had to do this – Upper Piney Lake dunk

After a 30 min swampy hike back to our bivy, we packed up for the long haul out to Piney Lake finally arriving back at the trucks around 6:30pm for a 12 hour day. Despite our ill-preparedness for the mosquitos, this was a wonderful trip with great friends in the remote heart of the Gore Range. Truly a spectacular area and if you are willing to put in a long haul and bushwhack into the Upper Piney River basin, you will be rewarded with solitude and very remote peaks and ridges. I think all of us would recommend The Saw for a ridge run you can have all to yourself full of high quality scrambling. One of our favorites thus far. Its always exciting not having any beta on ridge runs yet finding a way through.

Mt. Bancroft: East Ridge Direct

I don’t venture into the Front Range very much, but with a very dry season thus far and a favorable weather forecast, Kristine & I met our good friend Jesse Hill from Denver at the Bancroft TH for some east ridge direct fun. I know so many skiers are bummed with the current Colorao snowpack, but honestly I have been enjoying all of this dry, warm winter weather and taking advantage of it by rock climbing some and getting out high on some peaks. The skiing is just not worth it to me inbounds or in the backcountry right now until we get lots of snow, which is absolutely fine. Just means more climbing. I’ve heard this was a fun route in summer by some friends of mine and is in Cooper’s Colorado Scrambles book, but I thought it may be more interesting & exciting in winter. The ridge definitely did not disappoint and provided awesome winter scrambling with some technical spice thrown in. After parking on the Stewart Road at 8:30am, we hiked the mostly bare 2.2 miles up to the summer parking TH at Loch Lomond. There was some semi-deep snow before Loch Lomond, but it was manageable in our plastic boots without snowshoes. The wind was whipping in the valley, so my hopes were that it would die down before we hit the east ridge. Thankfully, it did. We then made our way up to the base of the east ridge in the howling wind.

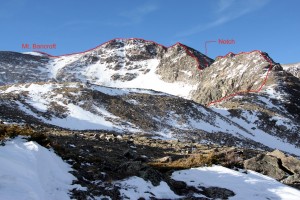
The east ridge direct route to Bancroft's summit

The east ridge direct route to Bancroft’s summit

The initial portion of the ridge (up to the infamous notch) was fairly straighforward with some fun class 3 moves if you stayed on the ridge proper.

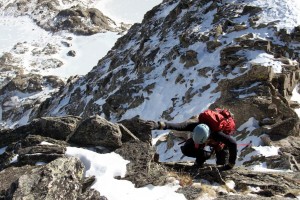
Kristine climbing the initial class 3 portion of the east ridge

Kristine climbing the initial class 3 portion of the east ridge

We then approached the rappel station on the east side of the notch and found a party of two climbers setting up their own rappel. We had been gaining on them all morning and decided this was as good a place to pass as any. So, I threw my 60m, 8mm rope around a flake of rock at the top of the east side of the notch and we all rapped down with me going last. In all honestly, I should have tied some webbing and set up a rap anchor, but we wanted to get ahead of the party of two climbers and the rock was smooth enough that the rope would easily pull, so I just ran it over the rock. Not pretty or textbook, but good enough for just one rap.

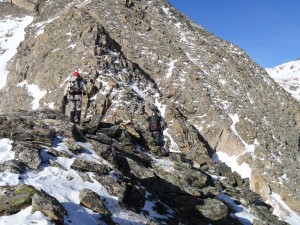
Jesse & I approaching the notch and rappel station

Jesse & I approaching the notch and rappel station

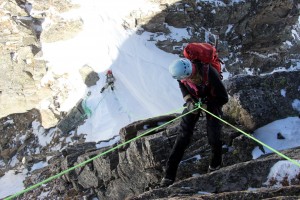
Kristine on rappel with Jesse below in the notch

Kristine on rappel with Jesse below in the notch

Me rappelling down past the party of two climbers on the left

Me rappelling down past the party of two climbers on the left

Once, we were all at the notch and pulled the rope, Kristine put me on belay as I led up the 1st crux 5.2 headwall pitch west out of the notch and back to the ridge proper. I only placed a #1 cam and the 25 ft pitch wasn’t too difficult and very fun despite climbing in my Koflach Vertical plastic boots. Great hand/finger holds and the rock was warm enough for me without gloves. I then set up an anchor, belayed Kristine & then Jesse up, and then coiled and stashed the rope in my backpack.

Me belaying Jesse up the 1st crux 5.2 headwall pitch out of the notch

Me belaying Jesse up the 1st crux 5.2 headwall pitch out of the notch

Having passed the supposed crux of the route, the real difficulties seemed to be ahead of us. I was excited. What followed was a few hundred feet of mostly horizontal knife-edge ridges, some snow covered and some dry. This was some exciting scrambling for sure as there are serious drop-offs to the north & south. We never donned our crampons, though in retrospect, it probably would have been a good idea. This was the most treacherous section of the ridge, in our opinion, especially being in plastic boots on lightly snow covered rock. Obviously, in summer, you would just skip across this with approach shoes, and in spring, I can see this being much easier as there would be a large corniced snow ridge you can basically trudge across with your axe.

The remaining portion of the east ridge from the top of the 1st crux 5.2 headwall pitch

The remaining portion of the east ridge from the top of the 1st crux 5.2 headwall pitch

Jesse & Kristine on the ridge

Jesse & Kristine on the ridge

Jesse crossing a knife-edge snow ridge

Jesse crossing a knife-edge snow ridge

Me looking back at Kristine having crossed the knife-edge snow ridge

Me looking back at Kristine having crossed the knife-edge snow ridge

Jesse & Kristine almost done with the knife-edge ridge and to the base of the 2nd crux headwall pitch

Jesse & Kristine almost done with the knife-edge ridge and to the base of the 2nd crux headwall pitch

I had read a route description of the east ridge which said there was a pair of chimneys that go at 4th to low 5th class on the ridge’s right (north) side. However, the ledges and holds were pretty snow covered, and not feeling the motivation to put my crampons on, I chose to head slightly left of the ridge crest just a few feet and found a doable yet severly exposed dry low 5th class route up to a snow covered ledge. This 30 ft headwall definitely had a few low 5th class moves over big air. In retrospect, I really should have led this on belay. With the damage done, I set up an anchor, threw down the rope, and belayed Kristine and then Jesse up to me.

Me scoping out the 2nd crux headwall - I climbed up around the corner to my left

Me scoping out the 2nd crux headwall – I climbed up around the corner to my left

Me belaying Kristine up the 2nd crux low 5th class headwall pitch

Me belaying Kristine up the 2nd crux low 5th class headwall pitch

Once past the 2nd crux headwall, we spotted the party of two climbers just starting the knife-edge ridge after the 1st crux 5.2 headwall pitch. They were belaying the knife-edge ridge, which just seemed so painstakingly slow. Turns out they turned around shortly thereafter and likely descended down the couloir south to Lake Caroline from the notch. They returned to their cars at the trailhead 15 minutes after we did at the end of the day.

The party of two climbers seen from above the 2nd headwall crux

The party of two climbers seen from above the 2nd headwall crux

We then climbed some fun and blocky class 3 rock up the ridge to a tower. Jesse had scoped a small snow covered ledge around to the tower’s right (north) side and so we took the ledge route. In retrospect, we should have just climbed up the remaining 20 ft to the top of the tower and proceeded on the ridge crest as the 30 ft of climbing we endured on the ridge’s north side back up to the ridge proper once the ledge ran out was quite spooky and involved some pretty treacherous moves over slick rock. Once back on the ridge proper, we covered some more fun knife-edge ridge, which soon terminated into the easier class 3 climbing of the upper ridge.

Kristine back on the ridge proper - a large party can be seen approaching the rappel into the notch right of center

Kristine back on the ridge proper – a large party can be seen approaching the rappel into the notch right of center

Jesse & Kristine back on the ridge proper

Jesse & Kristine back on the ridge proper

More knife-edge ridge

More knife-edge ridge

Kristine

Kristine

The easier class 3 terrain of the upper ridge

The easier class 3 terrain of the upper ridge

We saw a large party rappelling into the notch from the upper ridge, though we’re not sure how long on the ridge they pressed and whether they made it or not.

Close-up of the large party rappelling into the notch

Close-up of the large party rappelling into the notch

The east ridge from the class 3 terrain of the upper ridge

The east ridge from the class 3 terrain of the upper ridge

Kristine on the upper ridge

Kristine on the upper ridge

Jesse climbing a fun little class 4 section on the upper ridge

Jesse climbing a fun little class 4 section on the upper ridge

The easier class 2 section to the flat summit plateau

The easier class 2 section to the flat summit plateau

We finally reached the large, flat summit plateau below Bancroft’s summit and endured some pretty stiff west winds through the col.

Jesse bracing against the strong winds

Jesse bracing against the strong winds

We topped out on Bancroft’s summit around 1:30pm in clear skies but strong winds.

Kristine almost to Bancroft's summit looking like a ninja

Kristine almost to Bancroft’s summit looking like a ninja

Mt. Bancroft summit (13,250')

Mt. Bancroft summit (13,250′)

Looking north to James Peak from Bancroft's summit

Looking north to James Peak from Bancroft’s summit

After 20 minutes on top, we descended the very mellow southeast ridge back to Loch Lomond and then hiked out the 2.2 miles down the road arriving back at the trucks at 4pm.
One last look at the majority of the east ridge with the obvious notch as viewed from the southeast on our descent

One last look at the majority of the east ridge with the obvious notch as viewed from the southeast on our descent

All in all, a wonderful day on a pretty challenging route given the conditions albeit very exciting and fun. For those looking for a ridge run with some technical spice, I would highly recommend this route as I am sure many others would as well. Hopefully, this TR may help others plan a winter ascent up Bancroft’s east ridge direct. I may just have to start venturing into the Front Range more often

The Spider & Fly

Now I can truly say the Gore Range is my favorite range in Colorado. Its proximity to my home, its ruggedness and remoteness, and lack of people all combine to make this place very special and my favorite. I had been wanting to climb these remote 12ers in the heart of the Gores for some time having always gazed at them from other Gore summits and down the Piney River Valley en route to several ascents of Mt. Powell, Peak C, etc. I had always thought the southeast face up The Fly to its east ridge may make a good climb as well as the double traverse over to The Spider and back to The Fly may make a nice day. I knew there would be some snow, but hopefully the southern facing aspects would be relatively dry. We took a gamble to leave behind the microspikes/crampons and axes and turned out the gamble paid off as we were able to stay on dry rock much of the time. Loving this late Fall weather, Kristine & I backpacked the 4.5 miles into Booth Lake (11,500′) from the Booth TH (8,200′) this past Saturday afternoon. Friends J & Chuck drove to the Eisman Hut and backpacked in from there for a little extra adventure and to meet us at Booth Lake. Kristine & I arrived at the lake to find the place to ourselves at 4:30pm, 3 hrs after leaving the Booth TH. J & Chuck arrived 2 hrs later sharing many adventursome bushwhacking stories.

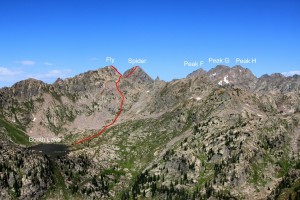
Our route up the Fly and over to The Spider taken from the southeast on the West Partner Peak/Outpost Peak ridge

Our route up the Fly and over to The Spider taken from the southeast on the West Partner Peak/Outpost Peak ridge

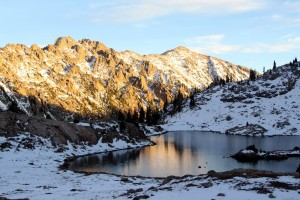
Booth Lake (11,500')

Booth Lake (11,500′)

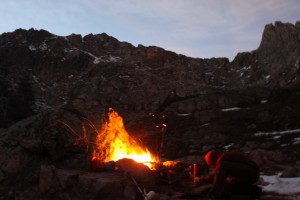
The Fly rising behind our campfire at dusk

The Fly rising behind our campfire at dusk

After sleeping in a bit and a round of coffee, muffins, & oatmeal, we got going around 9am up to The Fly.

Typical terrain on The Fly's southeast face

Typical terrain on The Fly’s southeast face

While we could have continued up the class 2/3 grass ramps and cliff bands all the way to The Fly’s summit, I had spotted an access gully to reach the east ridge proper for some fun scrambling.

Access gully to The Fly's east ridge

Access gully to The Fly’s east ridge

On The Fly's class 3 east ridge

On The Fly’s class 3 east ridge

Kristine climbing the fun class 3 ridge of The Fly (Upper Piney Lake in the background)

Kristine climbing the fun class 3 ridge of The Fly (Upper Piney Lake in the background)

After about an hour from leaving Booth Lake, we reached The Fly’s summit. Glancing over at The Spider, I was glad to see its southern ridge fairly dry.

The Spider from The Fly's summit

The Spider from The Fly’s summit

The crux would be downclimbing off The Fly’s north ridge keeping in mind how much snow we would encounter on the northern aspect and given that we didn’t bring any spikes or axes. Kristine decided to stay on the summit of The Fly for some R&R while J, Chuck, & I took off down The Fly’s north ridge to The Fly/Spider saddle. We found a mostly dry class 4 chimney on the north ridge proper to downclimb in lieu of traversing steep snow slopes on either side sans spikes/axes. Once to the lowpoint between The Fly & The Spider, we traversed class 3/4 slopes on the ridge’s west side up to The Spider. Several towers could be climbed on the ridge proper and likley go at low-mid 5th class as well.

En route to The Spider with the Spider/Fly ridge lowpoint below
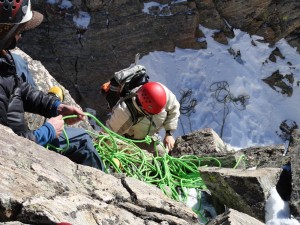
En route to The Spider with the Spider/Fly ridge lowpoint below
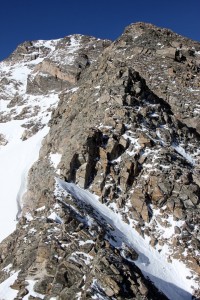
The Spider's upper south slopes

The Spider’s upper south slopes

J & Chuck scrambling up to The Spider

J & Chuck scrambling up to The Spider

Chuck topping out on The Spider w/ West Partner Peak behind

Chuck topping out on The Spider w/ West Partner Peak behind

Me on the summit of The Spider w/ Ripsaw Ridge behind
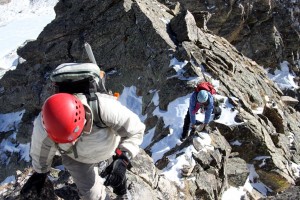
Me on the summit of The Spider w/ Ripsaw Ridge behind

The Fly from The Spider's summit

The Fly from The Spider’s summit

After 10 minutes or so on The Spider’s summit, we started back towards The Fly. The wind was howling but otherwise it was a beautiful day. Once back at the Fly/Spider ridge lowpoint, we glanced up at the class 4 chimney we had downclimbed and headed straight for it mostly trying to stay on dry rock.

Looking up at The Fly's north ridge from the Fly/Spider ridge lowpoint. We descended/ascended the obvious chimney in the center of the picture.

Looking up at The Fly’s north ridge from the Fly/Spider ridge lowpoint. We descended/ascended the obvious chimney in the center of the picture.

The class 4 chimney on The Fly’s north ridge proper provided the best scrambling of the day.

Chuck & J scrambling up The Fly's north ridge

Chuck & J scrambling up The Fly’s north ridge

Chuck & J climbing the class 4 chimney on The Fly's north ridge

Chuck & J climbing the class 4 chimney on The Fly’s north ridge

Almost up to The Fly's summit

Almost up to The Fly’s summit

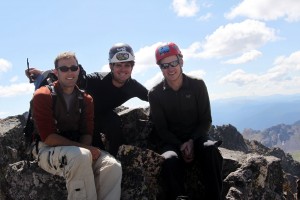
Back on the summit of The Fly with Booth Lake below
Back on the summit of The Fly with Booth Lake below
Chuck & J had hauled their packs to The Fly’s summit in anticipation of heading down the Fly’s south ridge, down to West Booth Pass, and onto the Eisman Hut. So, the boys took off down the south ridge while Kristine & I headed back down The Fly’s southeast face to Booth Lake. After some PB&Js at camp, we packed up and got back to the Booth TH around 2:30pm. Not a bad morning at all. All in all, another great little Gore trip. These are two great 12ers with some outstanding views and quality scrambling in the heart of the Gores.

Ripsaw Ridge
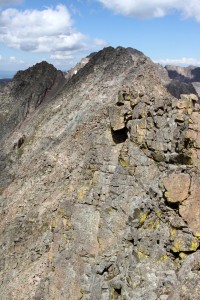
As a Vail local, the more time I spend in the rugged Gore Range, the more appreciative & grateful I am to have these peaks so close to home. After over a decade of driving all over this state to climb 14ers over & over & over again, I think finally I’m more than content at exploring and climbing Gore Peaks for the time being. Also, after our Kilimanjaro climb this August, helping my wife, Kristine, finish climbing all of the 14ers this summer, and with Fall knocking on the door, I am extremely psyched to get back to our local peaks and in the heart of the Gore Range. I’d always wanted to traverse the Ripsaw Ridge from the first time I had heard about it. Upon reading Brian Miller’s (lordhelmut) TR on the Ripsaw from July 2010, I was extra energized to get this traverse. The Ripsaw is a ridge extending from Peak C (as its northern terminus) south to Peak G. However, in theory, this ridge continues south from Peak G onto Peaks H, J, P, West Partner (Peak U), East Partner Peak (Peak V) and so forth. The Ripsaw is a very sustained class 3/4 ridge over several miles where some low class 5 moves are almost unavoidable and typically welcomed in our case to add some excitement. It always seems my initial plan of traverses is a little over ambitious thinking we could do Peak C to West Partner Peak in a day or so…yeah right. But, we did complete the proper part of Ripsaw from Peak C to Peak G. Peak G to West Partner will have to wait for another day. We did the Partner Traverse (East to West Partner) last July 2010.

Ripsaw Ridge (Peak C - Peak G) from Meadow Mtn near Minturn in May, 2009

Ripsaw Ridge (Peak C – Peak G) from Meadow Mtn near Minturn in May, 2009

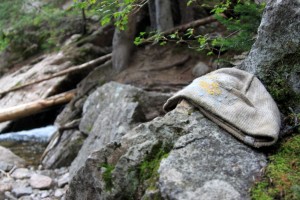
Good buds J, Caleb (RoanMtnMan), & myself backpacked in to the base of Peak C and set up camp on a nice rocky rib in the trees. Having climbed Peak C a few times via its SW couloir, I knew the turnoff pretty well and where we should camp to get an early start up Peak C. Amazingly, on the backpack in, I found my wife’s knit cap on a rock that she must have lost over a year ago on our climb of Mt. Powell when she took a stumble across one of the creeks.

Kristine's dirty knit cap

Kristine’s dirty knit cap

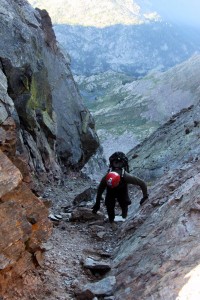
We got a 5:30am start out of camp and made quick work of the hike into the upper tarn-filled basin below Peak C’s SW couloir in the dark. Climbing Peak C’s SW couloir is most definitely easier & more pleasant in the Spring when it is snow-filled as I have done before.

Caleb climbing Peak C's SW couloir and almost to the notch between Peaks C & C-Prime

Caleb climbing Peak C’s SW couloir and almost to the notch between Peaks C & C-Prime

We then reached the notch between Peaks C & C-Prime and took a left up the fun class 4 rock which then turns into class 2/3 rock to Peak C’s summit.

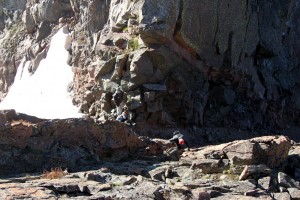
J at the notch between Peaks C & C-Prime and Caleb starting the class 4 rock

J at the notch between Peaks C & C-Prime and Caleb starting the class 4 rock

We had a great view of our day’s work of the Ripsaw Ridge to the south.

J & Caleb climbing Peak C's south ridge w/ Ripsw Ridge behind

J & Caleb climbing Peak C’s south ridge w/ Ripsw Ridge behind

Piney Lake from Peak C's summit

Piney Lake from Peak C’s summit

Peak C summit (13,220')

Peak C summit (13,220′)

Descending back to the notch between Peaks C & C-Prime, we then climbed down the very loose Peak C SW couloir several hundred feet to the access rock gully up to Peak C-Prime’s south ridge. This access gully is about 1/3 of the way down from the notch between Peaks C & C-Prime. It is loose as well but soon splits and we followed the steeper yet more stable left branch (class 4 rock) to reach a point just south of Peak C-Prime’s summit block. From this point, it is a fun class 3/4 scramble to Peak C-Prime’s summit on its SE face.

The access ramp on Peak C-Prime's SE face to gain some nice class 3/4 rock to the summit

The access ramp on Peak C-Prime’s SE face to gain some nice class 3/4 rock to the summit

J & Caleb climbing class 3/4 rock after the access ramp

J & Caleb climbing class 3/4 rock after the access ramp

Me sitting on top of Peak C-Prime's summit block

Me sitting on top of Peak C-Prime’s summit block

Once we descended Peak C-Prime’s summit block, the ridge over to Peak D’s summit block is probably the easiest section of the Ripsaw (mostly class 2).

Downclimbing Peak C-Prime's summit block to the Peak C-Prime/D saddle

Downclimbing Peak C-Prime’s summit block to the Peak C-Prime/D saddle

On the ridge to Peak D

On the ridge to Peak D

Once at the base of Peak D’s summit block, we scrambled up to a fun class 4 dihedral and then skirted a gendarme around to the southwest.

Our approximate route up Peak D's north ridge

Our approximate route up Peak D’s north ridge

Ascending the class 4 didehral up Peak D's north ridge

Ascending the class 4 didehral up Peak D’s north ridge

J looking up at our approximate route up the remaining north ridge of Peak D (after skirting the gendarme)

J looking up at our approximate route up the remaining north ridge of Peak D (after skirting the gendarme)

Caleb climbing to Peak D's summit

Caleb climbing to Peak D’s summit

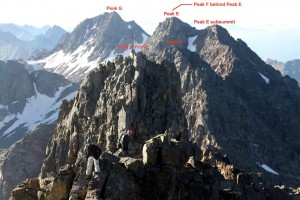
Peak D summit (13,047') w/ a subsummit of Peak E, Peak E itself, & Peak G behind (right to left)

Peak D summit (13,047′) w/ a subsummit of Peak E, Peak E itself, & Peak G behind (right to left)

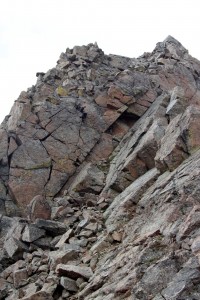
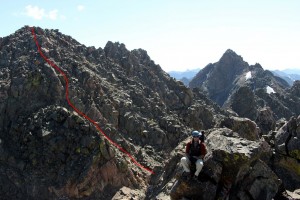
The downclimb from Peak D’s summit to the Peak D/E saddle is fairly straightforward and mostly class 2/3. Once at the lowpoint between Peaks D & E, you can ascend a 5th class chimney for 15′ or descend 50-100 vertical feet to the west and ascend easier terrain. We then ascended up to a highpoint on mostly class 2/3 terrain and skirted another gendarme to the southwest to reach the base of Peak E’s subsummit. Taking Peak E’s subsummit straight on would be well into middle 5th class climbing and so as lordhelmut suggested in his TR, we skirted around to the southwest and ascended class 3/4 rock up a gully to the Peak E subsummit. From Peak E’s subsummit, we descended to the saddle before the final climb up Peak E. The route up Peak E I took was class 4 with maybe a few low 5th class moves but easier class 3 and some class 4 rock is further around to the right or southwest.

J on the Peak E subsummit with my approximate route up Peak E behind from the Peak E/Peak E subsummit saddle (Peak G is to the right)

J on the Peak E subsummit with my approximate route up Peak E behind from the Peak E/Peak E subsummit saddle (Peak G is to the right)

Peak E summit (13,220')

Peak E summit (13,220′)

Peak E was the only summit we found with a summit register and the last person who signed in was from October 1, 2010. The person before her was lordhelmut in July 2010. Goes to show how little these peaks are climbed. The traverse from Peak E to Peak F is a bit complex but in general we stayed a hundred or more vertical feet to the ridge’s right (southwest) side and crossed over rock rib after rock rib and into gully after gully. Taking the ridge proper traverse from Peak E to Peak F would be impractical and unrealistic given its multiple mid-high 5th class gendarmes and towers. However, once we reached the base of the final ascent up to Peak F, we took the ridge proper and enjoyed some of the best class 4/low 5th class climbing of the day.

Looking back at the traverse from Peak E to Peak F

Looking back at the traverse from Peak E to Peak F

Climbing up Peak F's north ridge

Climbing up Peak F’s north ridge

J topping out on Peak F

J topping out on Peak F

Another pic of J on the Peak E subsummit w/ our approximate routes up Peak F (right) and further south Peak G (left)

Another pic of J on the Peak E subsummit w/ our approximate routes up Peak F (right) and further south Peak G (left)

Peak F summit (13,220') w/ Peak G behind

Peak F summit (13,220′) w/ Peak G behind

We then descended off to the south via class 3/4 rock to the Peak F/G saddle staying again slightly to the right of the ridge crest.

Caleb descending Peak F to the Peak F/G saddle

Caleb descending Peak F to the Peak F/G saddle

After eating a PB&J, we ascended the ridge up to Peak G and then skirted a gendarme to the left thru a notch on the ridge’s left (northeast) side. Tackling Peak G’s remaining ridge crest to the summit would be mid 5th class climbing with high potential for big rockfall, so again we skirted around to the ridge’s right (southwest) side and ascended class 3/4 rock with a few low 5th class moves to the summit (see our approximate route up Peak G in picture #23).

J climbing Peak G's western slopes

J climbing Peak G’s western slopes

Peak G summit (13,260'), our final summit of the day

Peak G summit (13,260′), our final summit of the day

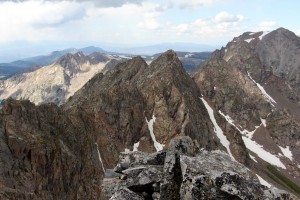
Looking north at Ripsaw Ridge from the Peak G summit w/ Mt. Powell at far right

Looking north at Ripsaw Ridge from the Peak G summit w/ Mt. Powell at far right

While we had the motivation in us to continue the ridge south to Peak H, it was 1:30pm and we could see thunderheads and rain falling to the west. Thus, we descended back to the Peak F/G saddle.

J looking south to Peak H and beyond from the Peak G summit

J looking south to Peak H and beyond from the Peak G summit

Per lordhelmut’s July 2010 TR, I knew we could descend the southwestern couloir to the valley floor from the Peak F/G saddle.

Our descent couloir from the Peak F/G saddle 3000' down to the Piney River valley floor.

Our descent couloir from the Peak F/G saddle 3000′ down to the Piney River valley floor.

The couloir was indeed tough on the knees as expected, but eventually we reached the grassy meadows only about 1000′ above the valley floor and took a well-earned rest. Another 45 min to an hour of descending down steep, grassy slopes and thru forests brought us to the Upper Piney Lake trail where we took a right. Another 2 miles and 45 minutes later, we arrived back at camp pretty happy with our day’s work. All in all, it was a great adventure with two of my best buds in what is becoming my favorite range in Colorado. I am looking forward to a few more trips and traverses in the Gores this Fall. I hope this TR can be of use to potential Ripsaw Ridgers when combined with lordhelmut’s TR from over a year ago. I want to thank lordhelmut for his TR which provided us some direction on the Ripsaw.